
Okta SSO
Introduction
This document provides detailed steps on Amorphic Data (Amorphic) Platform - OKTA integration. Amorphic simplifies analytics for all users and teams by orchestrating and automating analytic pipelines & workflows across AWS services, infrastructure and analytic tools and platforms.
Okta is an enterprise grade identity management service. With Okta IT can manage access across any application, person or device. Whether the people are employees, partners or customers or the applications are in the cloud, on premises or on a mobile device. Okta "integrates" applications into its service for us, and we simply deploy these pre-integrated applications to our users as necessary. We can authenticate these users against our own user store (e.g. AWS Cognito User Pools, Active Directory or LDAP) or we can use Okta as the user store. In Amorphic Data Cloud, Users/API calls get authenticated using Cognito. Amazon Cognito User Pools allow sign-in through a third party (federation), including through a SAML IdP such as Okta. Here we use Okta as a Security Assertion Markup Language 2.0 (SAML 2.0) identity provider (IdP) with an Amazon Cognito user pool.
Scope
This document covers the Amorphic Data Cloud"s OKTA integration mechanism with AWS Cognito User Pools.
Audience
This document is intended to provide Amorphic Data Cloud"s OKTA integration procedure and related answers for customer"s:
- Solution architecture team
- Security team
- DevOps team
- Program/Technical management
Amorphic - Okta Integration
Pre-requisites for Okta integration
Before we proceed with the process of Okta integration, we need the following pre-requisites:
- Amazon AWS account.
- OKTA developer account — https://developer.okta.com/signup/
Setup AWS Cognito User Pool
- Login to AWS management console and go to Cognito service dashboard. - In the Cognito AWS dashboard, click on "Manage User Pools" - Next, click on "Create a user pool", which will bring us to the following page:

- In the above "Create a user pool" page, please enter pool name then click on "Step through settings" and setup Attribute as the following:
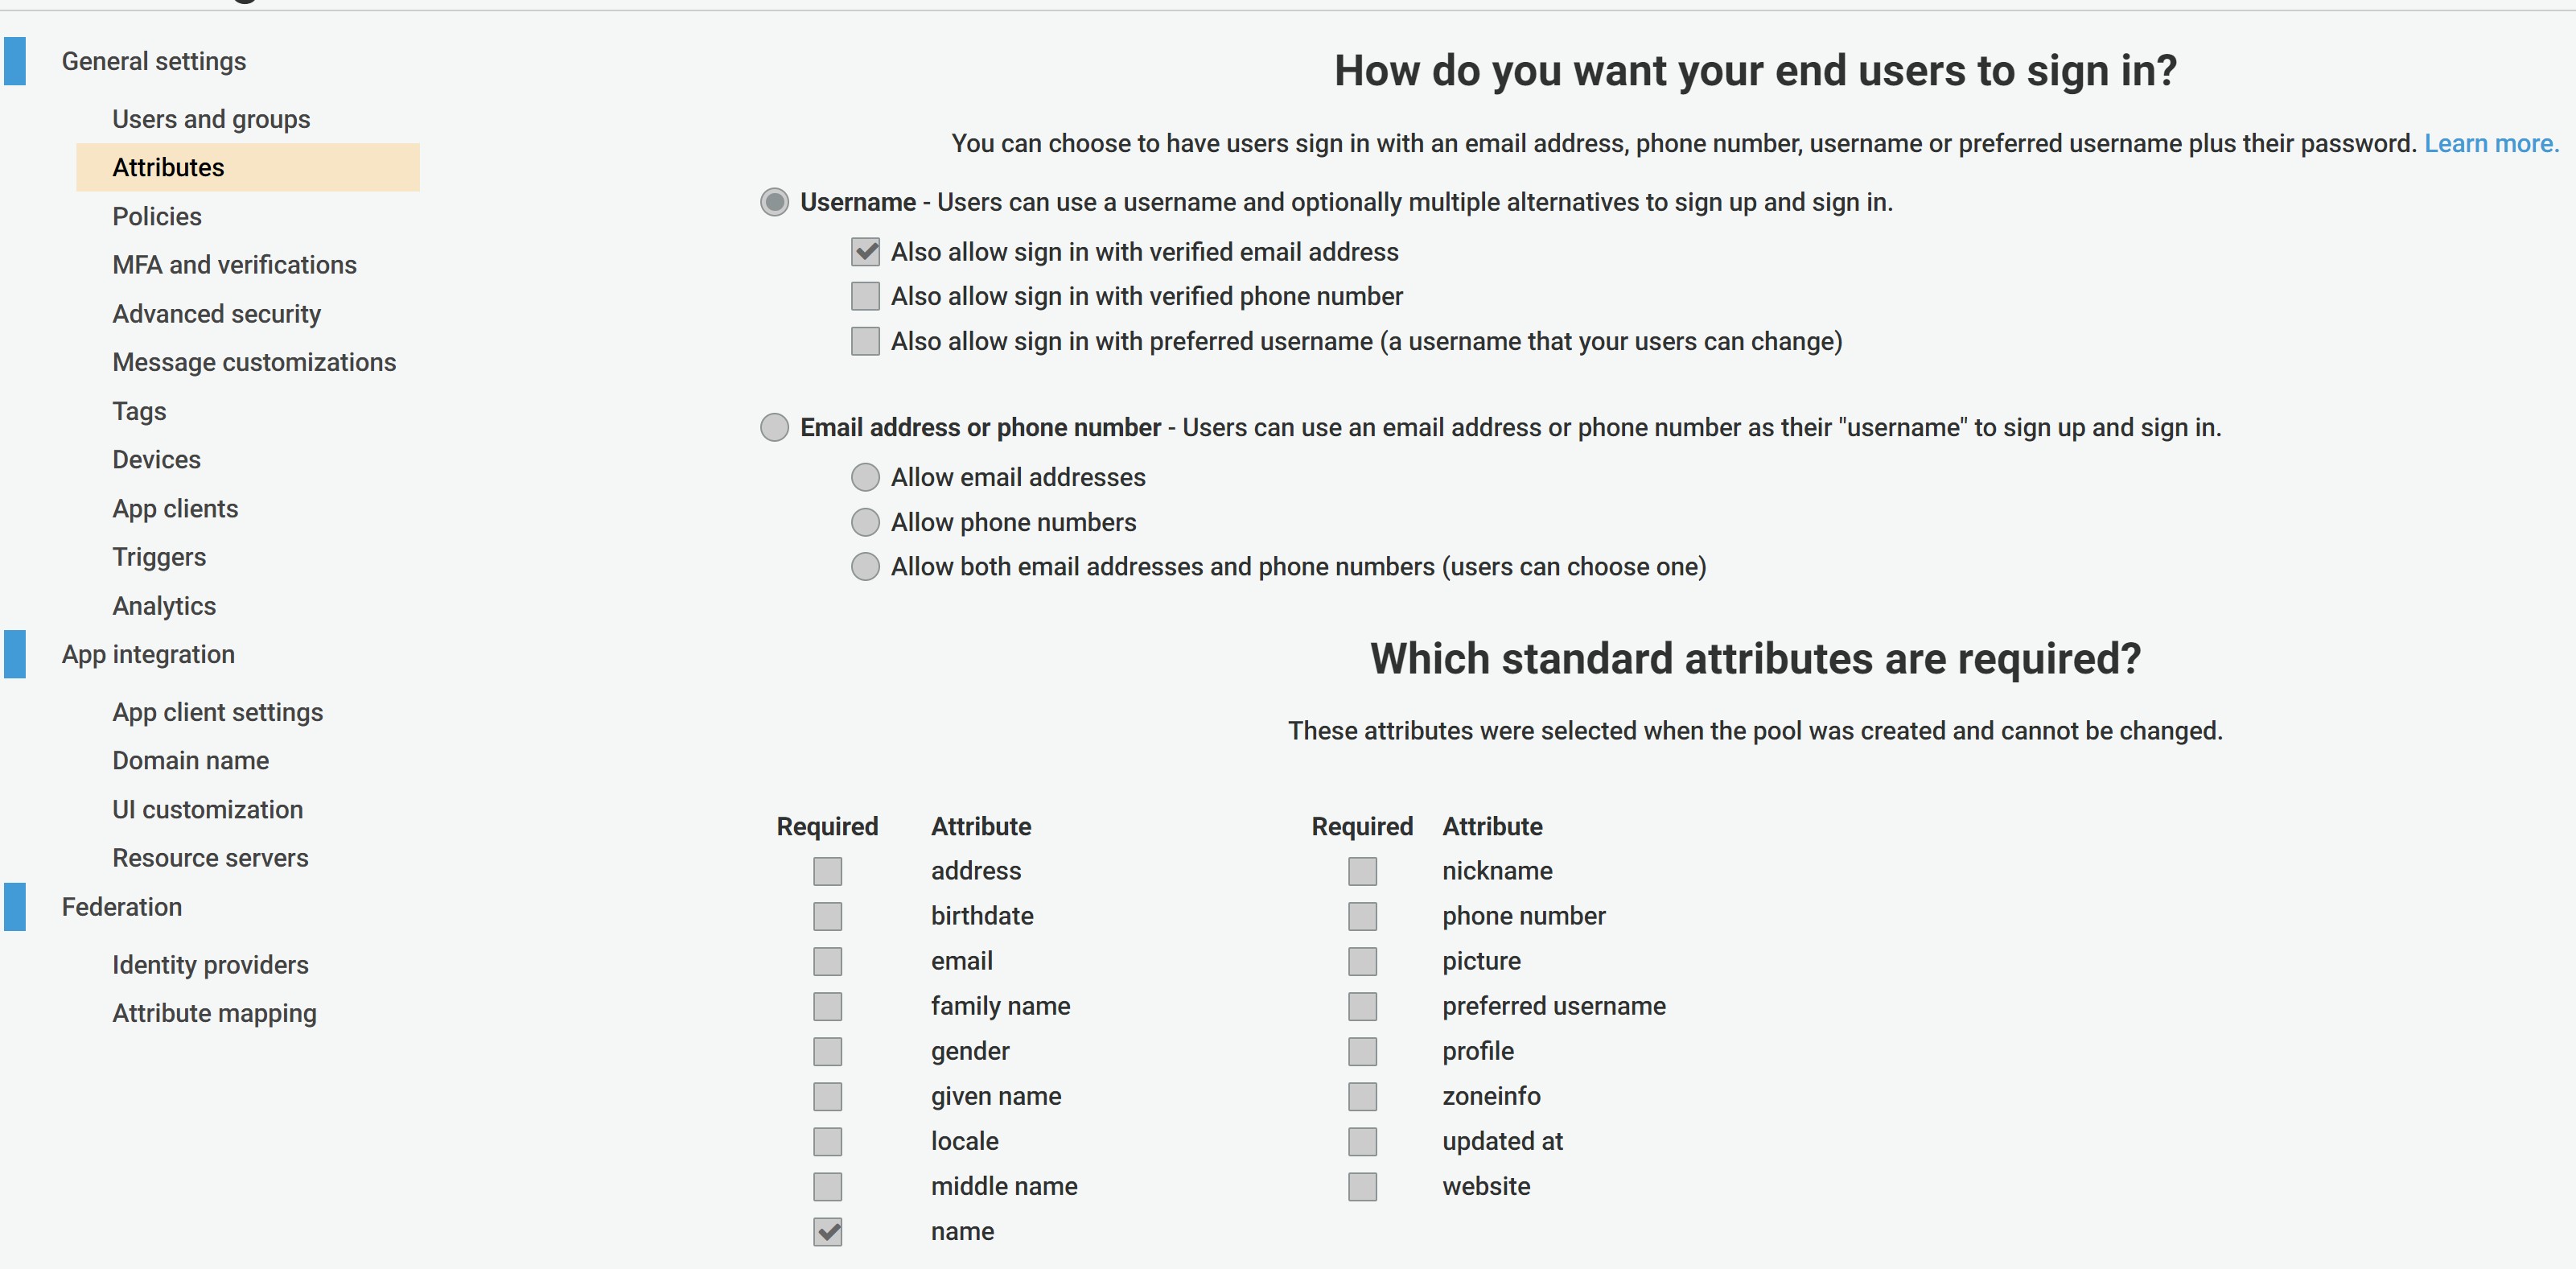
Please note that Amorphic Data Cloud requires two attributes: email and name. In the above snapshot of "Attributes", we define name attribute for the Cognito user pool. Upon saving the user pool settings, we will proceed to add a custom attribute as illustrated in the section: Adding a custom attribute to the Cognito user pool for "Email"
- Next, click on "Next Step" and setup "Policies" as following, you can customize based on your requirements:

- After setting up the policies, click "Next Step" and setup "MFA and verification" as following:

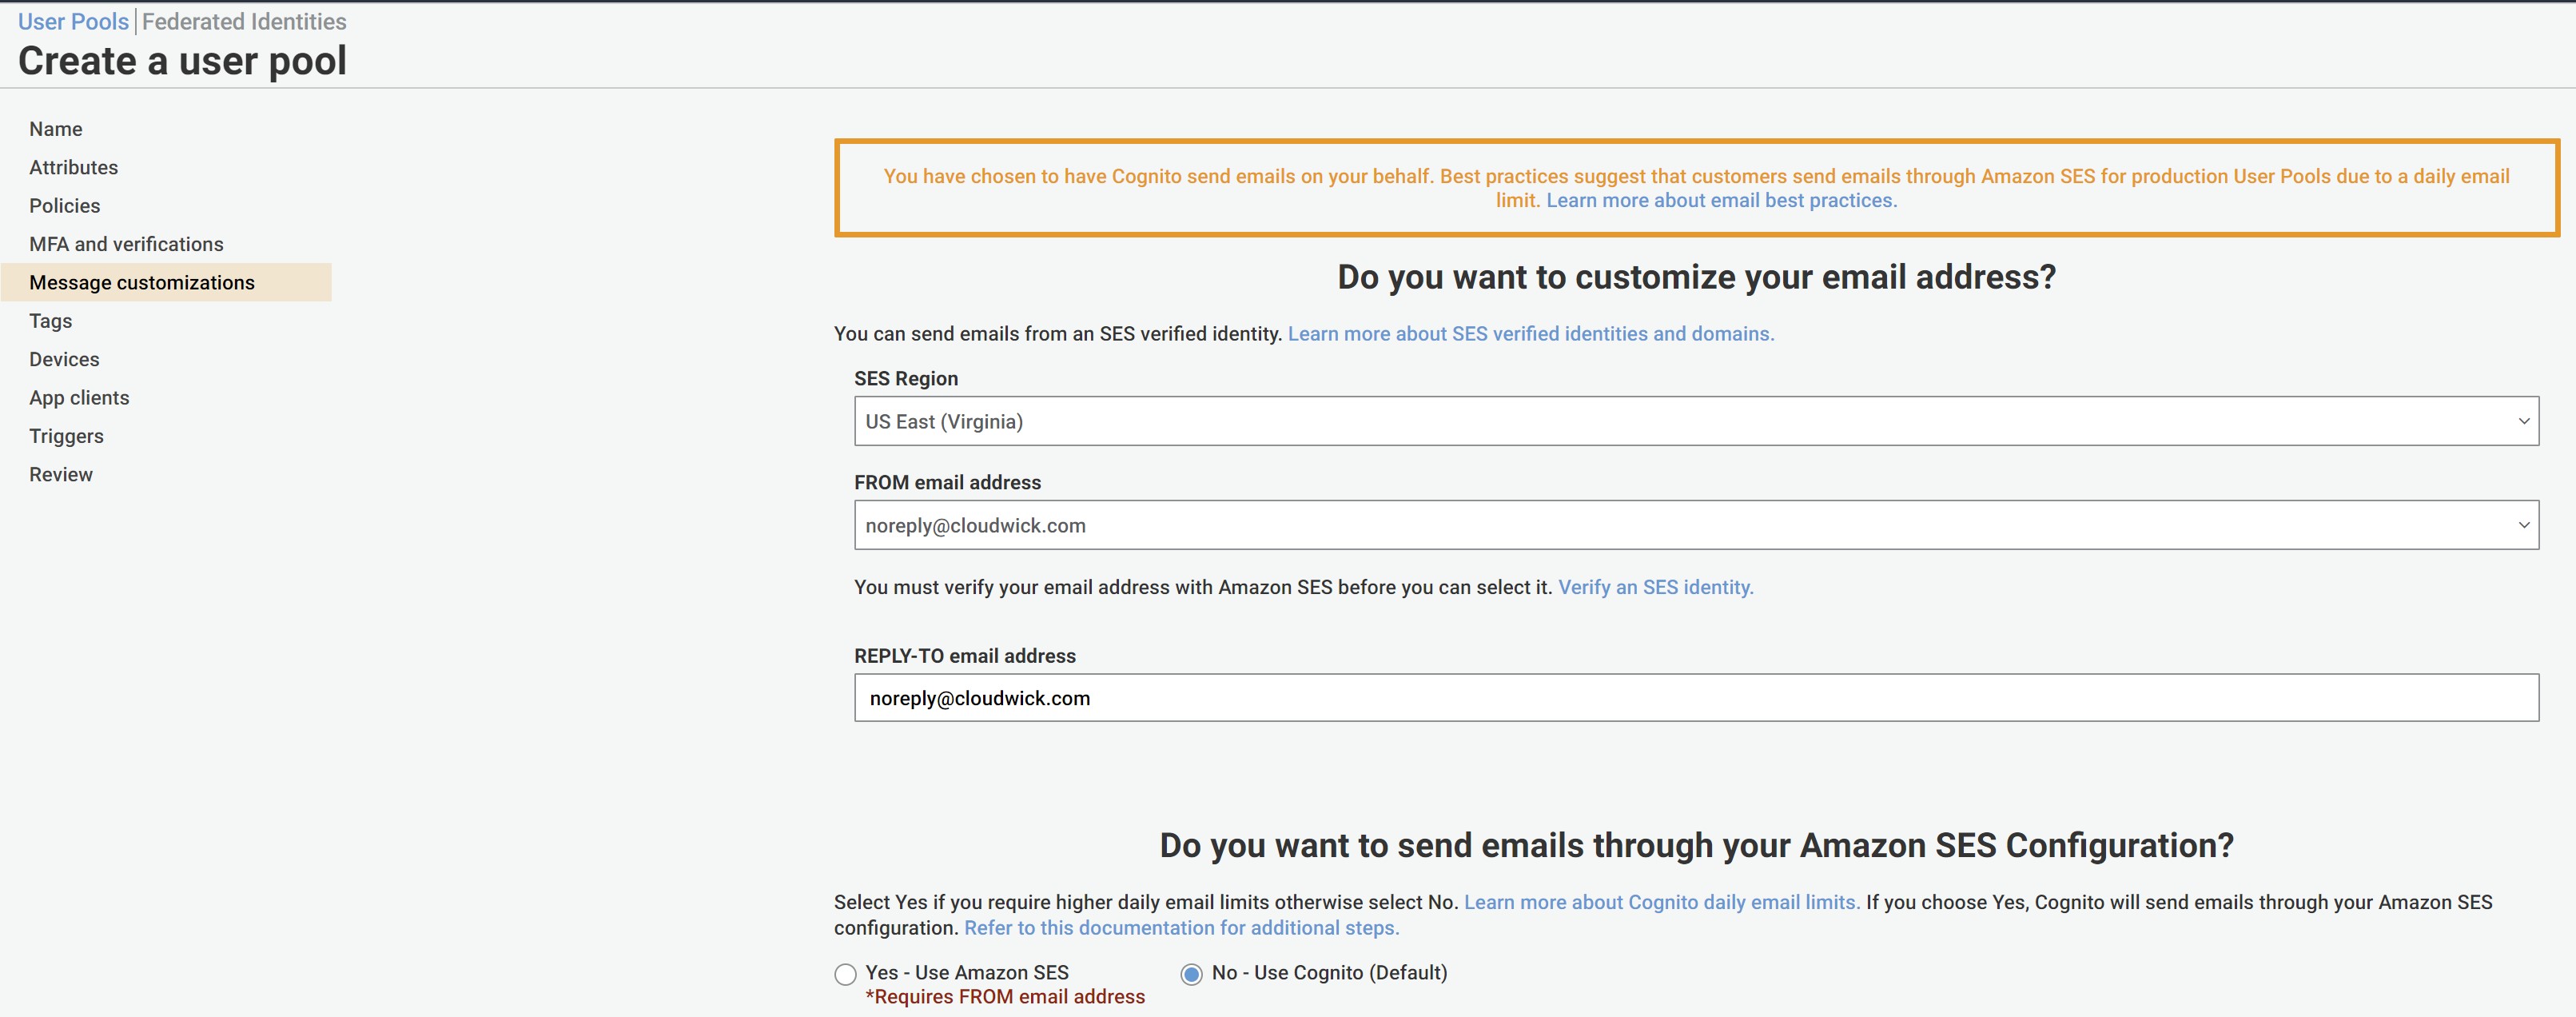
- After setting up MFA, click "Next Step" and setup "Message and customization" as following:

After setting up the message customizations, click "Next Step" and it will ask us to setup "Tags" (optional). Save the changes and proceed to further steps.
Now, it will ask you to setup "Devices" as following:

Adding an AWS Cognito App Client:
Click on "App Clients" in the Cognito dashboard as following and click on "Add an app client":
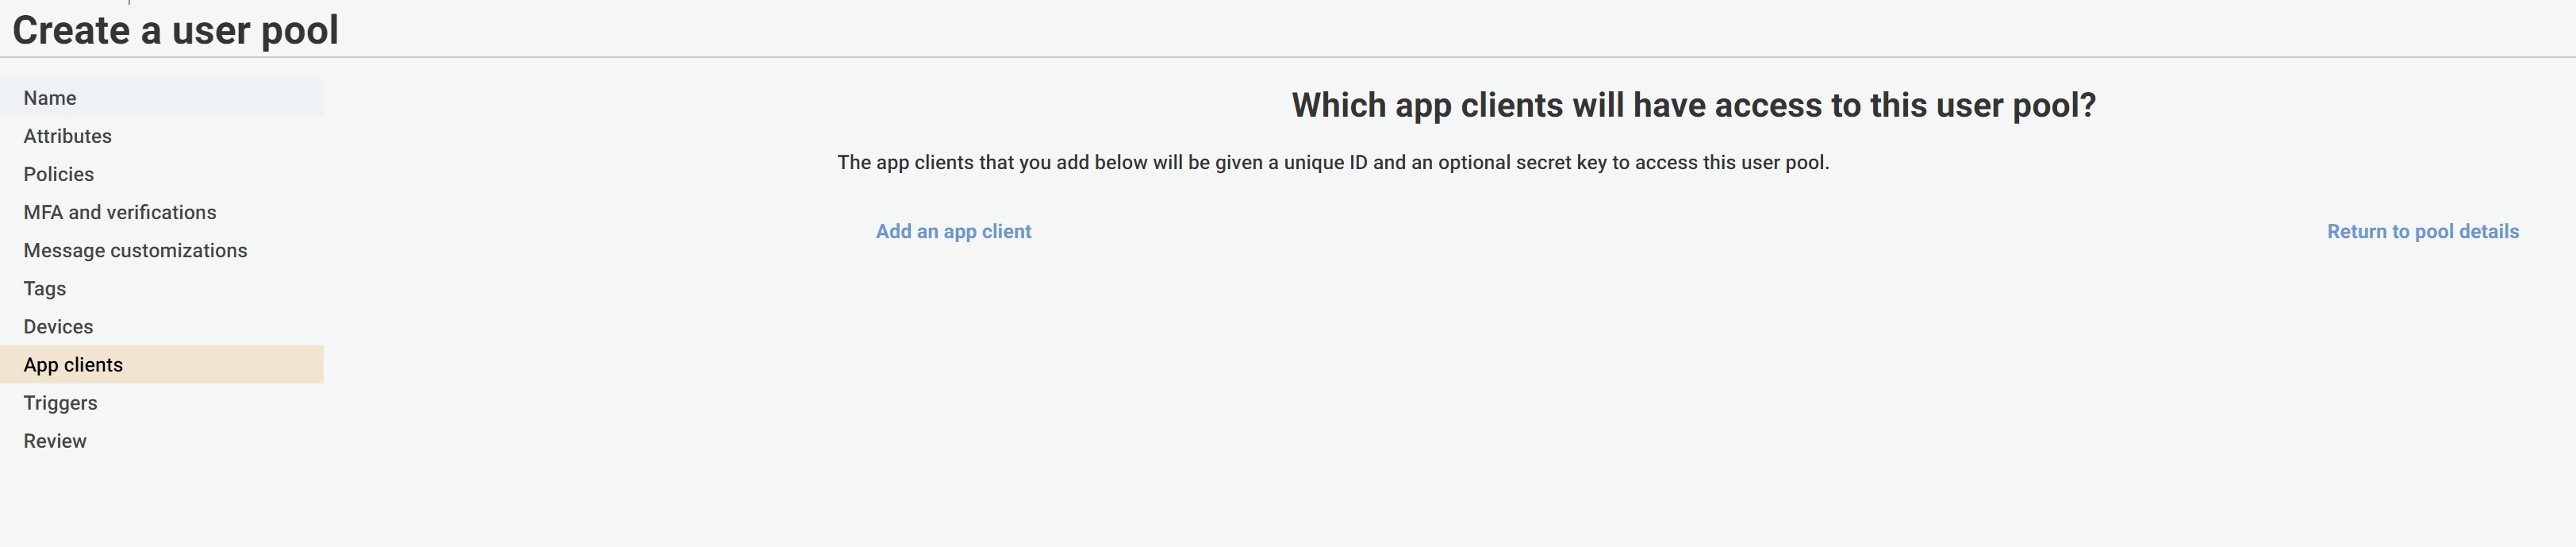

After populating the fields as shown above for the App Client, click on: "Create app client" to create the app client in our Cognito User Pool.
Leave the populated defaults for the "Triggers" section and proceed to Review the Cognito User Pool configuration.
Once the user pool is created, you will see following details. Save the user pool id somewhere as we need this later when we setup OKTA account.
Configure the Cognito User Pool Domain Name
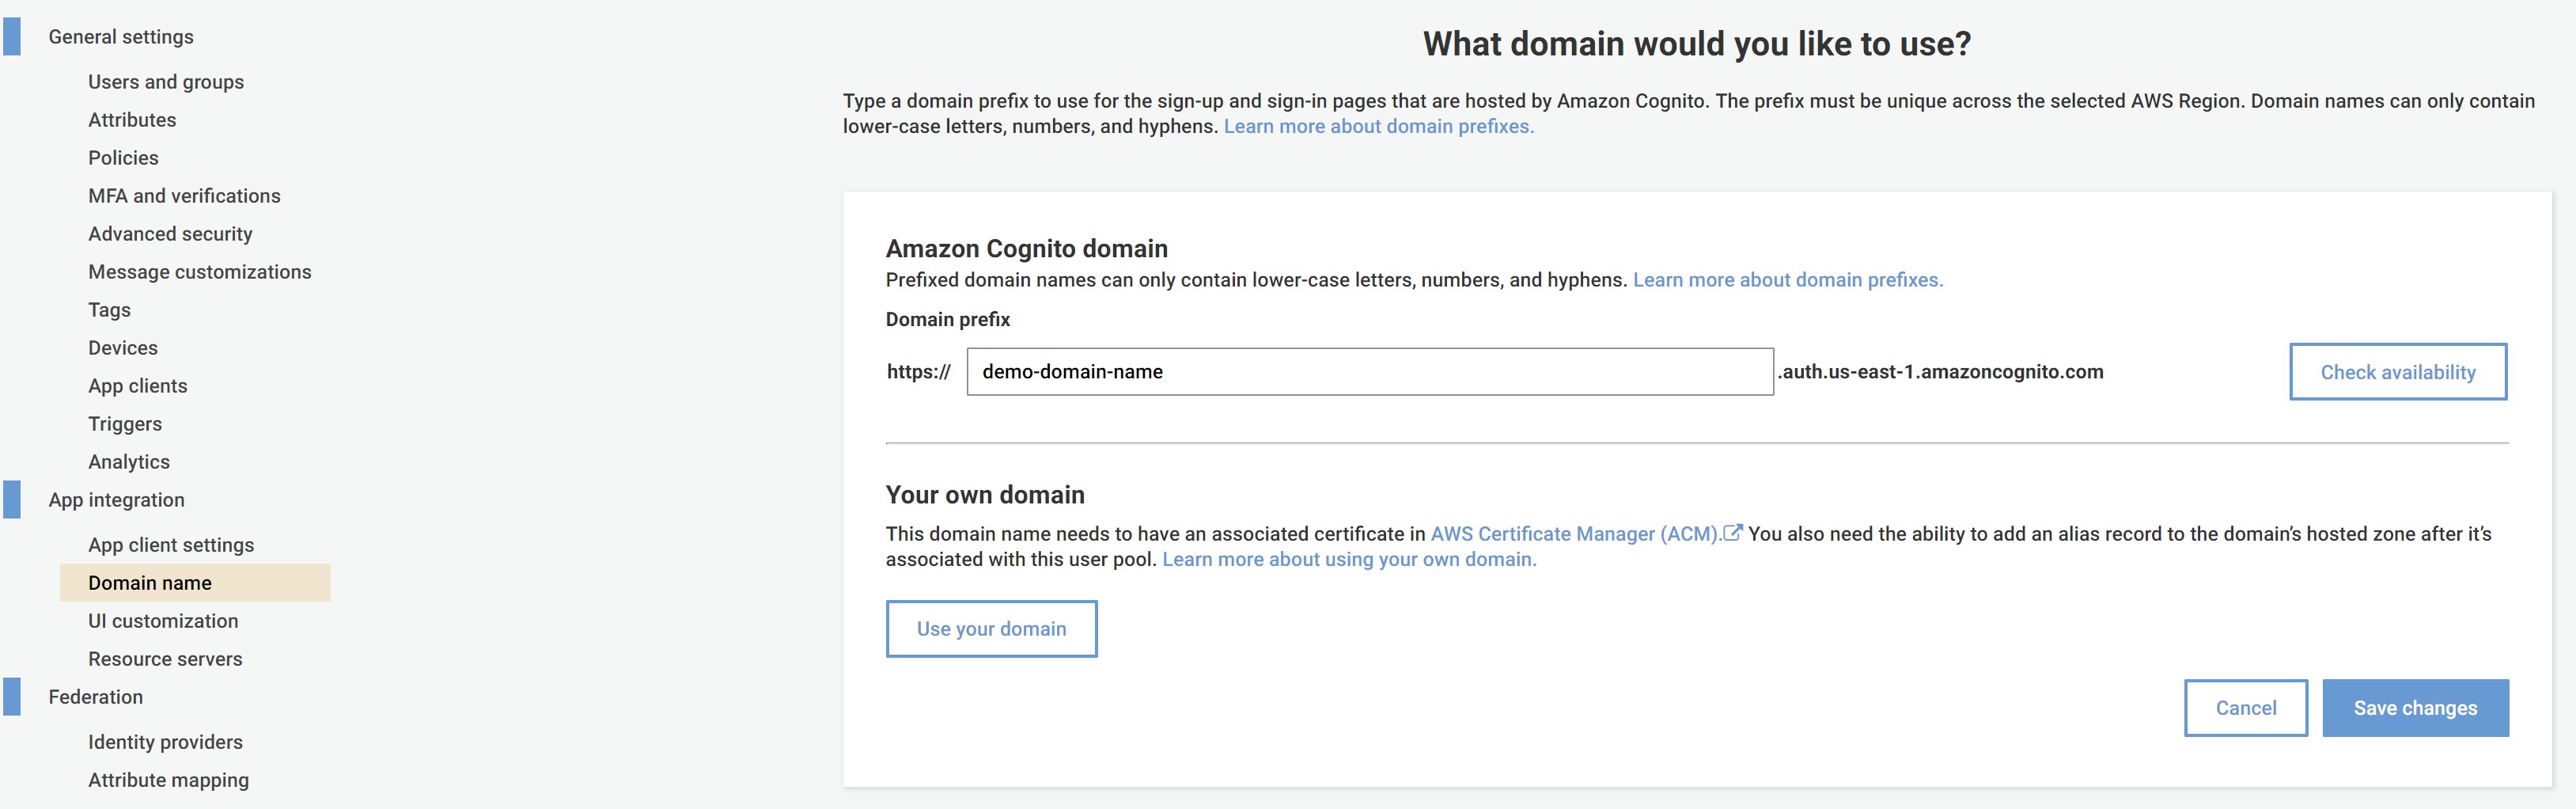
After the Cognito User Pool is successfully created, click on "Domain name" under the section: "App Integration" — add a domain name and click on "Save Changes" as shown below:
Adding a custom attribute to the Cognito user pool for "Email":
- Proceed to the Cognito user pool"s "Attributes" section and click on "Add custom attributes" and create the following custom attribute for Email as shown below:

- After creating the "Email" custom attribute and marking the attribute as "Mutable", please proceed to the "App Clients" section to set the custom attribute"s read and write permissions as shown below:

Setting up Okta developer account
Login into a newly created OKTA developer account or an existing account.
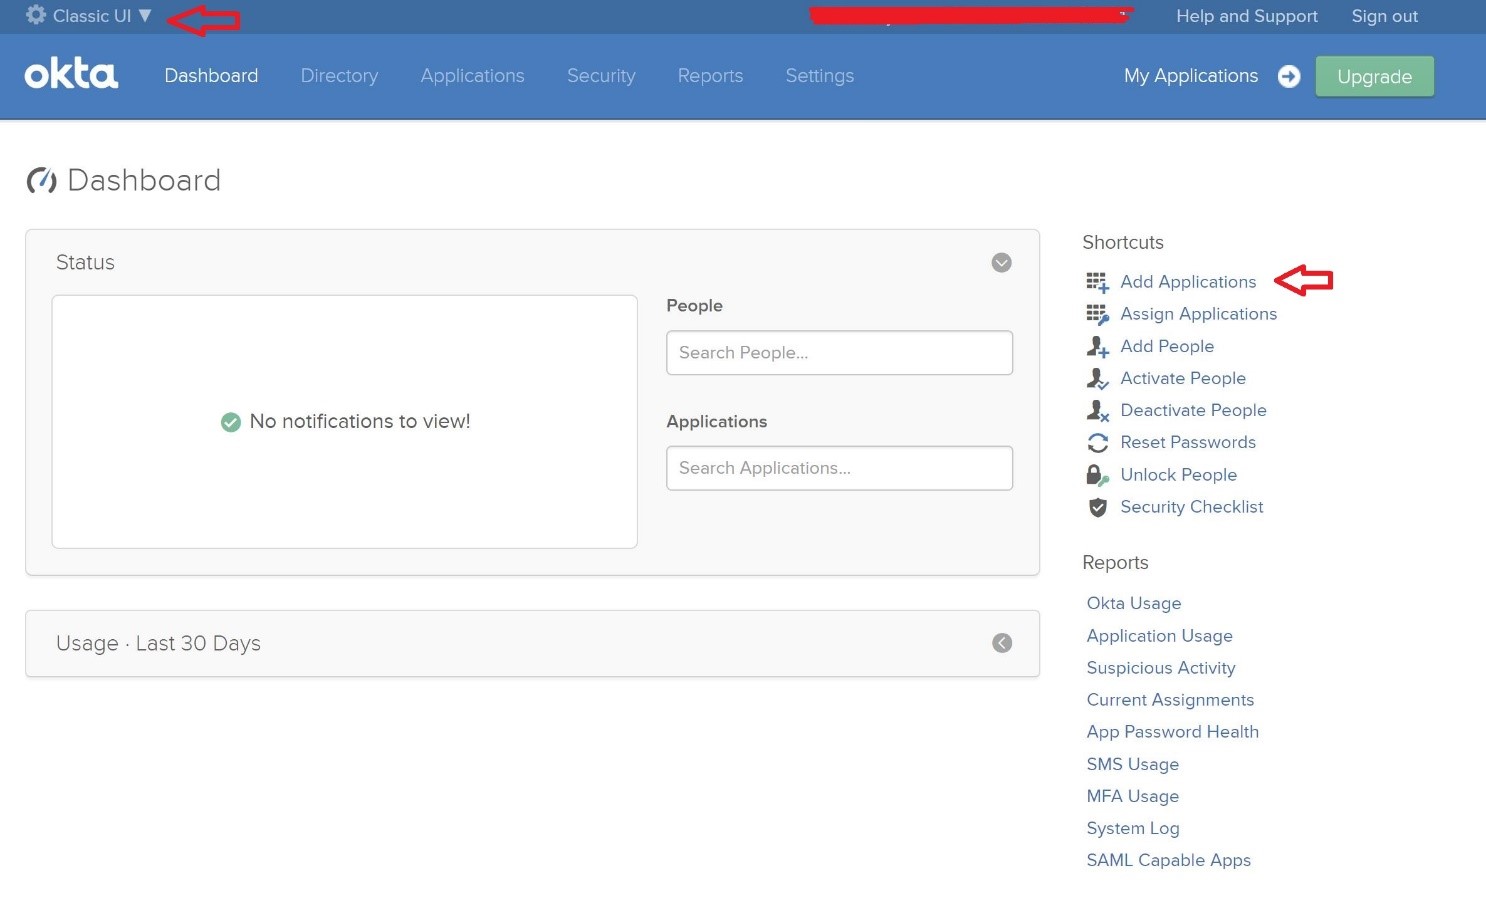
After login, please click on "Admin", will bring you to the console page:
From the console page, click on "Applications" and switch layout to "Classic UI".
Click on "Add Applications" shortcut and it will bring you to following page:
- Click on "Create New App" button and it will open a dialog as shown below:

- Please enter the "App name" and click "Next" as shown below:

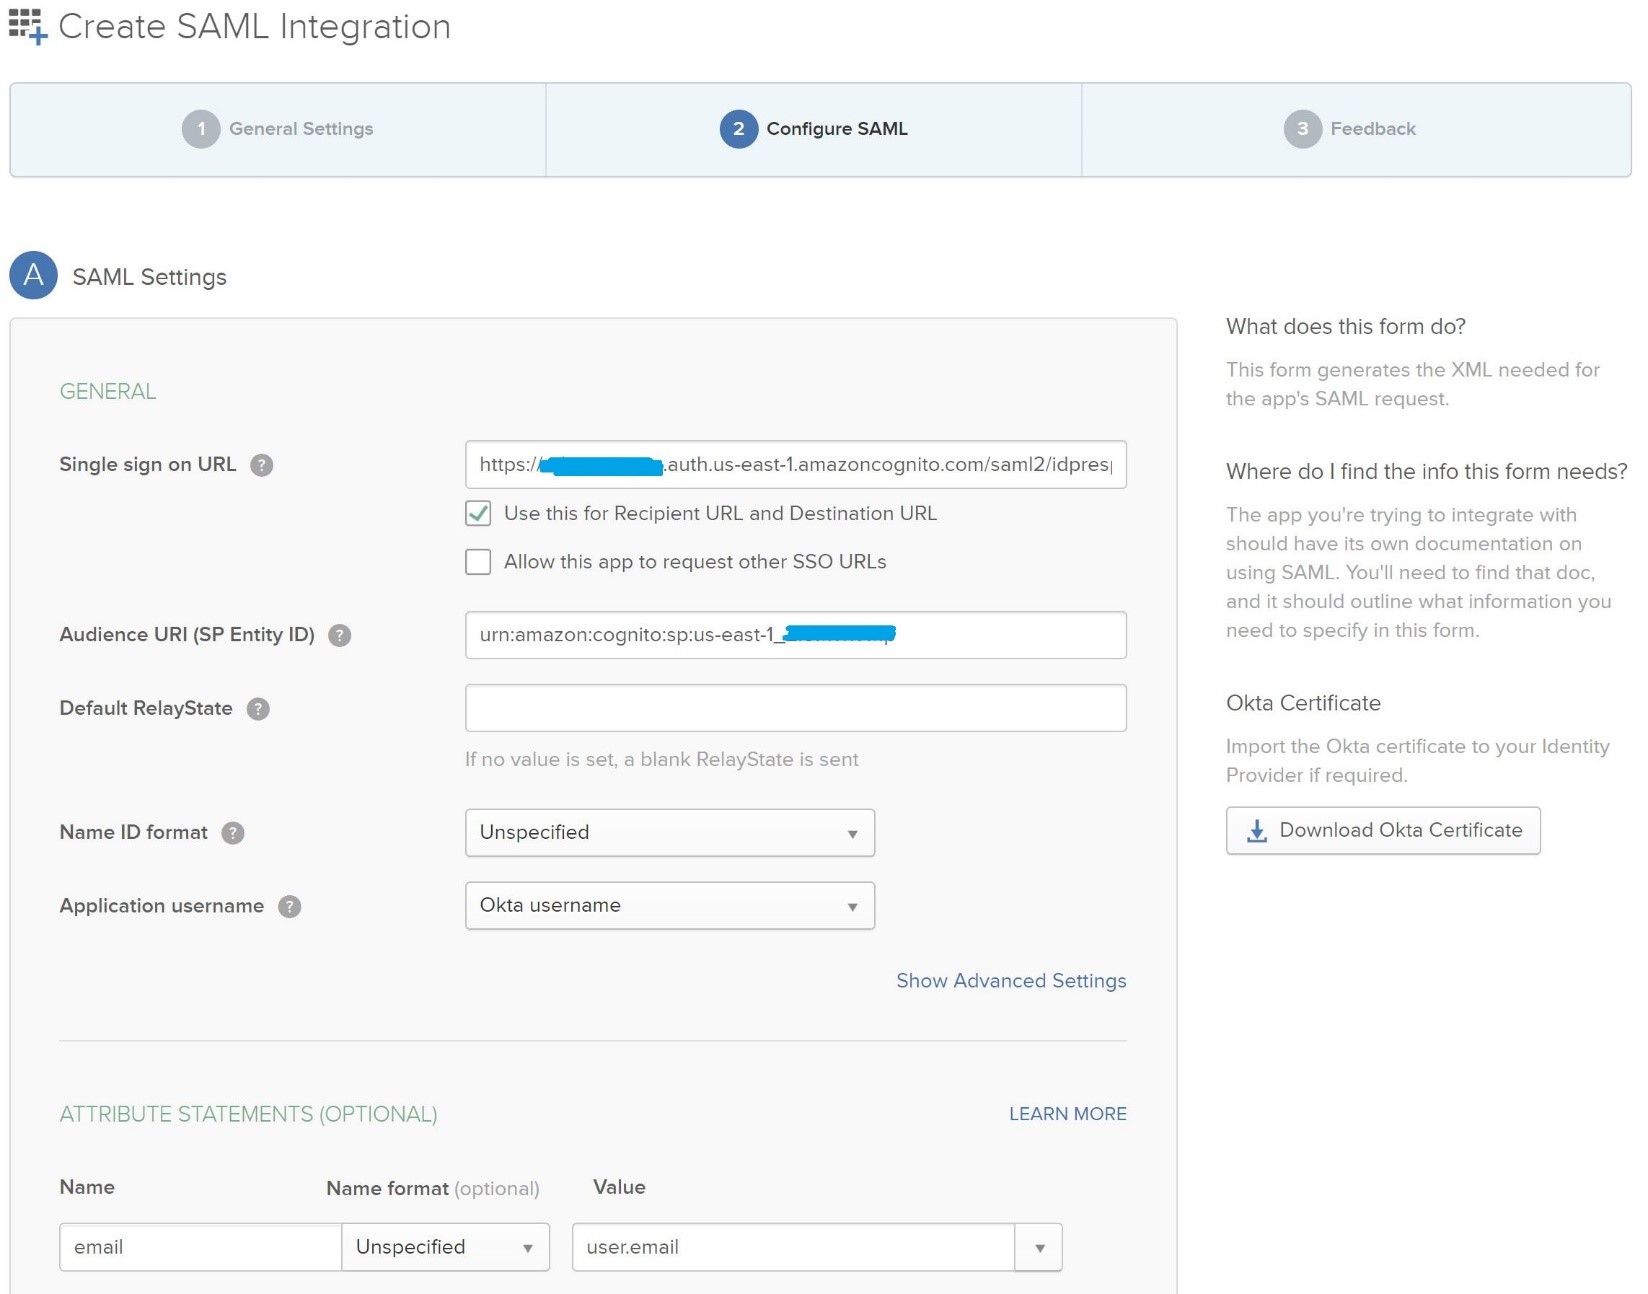
- Now, we proceed to configure the "SAML settings" of the OKTA application:
Enter the "Single Sign on URL".
The single sign on URL consists of the: Cognito Domain Name + saml2/idpresponse
Example: https://your_domain_name.auth.us-east-1.amazoncognito.com/saml2/idresponse
Please add "Audience URI (SP Entity ID)" as:
"urn:amazon:cognito:sp:" + cognito user pool id (which we saved from the earlier steps) Example: <urn:amazon:cognito:sp:us-east-1_YQ3n16VOT> Please refer to the below screenshot for the SAML settings described in the above steps.
- After filling in the SAML settings as detailed above, please click on "Preview the SAML Assertion" button and this will open xml docs into separate tab, COPY that content as save as xml file. For example, save as: "metadata.xml"

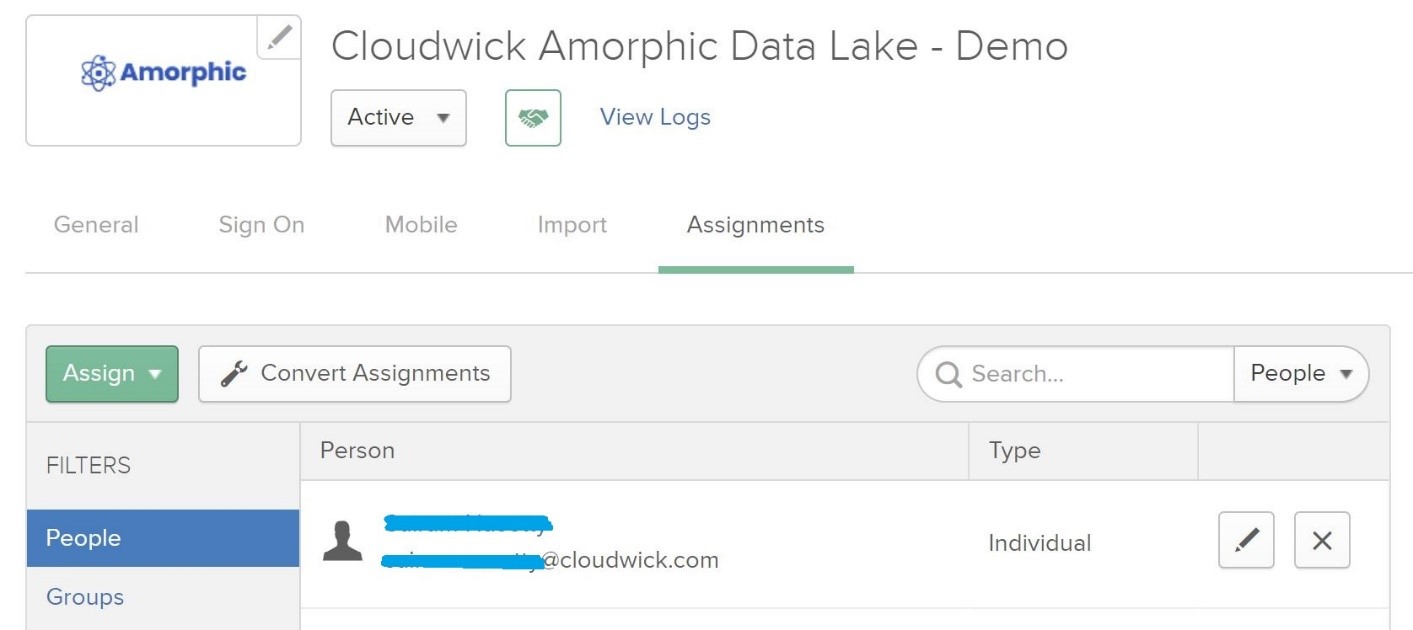
- Click "Next" and configure "Feedback". Click the "Finish" button and click on "Assignment" tab and assign to users (if you do not have user created, please create one) as shown below:

Next
We have successfully configured OKTA developer account.
Configuration of federated Identities in AWS Cognito using the Okta SAML assertion
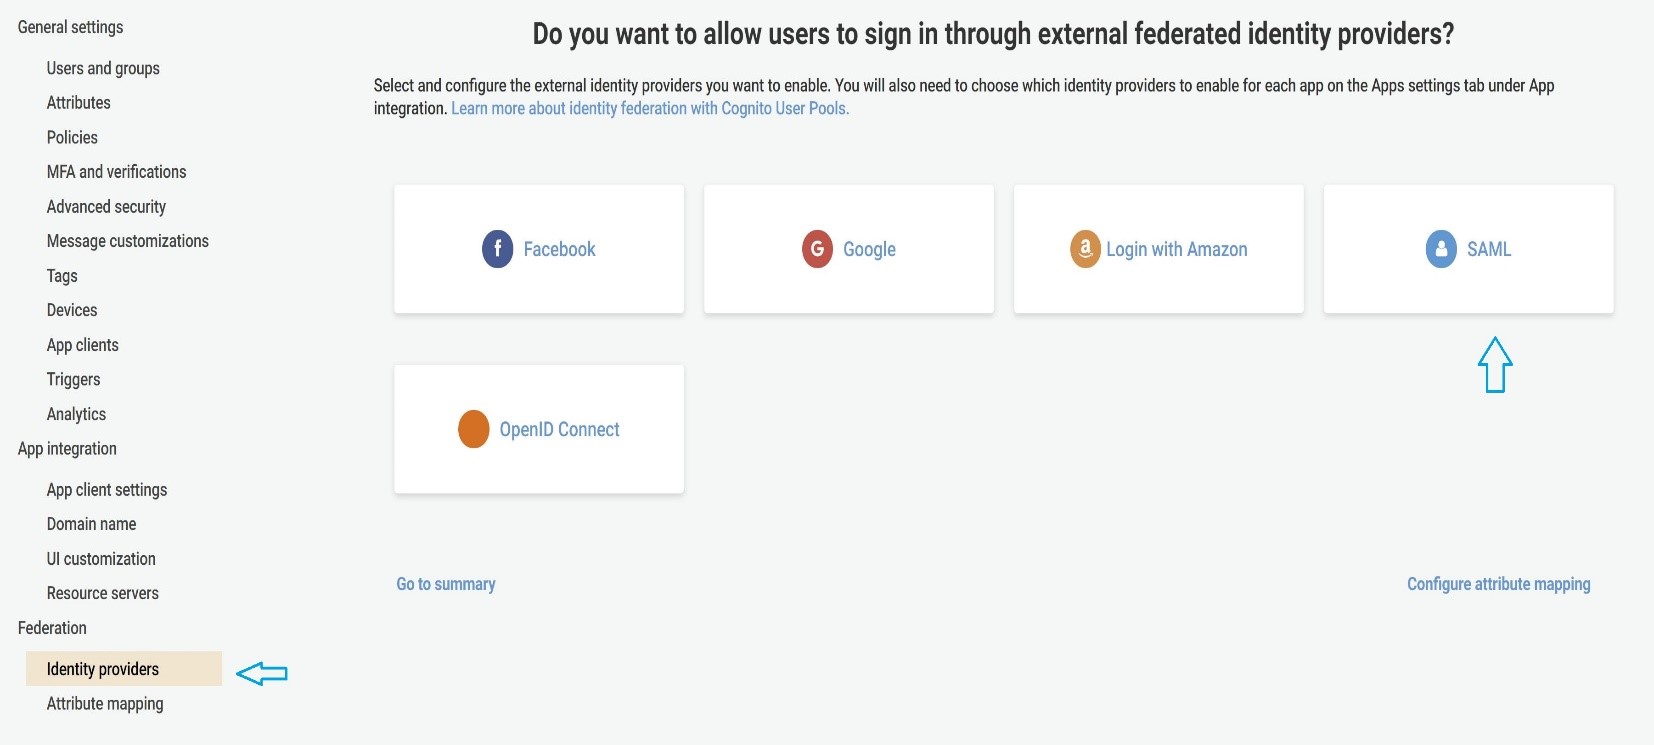
- Now that we have successfully configured OKTA, let us configure federated identities using the previously downloaded xml content/file (SAML assertion file). Please browse to the AWS Cognito setup page and click on "Identity Providers" under "Federation" and choose "SAML" as shown below:
- In order to create a Cognito identity provider, we need the Identity Provider metadata from our application in OKTA. To acquire the Identity Provider metadata, please navigate to the OKTA admin dashboard and go to "Applications" as shown below:

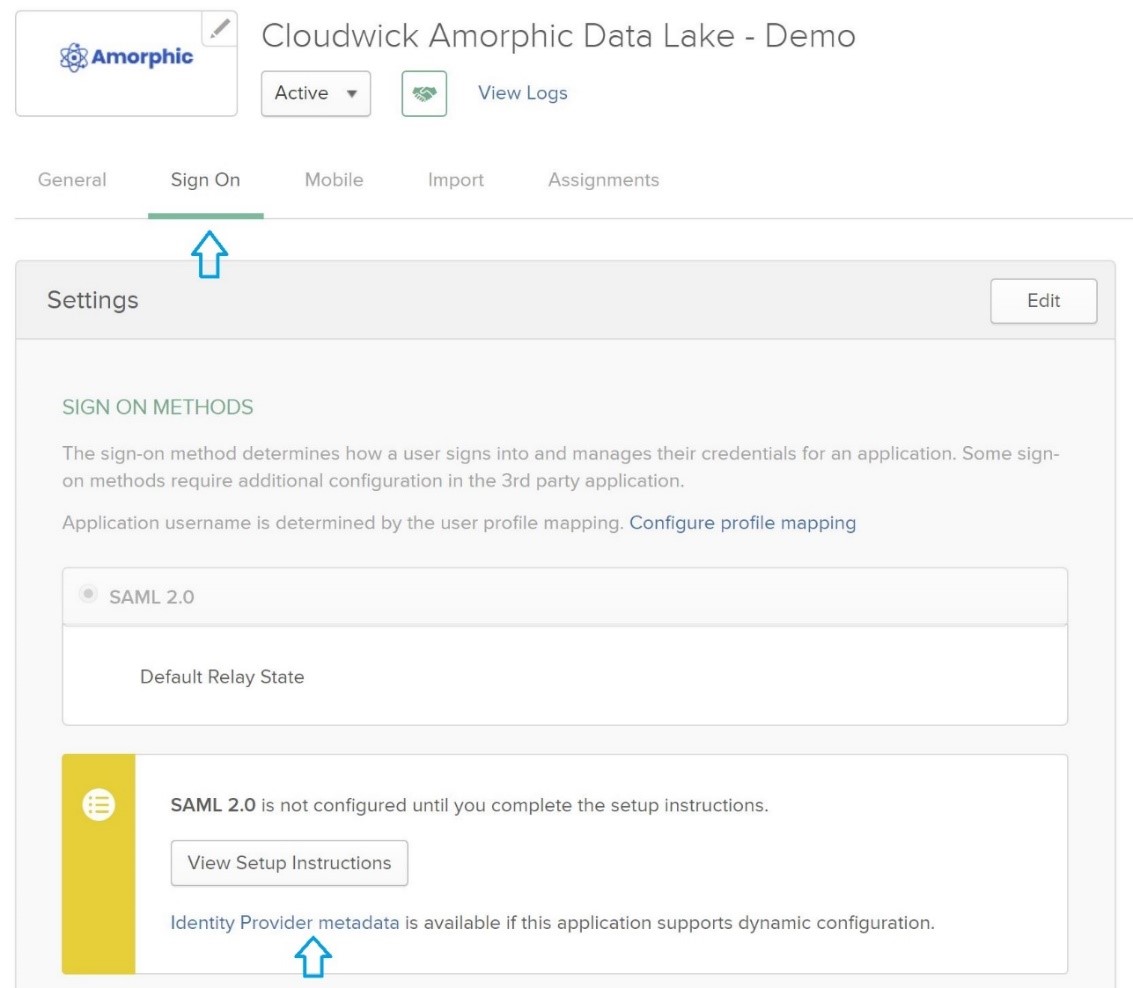
- Click on the existing active application that we earlier created and go to the "Sign On" tab of the application and click on the link that says: "Identity Provider metadata" as shown below:
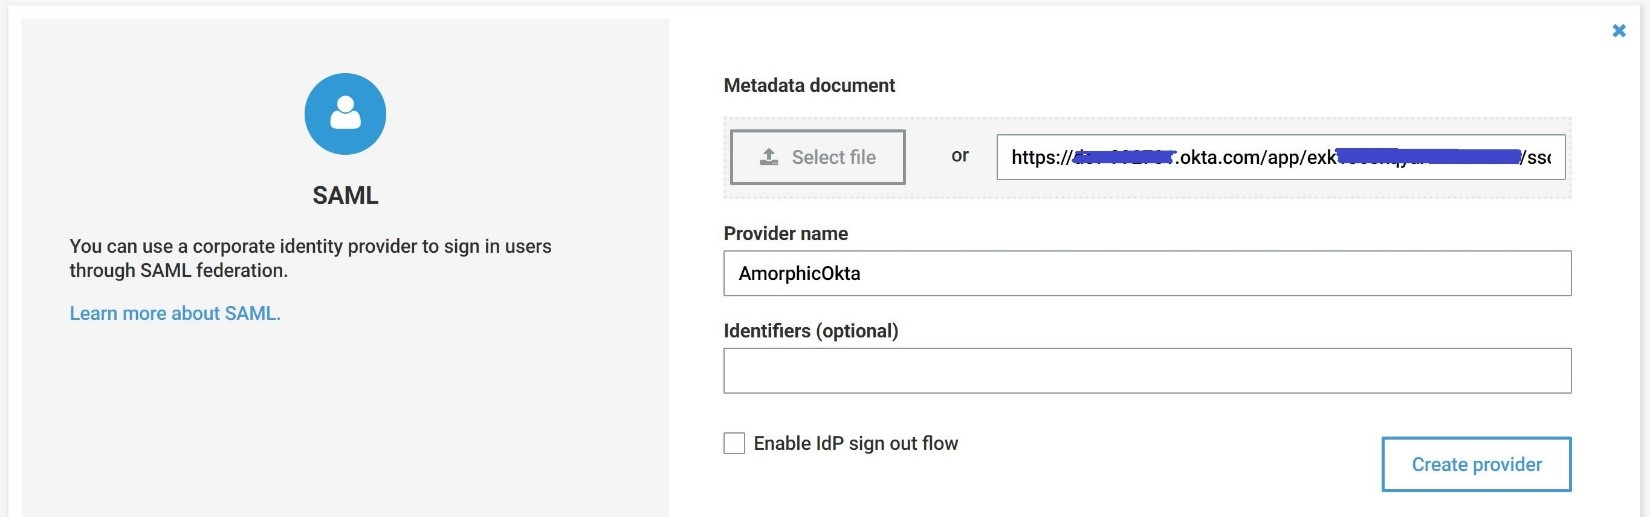
This will open up the Identity Provider Metadata on a separate URL. Please copy the URL so that it can be used to add a SAML 2.0 based Identity provider in Cognito dashboard. Saving the XML information in the Identity Provider Metadata URL as a file (example: metadata.xml) also works.
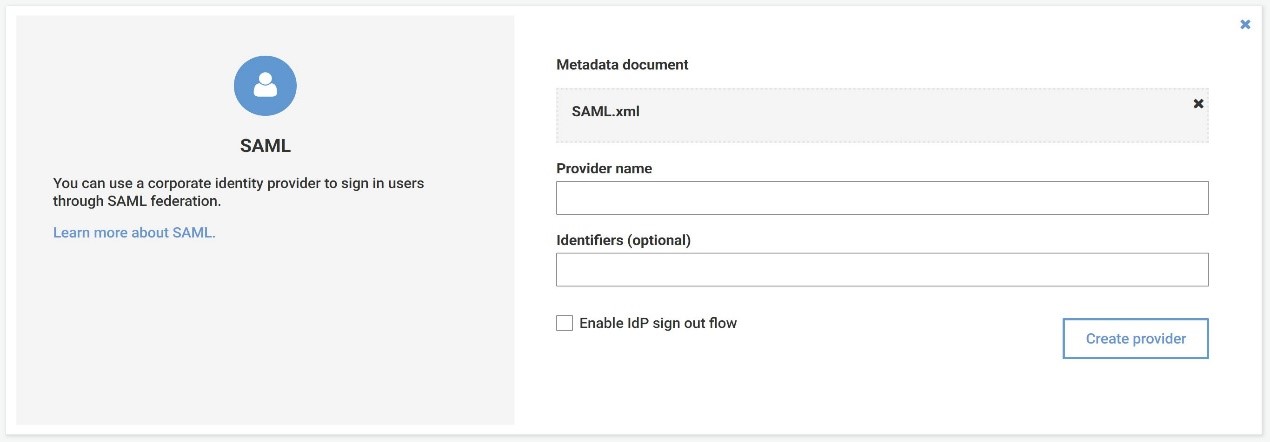
Navigate to the Cognito dashboard and proceed to: "Federation" and "Identity Providers" and upload the SAML xml file (if saved as detailed in step 6.4) or enter the URL of the OKTA Identity Provider Metadata and click on "Create Provider" as shown below:
- After successfully creation of the Identity provider in Cognito Federation, click on "App Client Settings" under "App Integration" and configure as shown below. Click "Save Changes" after the configuration of App client settings:
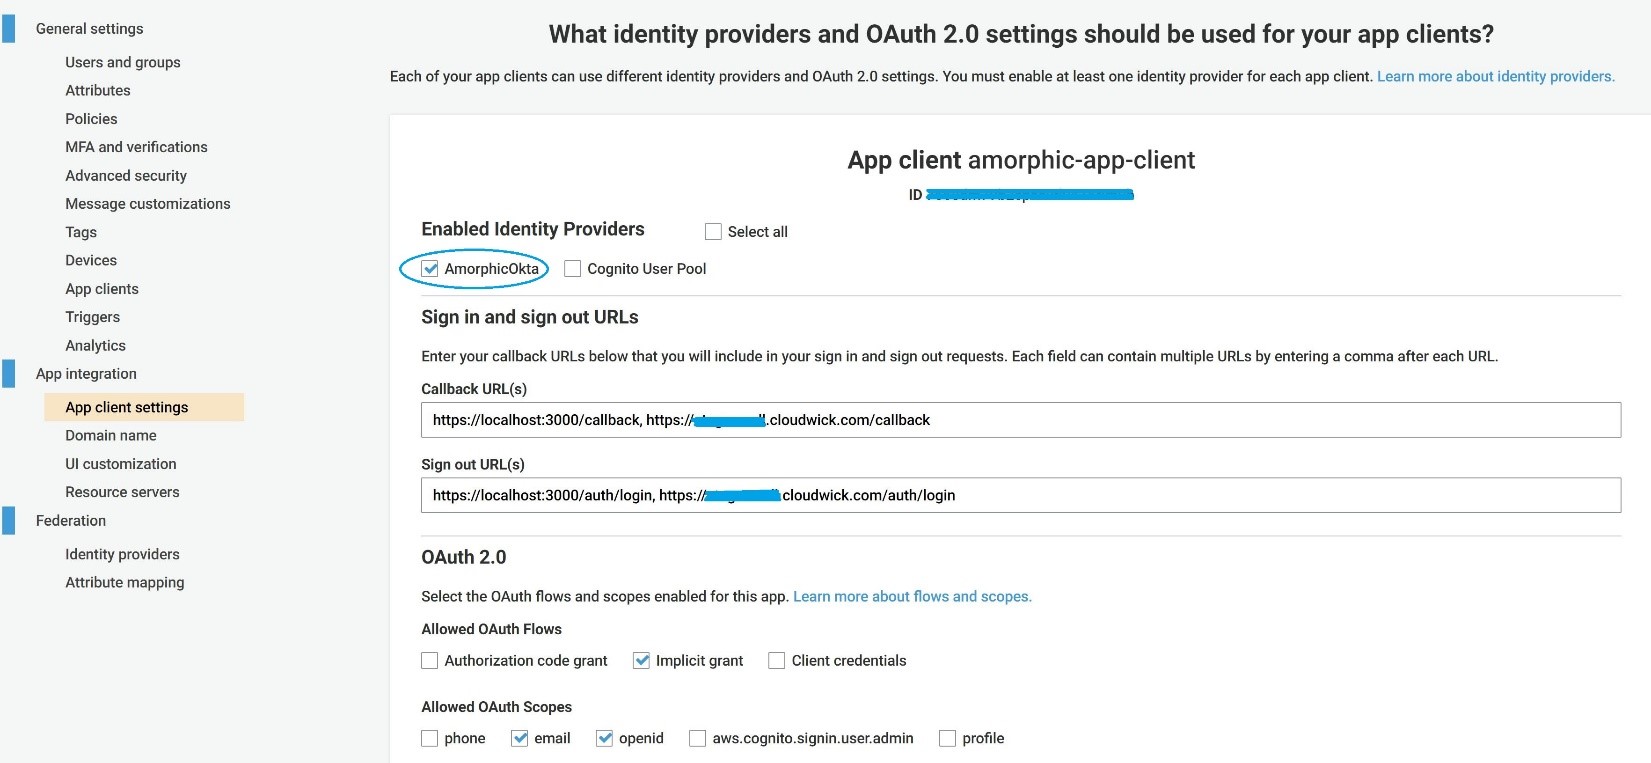
Please select the Cognito user pool"s OKTA identity provider that we earlier created (as highlighted in above snapshot). The callback URL(s) of the Cognito user pool point to "localhost" in the above screenshot as this is a demo of OKTA integration. The callback URL(s) will be populated with the Client"s Amorphic URL in production.
Testing the OKTA integration with Cognito user pool
The following testing procedure is subject to change as the Amorphic web UI evolves enabling us a more UI friendly testing mechanism.
Testing procedure flow
When we enable IDP based sign-in to Amorphic Data Cloud and in this scenario, specifically using OKTA as the identity provider, the basic test flow is as follows:
- Customer starts the OKTA based sign-in from the Amorphic login page.
- Amorphic login page contains the external link to the customer"s OKTA login.
- The end user clicks the IDP (OKTA) login link and authenticates with the customer"s OKTA.
- The end user"s OKTA login has Amorphic as an application (assuming the end user was already granted access to Amorphic application as defined in the earlier sections)
- The end user clicks on the Amorphic Data Cloud application available in the list of OKTA applications and goes to the landing page of Amorphic Data Platform.
- Cognito - behind the hood authenticates with OKTA and assigns a JWT token to the user so that upon OKTA authentication, upon clicking on the Amorphic app in the OKTA apps, the end user is directly taken to his/her Amorphic landing page
Test of OKTA integration for demo purposes
This test is for demo purposes only and is bound to change as the Amorphic web UI evolves.
At the time of this demo, the Amorphic web UI is not yet changed to reflect the UI redirection from successful OKTA login to the Amorphic landing page. So, to demonstrate the test, we adopt a slightly different approach and the Amorphic web app is launched on the localhost (local test machine). The callback URL(s) of the Cognito user pool has https://localhost:3000 as the callback URL.
Launch the Amorphic web app on the localhost using the following npm command. The appropriate Amorphic code branch was cloned prior to the execution of the following npm command: npm run install:clean
Alternatively, if the npm pakcages are already built, we can issue the following command to start the Amorphic demo web UI: HTTPS=true PORT=300 npm start
Go to the URL: https://localhost:3000 on your local machine. The Amorphic web UI will come up as shown below: (click on "show advanced" in the browser window if it says – "Not Secure")


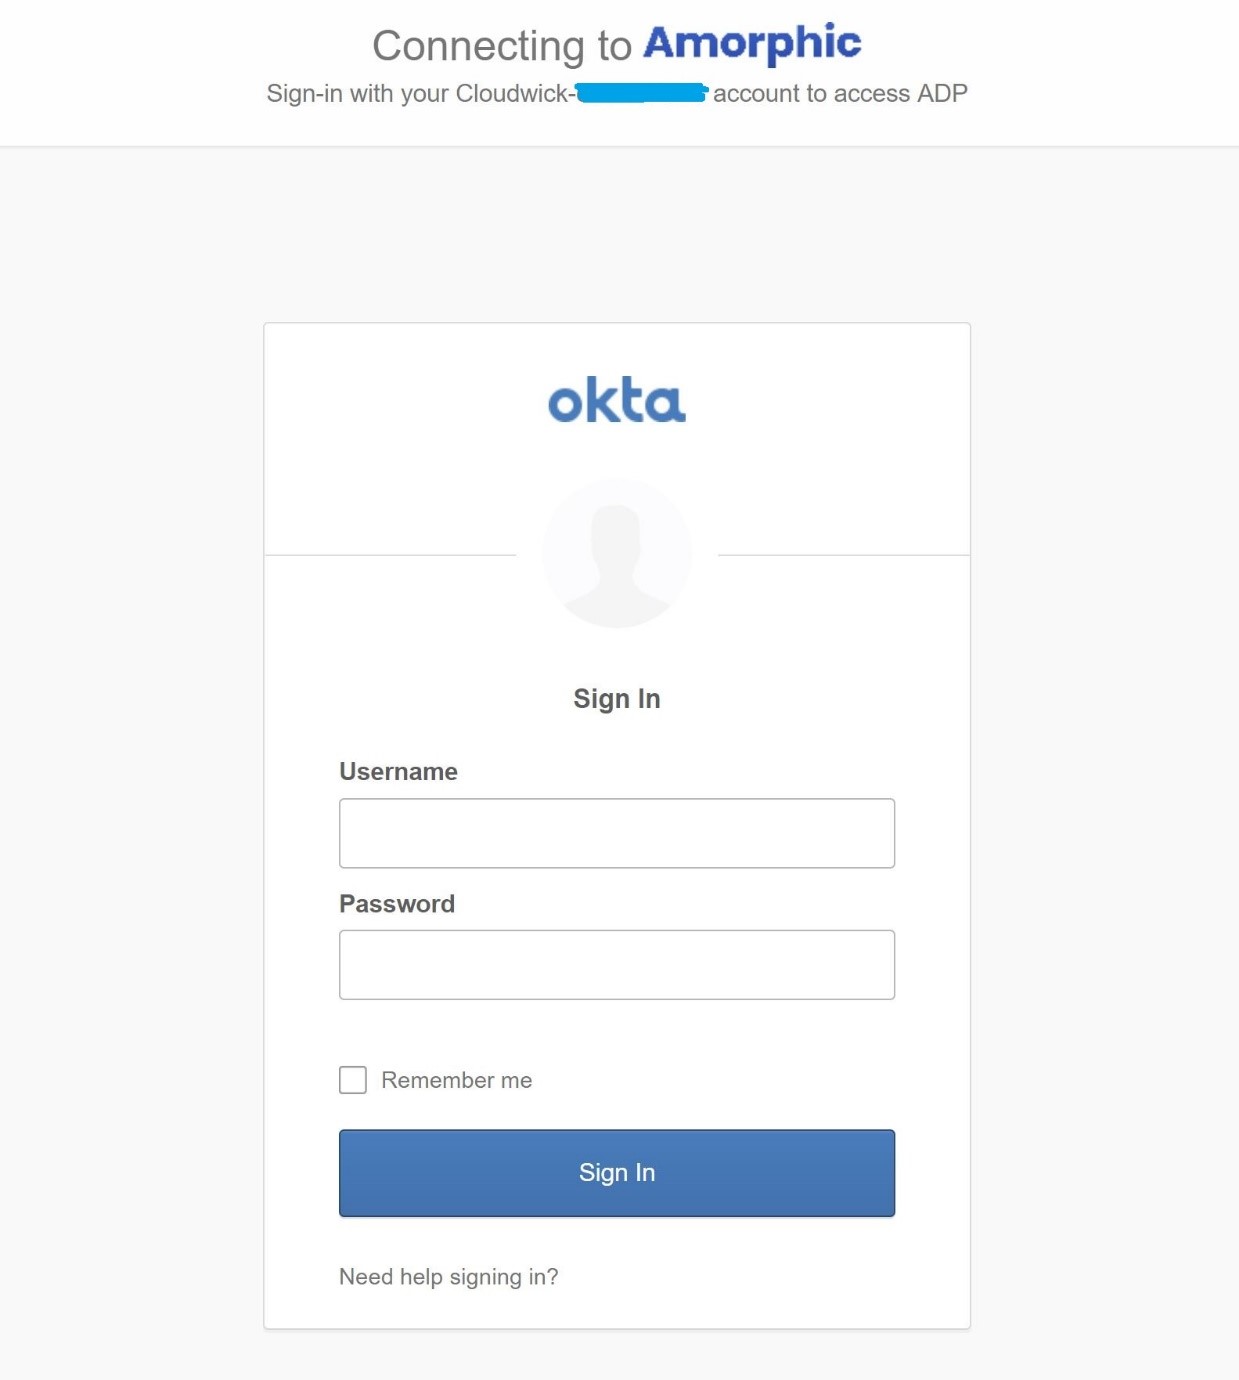
- Please click on "IDP Login" link in the login web page and this will take you to the OKTA login page – wherein you can provide your OKTA credentials as shown below:
- Upon entering the OKTA username and corresponding password, ideally, we will be redirected to the Amorphic landing page. At the time of documenting this demo, the redirection to landing page isn"t implemented. So, we take a slightly different approach to test the successful integration.
Technically, upon successful authentication with the OKTA identity provider, Cognito will generate a JWT token and allocate the token to the end user. So, in this demo, after the end user successfully authenticates using his/her OKTA credentials, the JWT token/SAML assertion object will be indicated when we navigate to the browser"s => "Inspect element" and go to => "Console" as shown below:

Navigating to the Amorphic application in OKTA dashboard
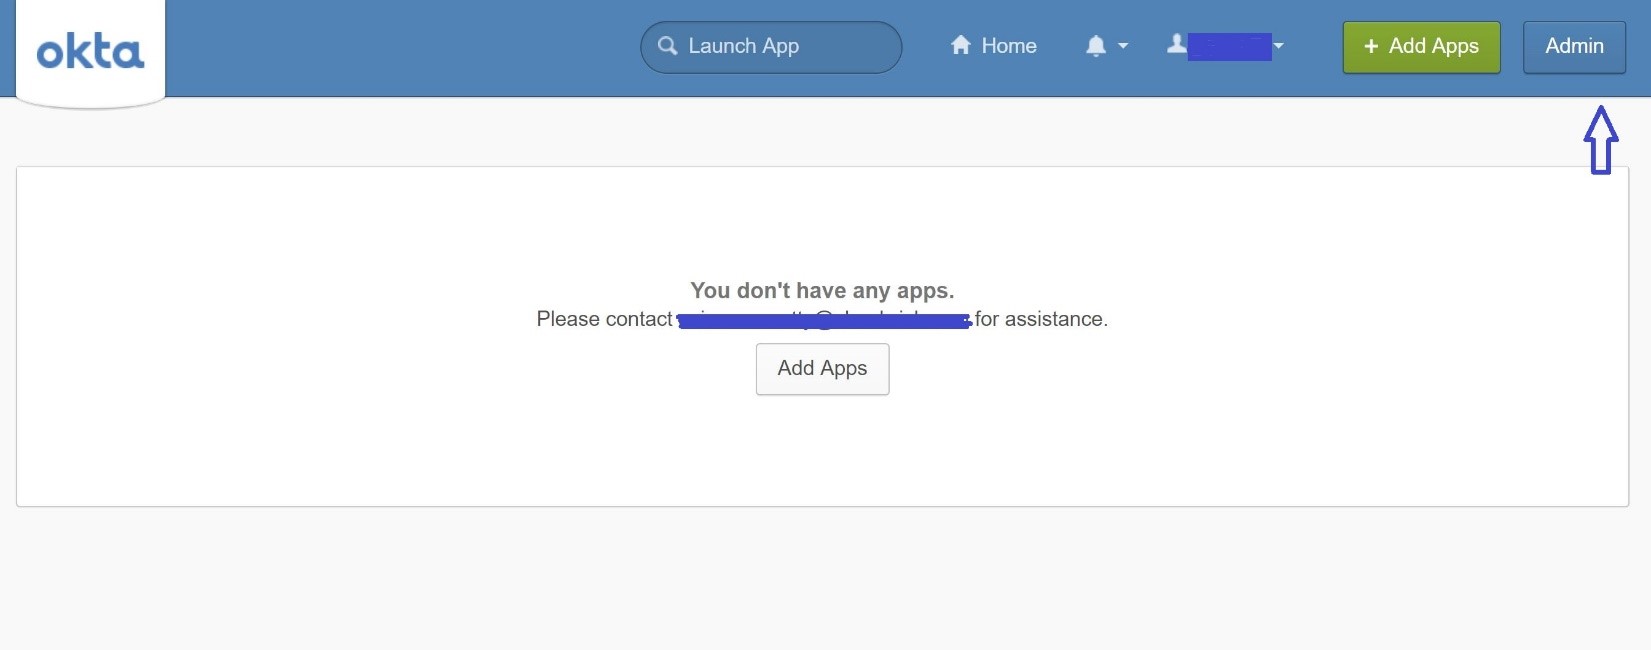
Login to your OKTA account and browse to "My Applications" as shown below:

This will take us to the OKTA dashboard wherein our previously created Amorphic application is shown to us:

For signing into the Amorphic Data Cloud, click on the corresponding application and it will take you to the Amorphic Data Cloud landing page.