
ML Models
Amorphic Model portal helps you create/import an AWS SageMaker model. This machine learning model object can be applied on a dataset files for prediction purposes.

Create ML Model
ML Models component helps user to create an ML Model object in Amorphic to facilitate and utilize on the dataset files.
Following are the attributes required to create an Amorphic machine learning model object:
| Attribute | Description |
|---|---|
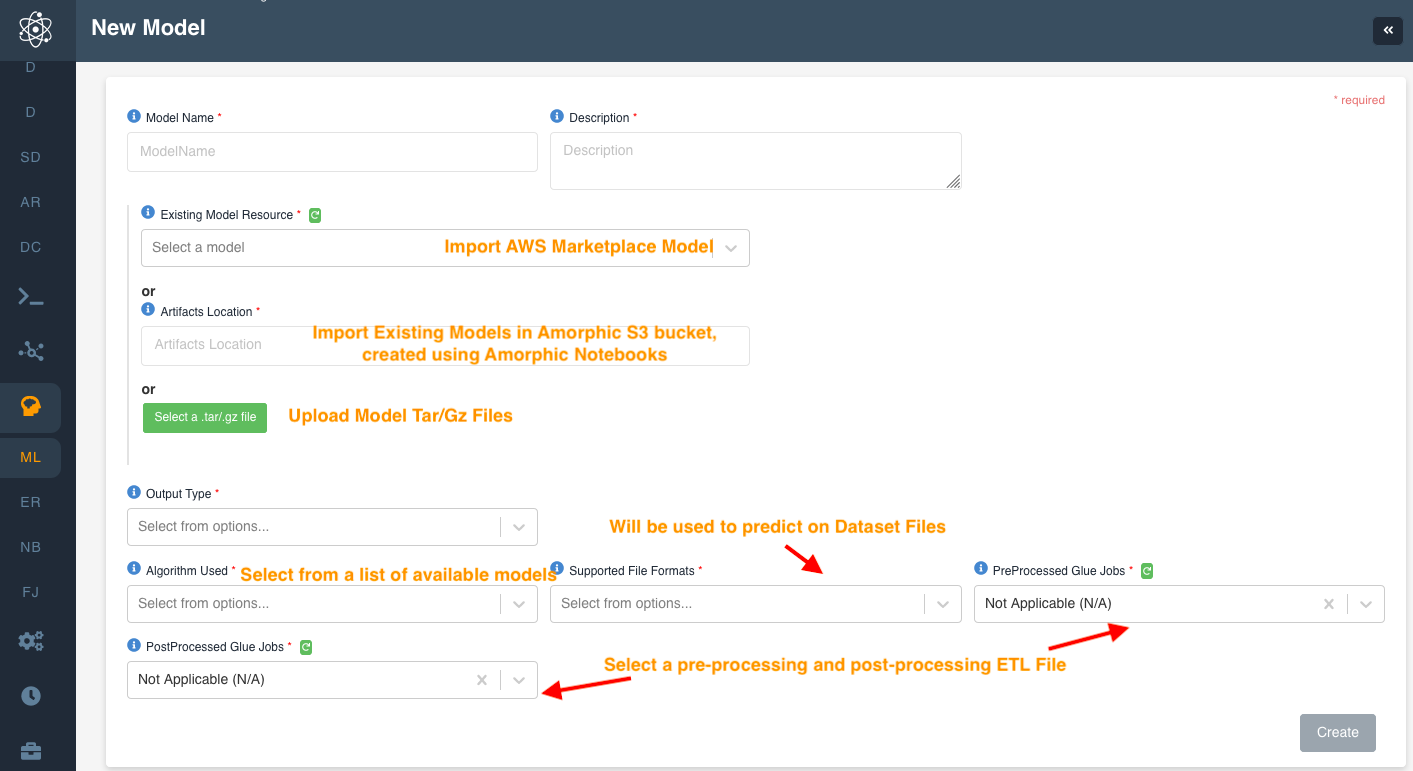
| Model Name | This is the model name in the Amorphic portal. |
| Description | This is the description of the ML model. |
| Model Resource | There are three ways to integrate Sagemaker model with the Amorphic portal |
| Existing Model Resource | This is a way to import Sagemaker Marketplace subscribed model in the Amorphic Portal. In order to import a model from Sagemaker marketplace, raise a request to the Admin. The admin will create a support ticket for the AWS Marketplace model using support@amorphicdata.com. Amorphic team will make sure the respective model is available to select. |
| Artifact Location | This is a way to upload your sagemaker model file directly from an Amorphic S3 location. Amorphic users can use Amorphic Notebooks to create a model in a Amorphic S3 location. Please refer to the Notebook section for the respective bucket details. |
| Select file | This is a way to upload a sagemaker model tar file directly to the Amorphic portal. Upon selecting this option you can upload any model tar or tar.gz file directly into the Amorphic portal. |
| Output Type | You have two options - Dataset Data or Metadata. Select Dataset data when the requirement is to run the model on a Dataset file. Select Metadata, when you would like to view "AI/ML Results" ie. metadata on a dataset files (explained later). Most of the time you would want to use Dataset data. |
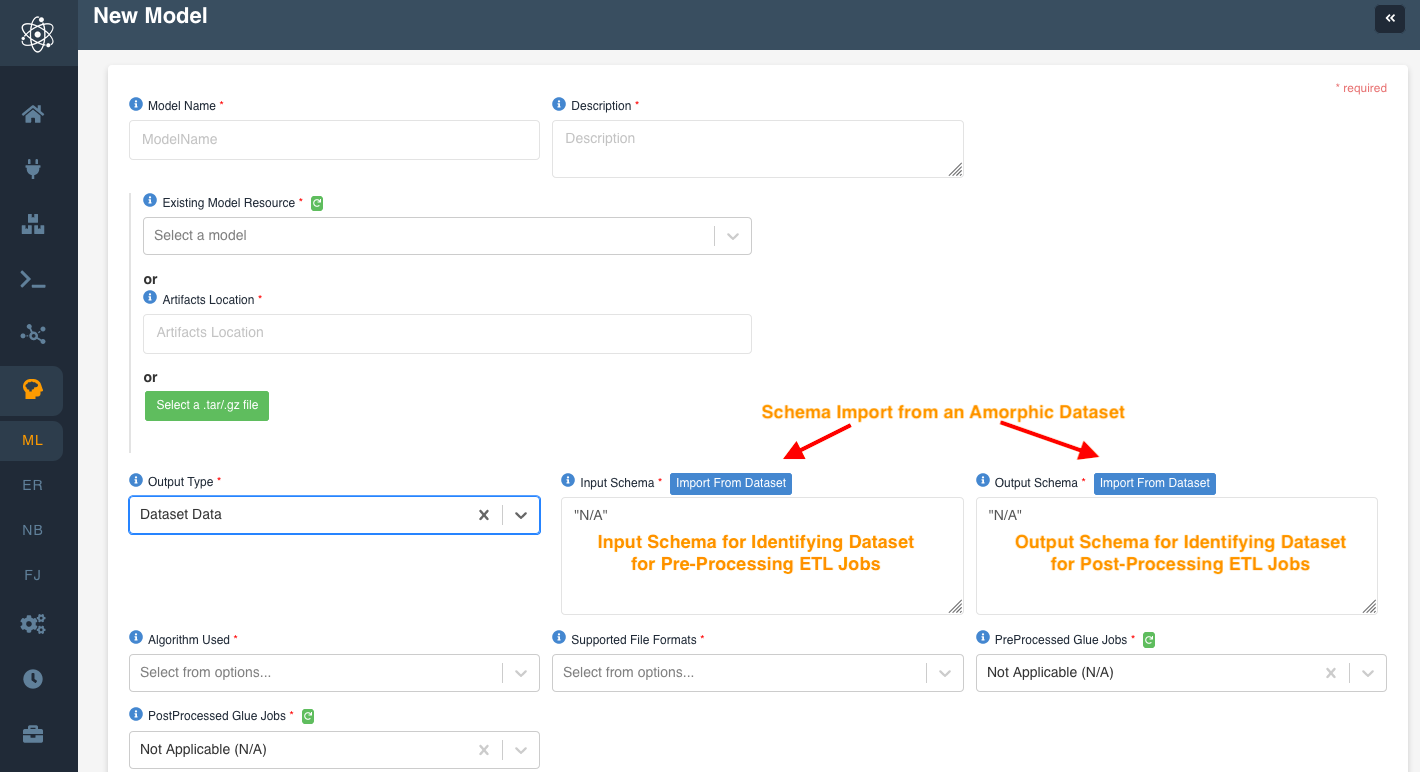
Dataset Data would require two additional inputs - Input and Output
Schema.
| Attribute | Description |
|---|---|
| Input Schema | This is the schema used to identify the schema for the Dataset on which the pre-processing ETL job or the model is to be run. |
| Output Schema | This is the schema used to identify the schema for the Dataset on which the post-processing job or the model output will be saved. |
Both the schema should have the same following format matching the
respective Datasets:

    [
        {
            "type": "Date",
            "name": "CheckoutDate",
            "Description": "description"
        },
        {
            "type": "String",
            "name": "MajorProdDesc",
            "Description": "description"
        },
        {
            "type": "Double",
            "name": "counts",
            "Description": "description"
        }
    ]

:::info Note
You can import the schema of an Amorphic dataset using the "Import from Dataset" functionality
:::
| Attribute | Description |
|---|---|
| Algorithm Used | The platform currently supports all the major AWS Sagemaker models |
| Supported file formats | Select the respective file type for predictions. If you require a file format other than the available format, then select the others file type. It will default to no file type required for batch prediction purposes. Note: if a model is selected as “Others” file type, then it can only be run on a “Others” file type Dataset. |
| Preprocess Glue Job | Select the pre-processing ETL jobs created using Amorphic ETL functionality. |
| Postprocess Glue Job | Select the post-processing ETL jobs created using Amorphic ETL functionality. |
Apply Amorphic Model
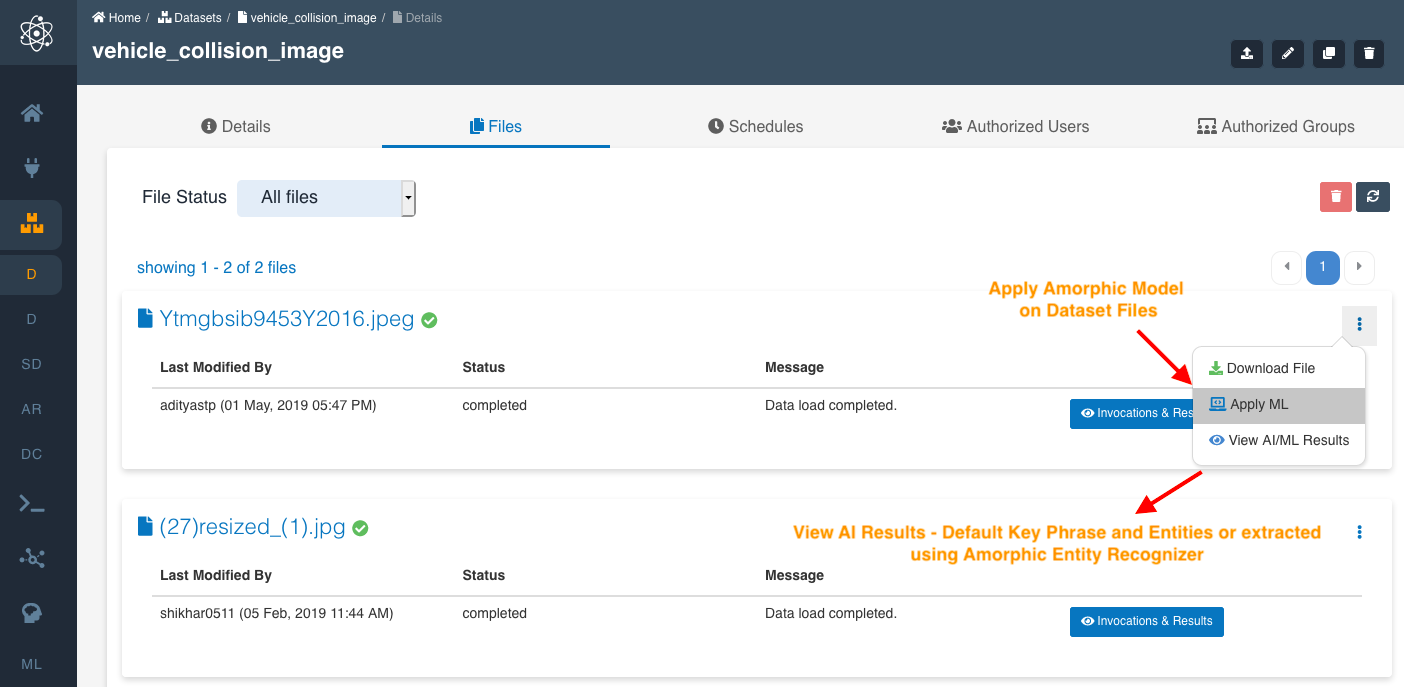
Once an Amorphic model object is created, you can run a model on a Dataset files in the Amorphic portal by going through the following steps:
- Select a Dataset in the Amorphic portal.
- Go to the “Files” tab and select the file on which you want to run the model.
- Click on the Top Right options for the file.
- Click on “Apply ML”
- Select the ml-model from the model dropdown. All Amorphic model objects that match the corresponding input schema of Datasets will be available to select.
- Select the required instance types. Note: certain aws marketplace subscribed models run on specific instance family type.
- Select the Target Dataset. The Datasets matching the output schema of the Amorphic model object will be available for selection.
- Click on “Submit”

ML Model
View ML Model
To view the details of a ML Model, click the View Details link for the respective ML Model.
Following details will be displayed in the ML Model details page based on the type of creation:

Authorized Users
This tab shows the list of users authorized to perform operations on the ML Model. The owner, user who created or have owner access to the model, can provide model access to any other user in the system.
There are two type of access types:
| Access Type | Description |
|---|---|
| Owner | This User has permissions to edit the model and provide access to other user for the model. |
| Read-only | This user has limited permission to model, such as view the details of the selected model. |
Authorized Groups
This tab shows the list of groups authorized to perform operations on Ml Model. A group is a list of users given access to a resource. Groups are created by going to User Profile -> Profile & Settings --> Groups
There are two type of access types:
| Access Type | Description |
|---|---|
| Owner | This group of users has permissions to edit the resources and provide access to other user/groups for the resources. |
| Read-only | This group has limited permission to resources, such as view the details. |
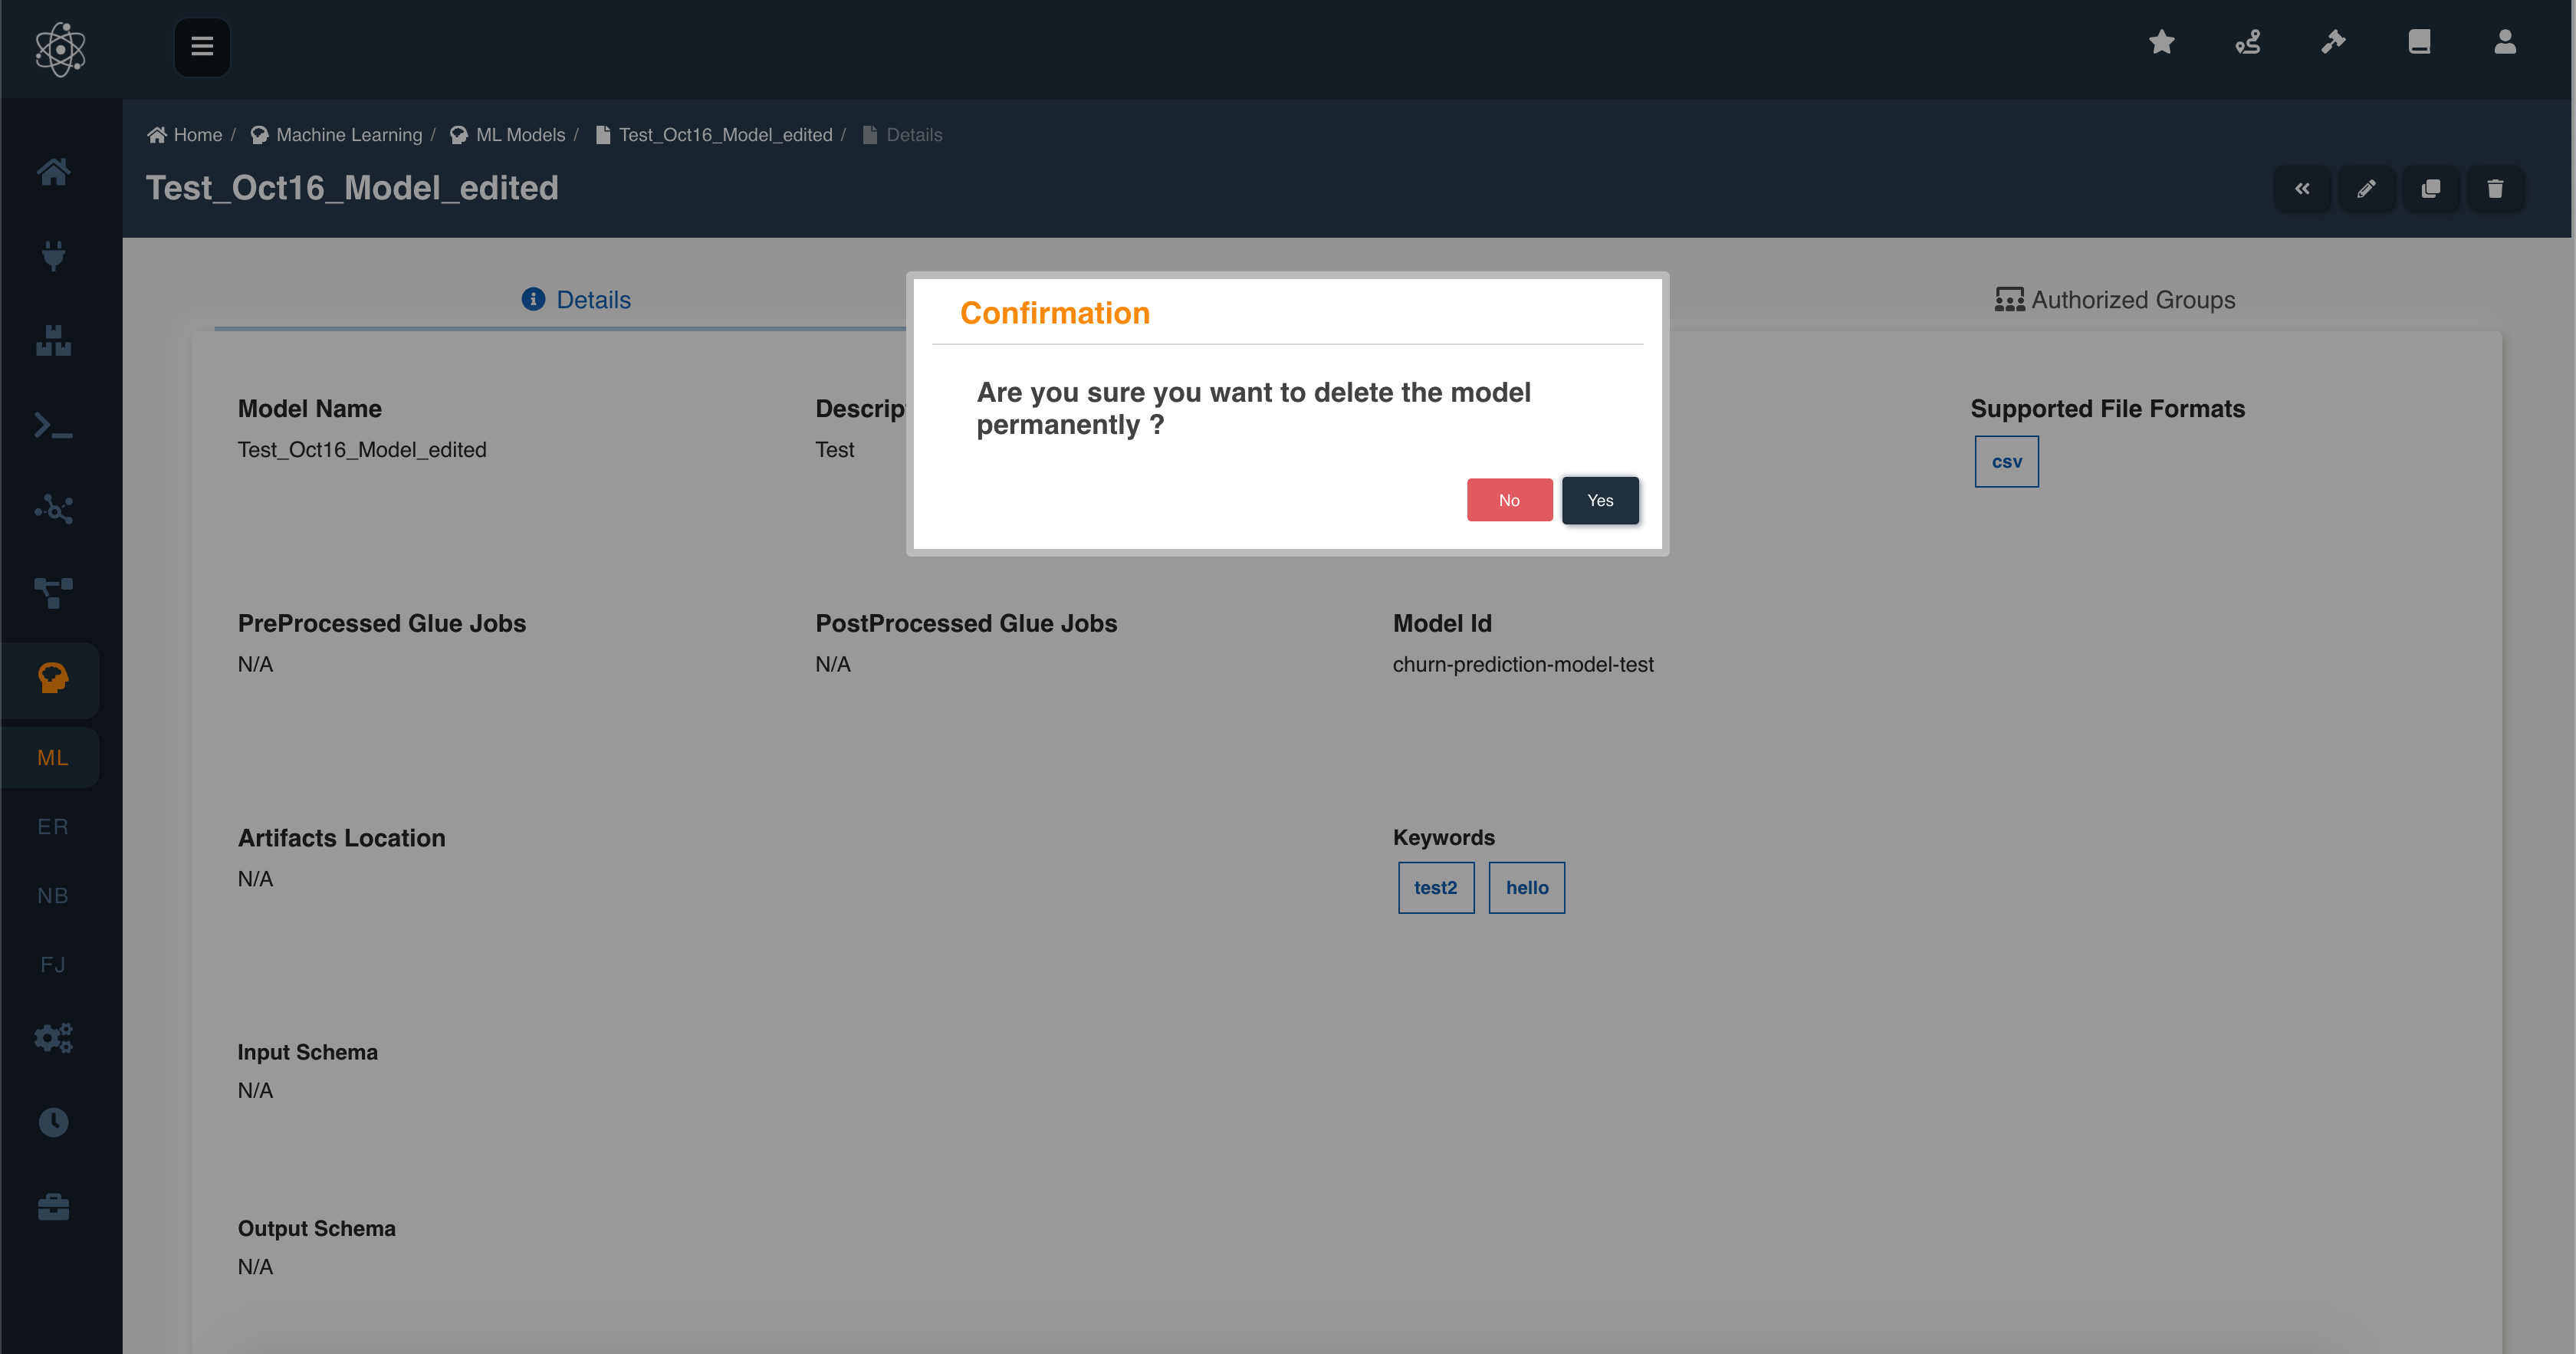
Delete ML Model
If the user has sufficient permissions to delete the ML Model then the ML Model can be deleted using the 'Delete' (trash) button on the right side.
Following image depicts how to delete the ML Model:
How ML Pipeline works in the Amorphic
The below figure shows how a typical ML pipeline of Amorphic platform looks like. During the Amorphic model object creation process, the pre-processing and post-processing ETL job functionality provides a way to drag and drop ETL workflows for a smooth user access.
