
Schedules
Amorphic Schedule provides a self-service data ingestion mechanism which provides a mechanism for batch and streaming data ingestion on a scheduled basis.
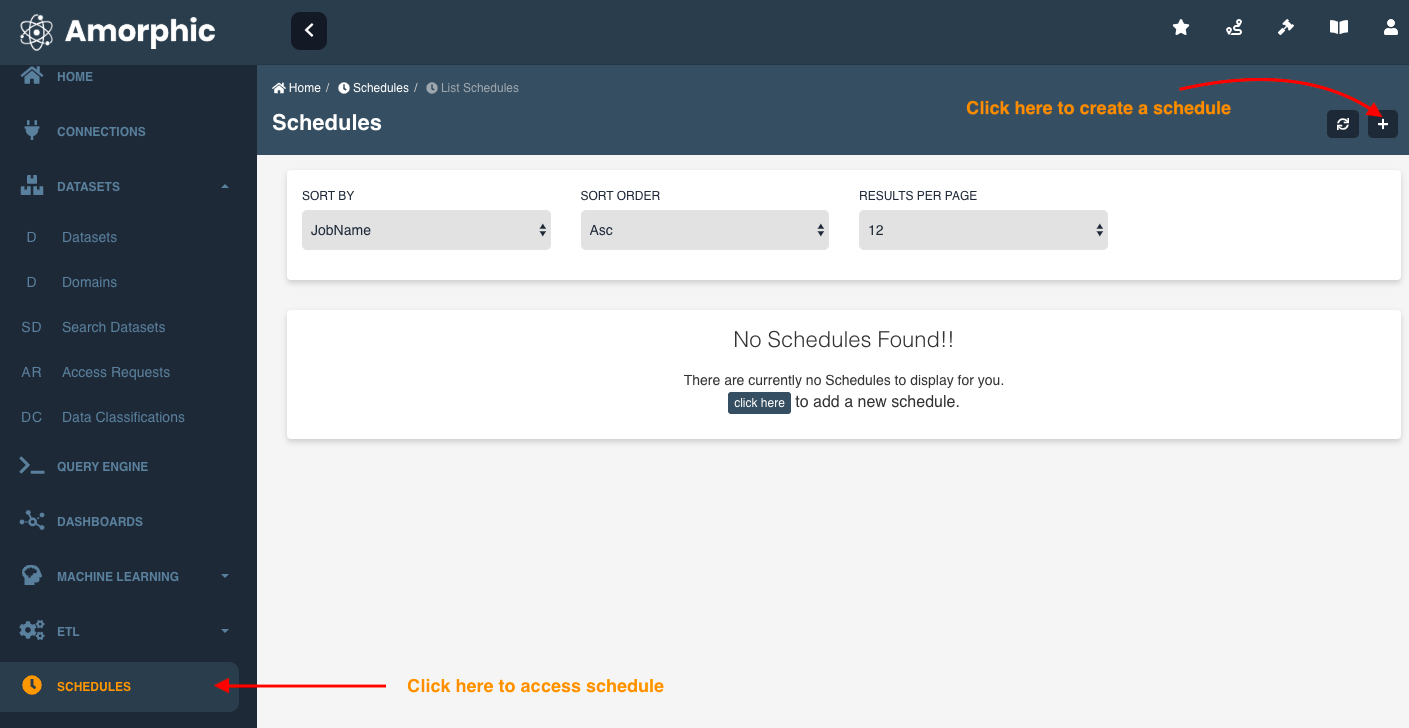
Create Schedule
A Schedule can be created using the + icon on the top right of page
under 'Schedules' section.

In order to create a schedule, User needs to specify all the mandatory requirements.
Schedule Name: A Unique name of schedule that user wants to create.
Description: Brief description of the schedule.
Type of Job: User needs to choose the type of Job from the dropdown list. Below are the list of options available for schedule.
| Type | Description |
|---|---|
| ETL Job | This option is used to schedule an ETL job |
| JDBC CDC | This option is used to Sync data between DWH to S3 for CDC related tasks, Please note that only tasks which have SyncToS3 option setting as yes will be shown and can be scheduled. |
| Data Ingestion | Data ingestion job for normal JDBC, S3 and Ext-API connections. |
| JDBC FullLoad | This option is used to schedule a JDBC BulkDataLoad full-load task. |
| Forecast Predictors | This option is used to schedule a Forecast predictor. |
| Forecast Reports | This option is used to schedule a Forecast report. |
| Workflows | This option is used to schedule a workflow. |
Notification settings has been moved to Settings page and using that user can choose the type of notification setting for the schedule. Please check the documentation on Notification settings.
Max Capacity: User can specify max capacity based on the data load. For JDBC type datasets, must be an integer value between 2 and 100, else either 0.0625 or 1. Allocated Capacity earlier used has been deprecated.
Schedule Type: The user can choose the schedule type whether to be On-Time or On-Demand.

On-Demand schedules can be run as per the need.
User can execute the schedules based on specific time as per requirement. Time based schedules require a schedule expression.

If the schedule job type is 'Data Ingestion' and the dataset is of 'reload' type then schedule execution will load the data and also reload the data automatically.
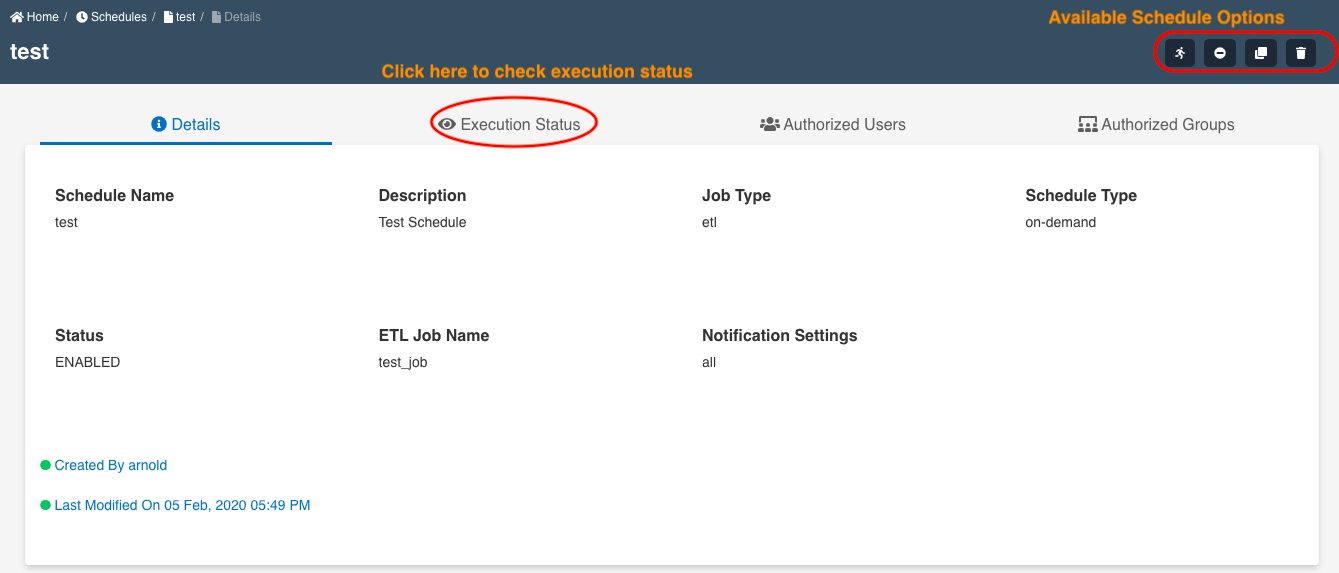
View Schedule
To view the details of a schedule, click the View Details link for the respective schedule. in the schedules listing page.
There are multiple options available to perform on the scheduled job:
- Run Schedule
- Disable Schedule
- Enable Schedule
- Edit Schedule
- Clone Schedule
- Delete Schedule
Run Schedule
Once a schedule is created for a specific job, the schedule can be using the Run Schedule Option available at the top right icon on the page.
Once the user runs the schedule then the user can check the status of the execution through 'Execution Status' tab.
Execution status indicates the current status of the scheduled job whether is it running, successful or failed.

Once the schedule execution is completed, Email notification will be sent based on the notification setting and schedule execution status.
Schedule execution will error out if the related S3 connection is using any of Amorphic S3 buckets as source. For ex: <projectshortname-region-accountid-env-dlz>
From Amorphic 1.13 Onwards, ExecutionTime key is changed to StartTime which is relevant for the execution. For executions, it'll display ExecutionTime if StartTime is not available.
User can stop/cancel the schedule execution if the execution is in running state.
The following picture depicts how to stop the schedule execution:

Schedule executions
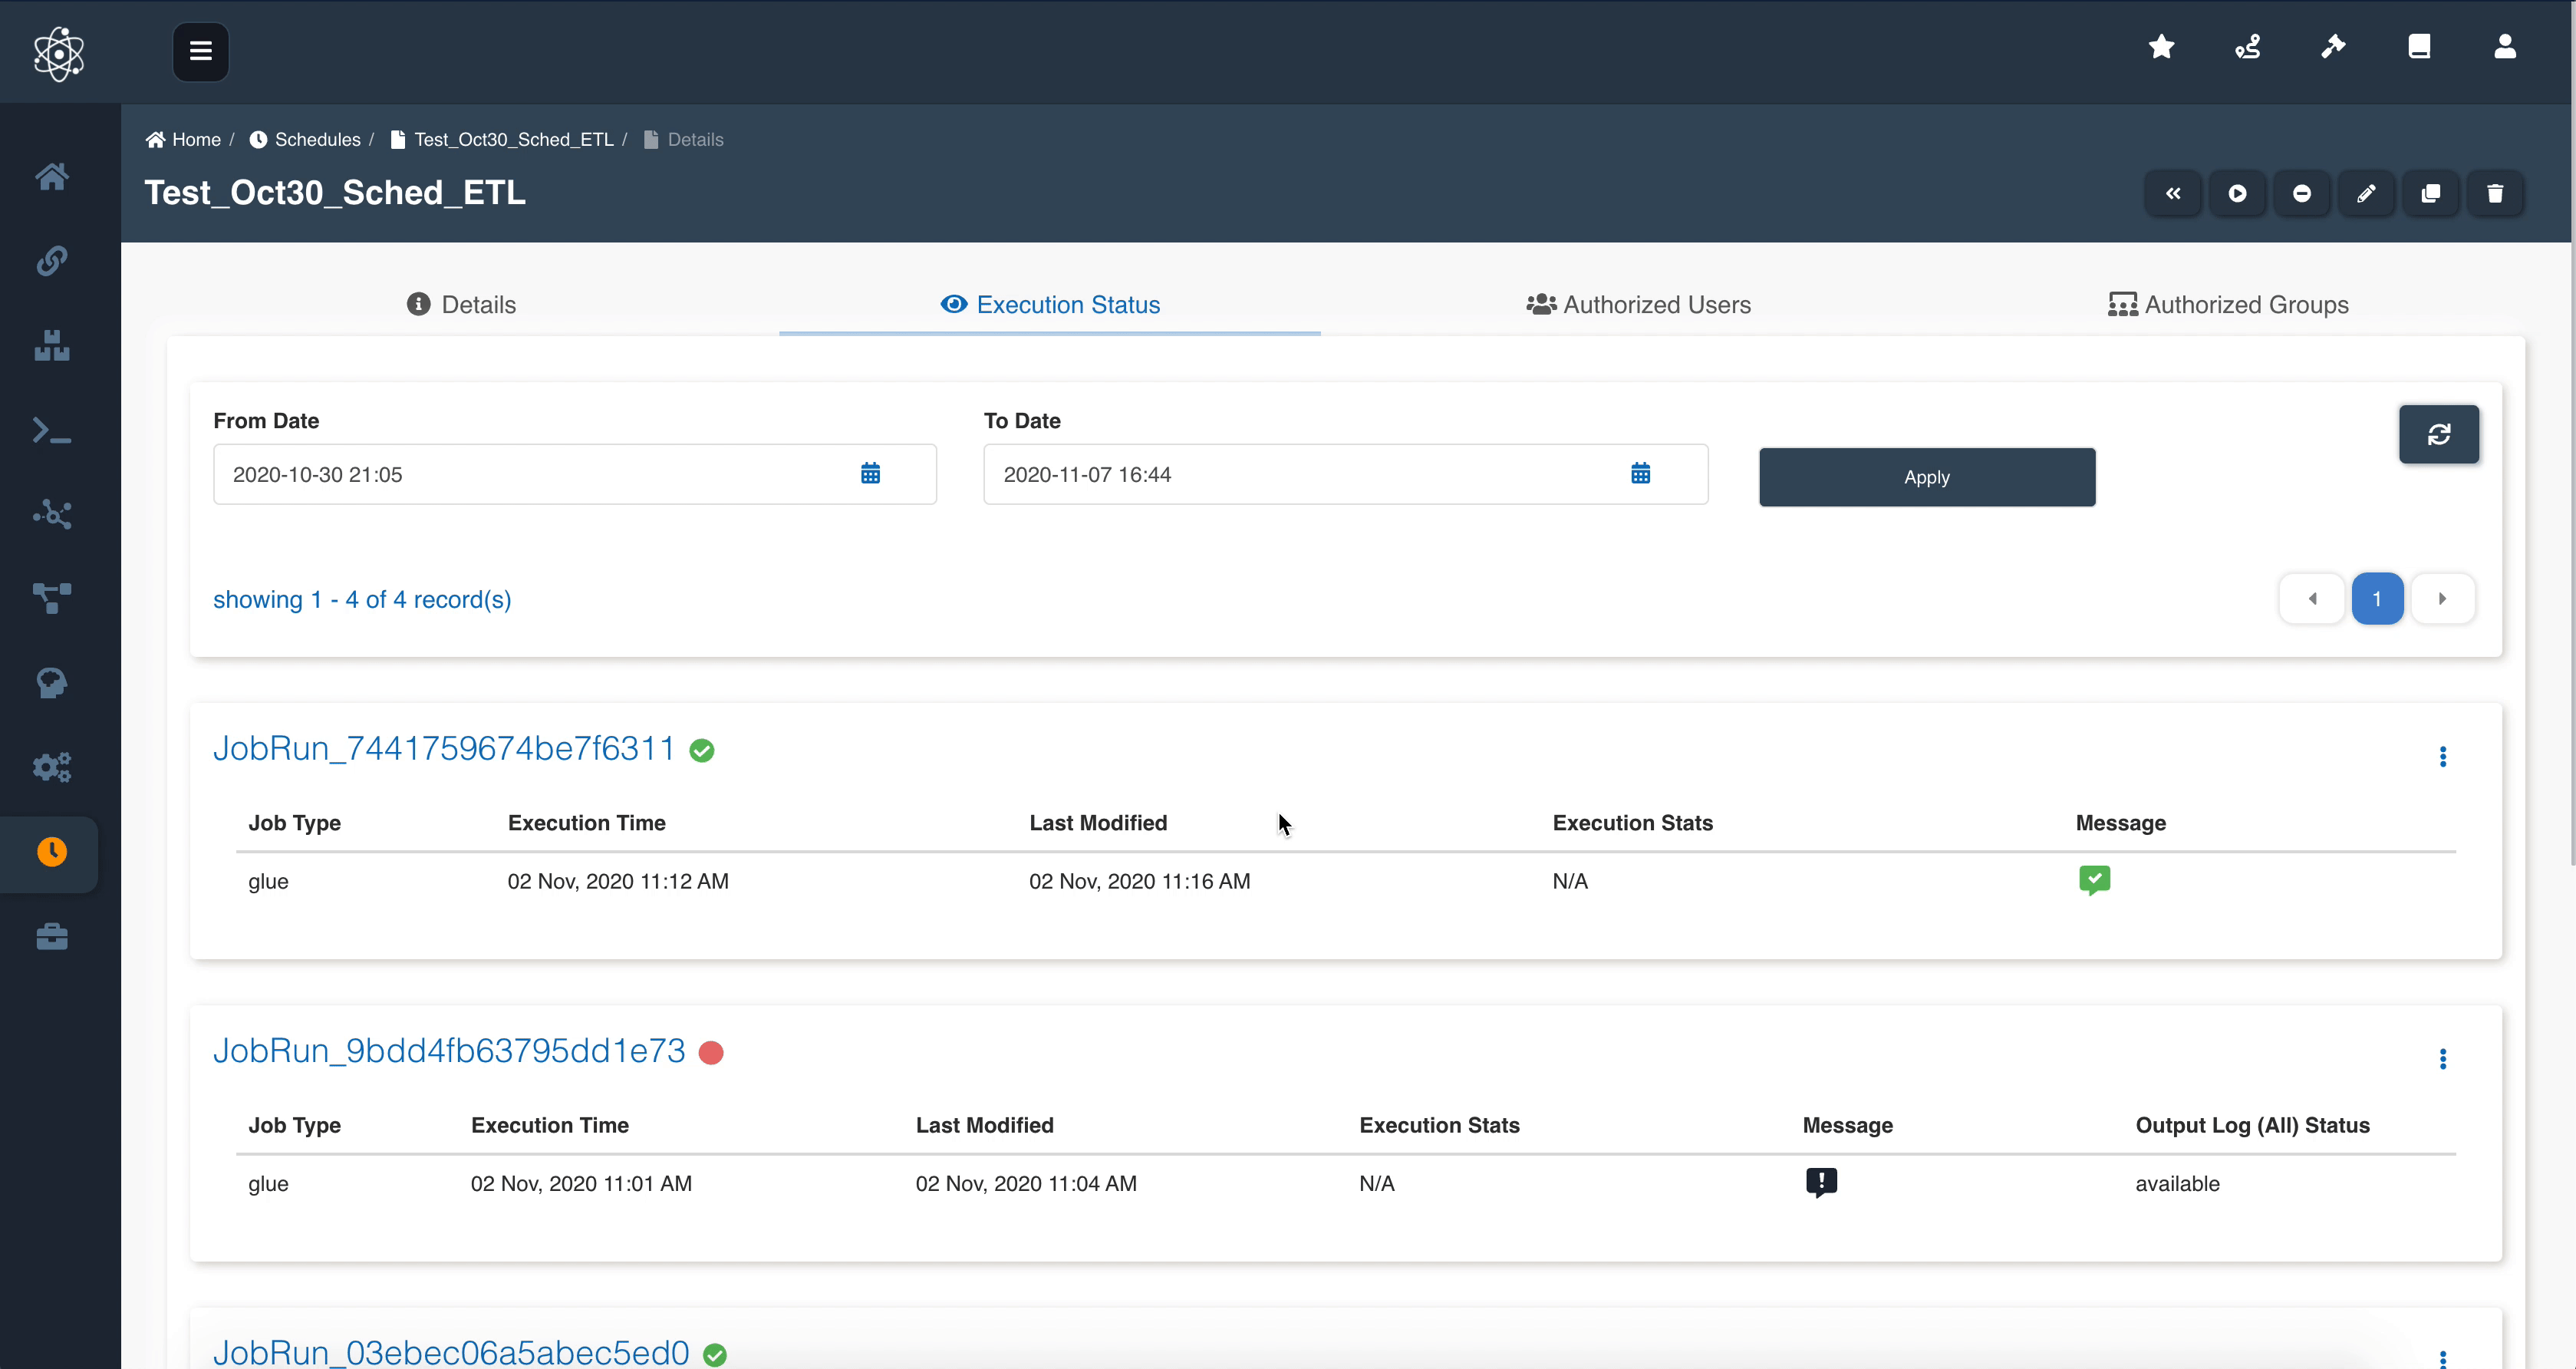
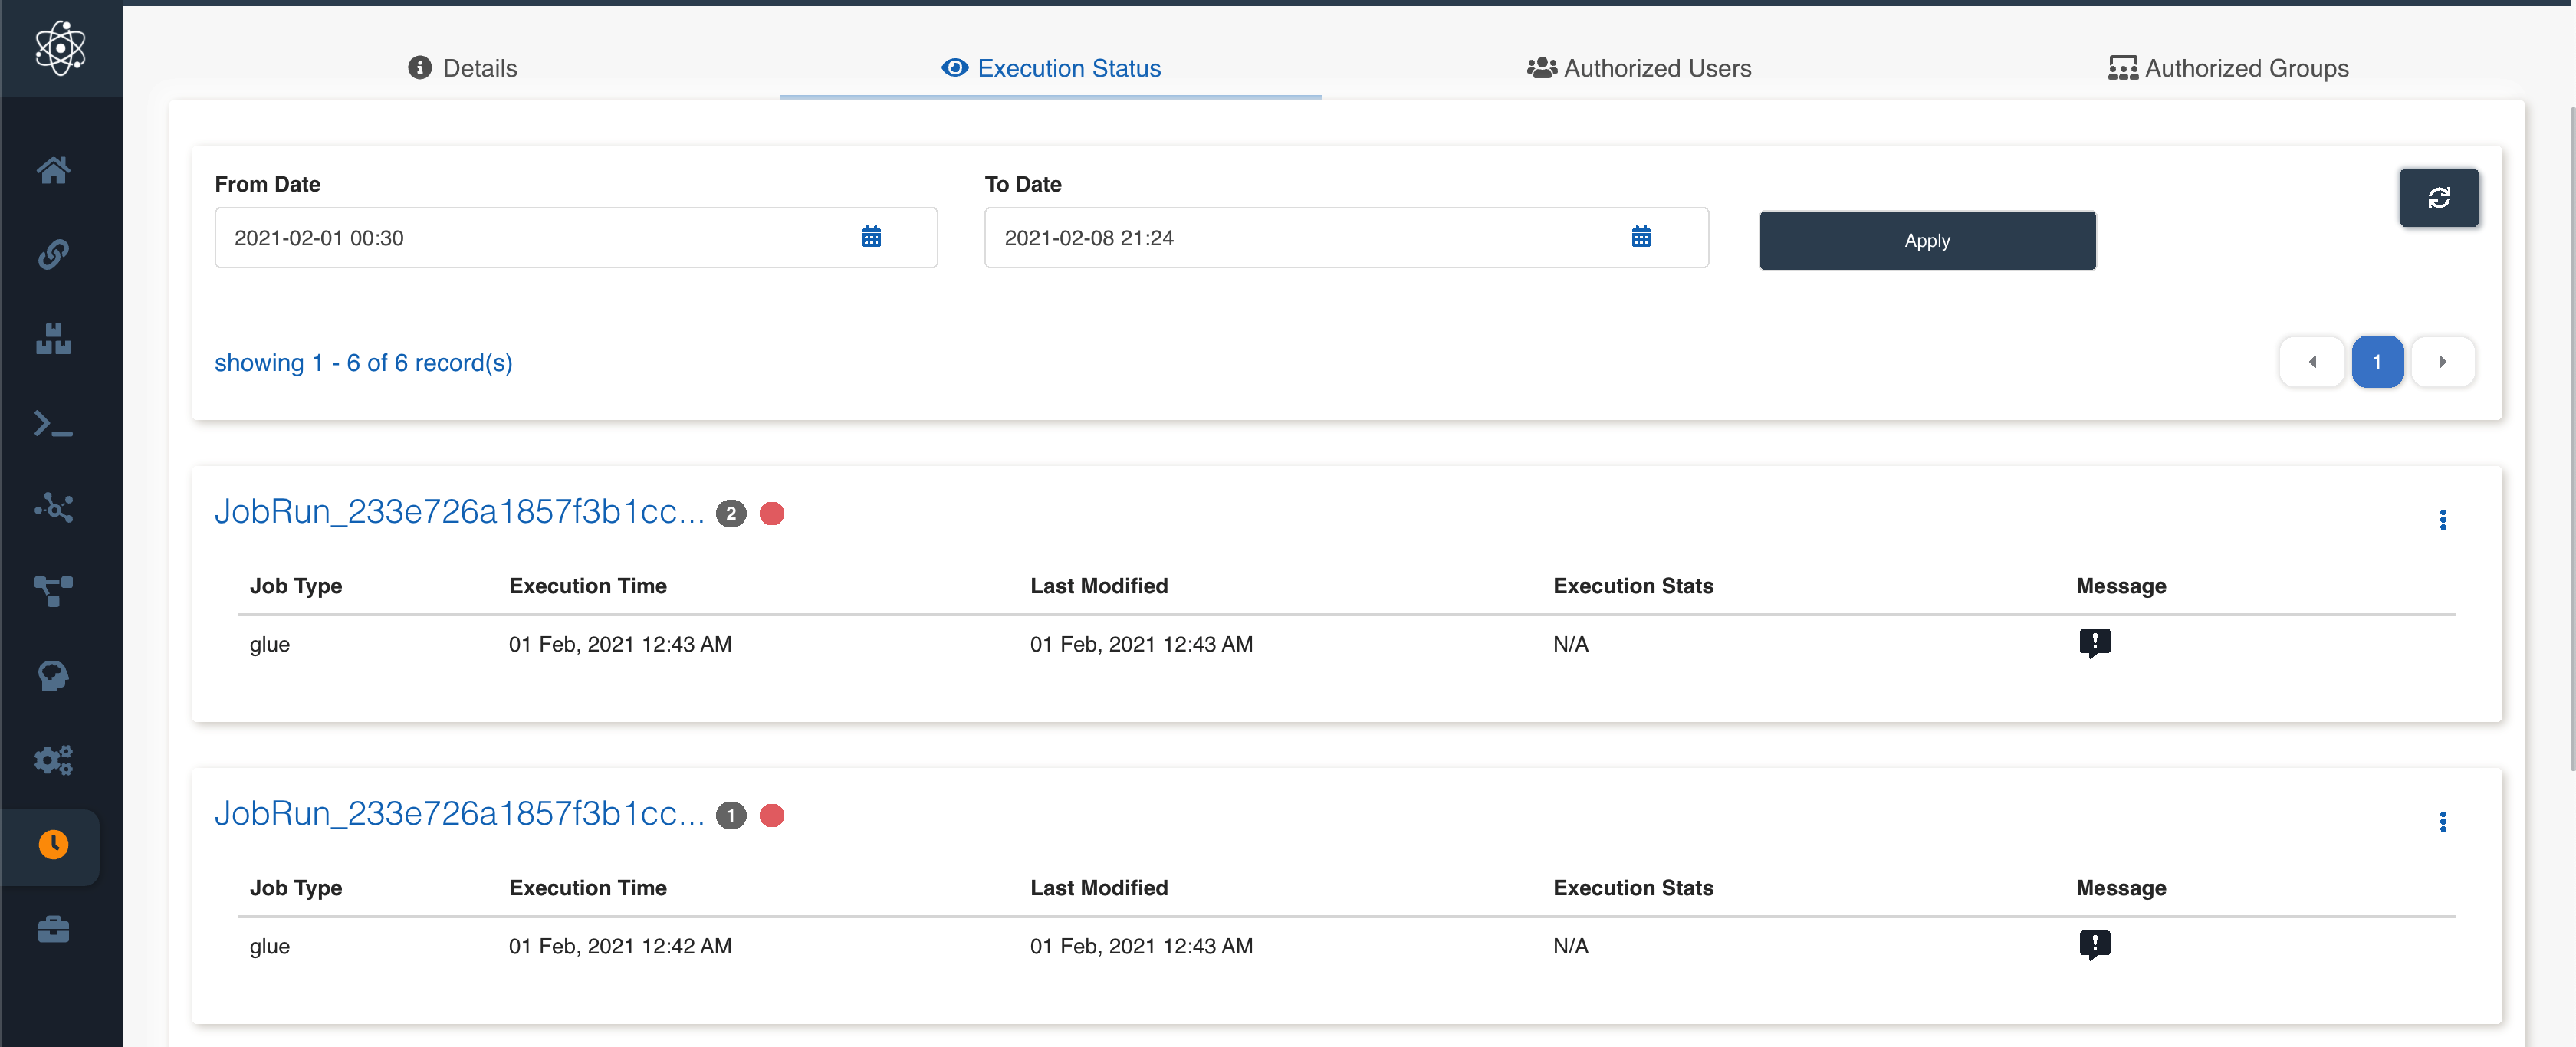
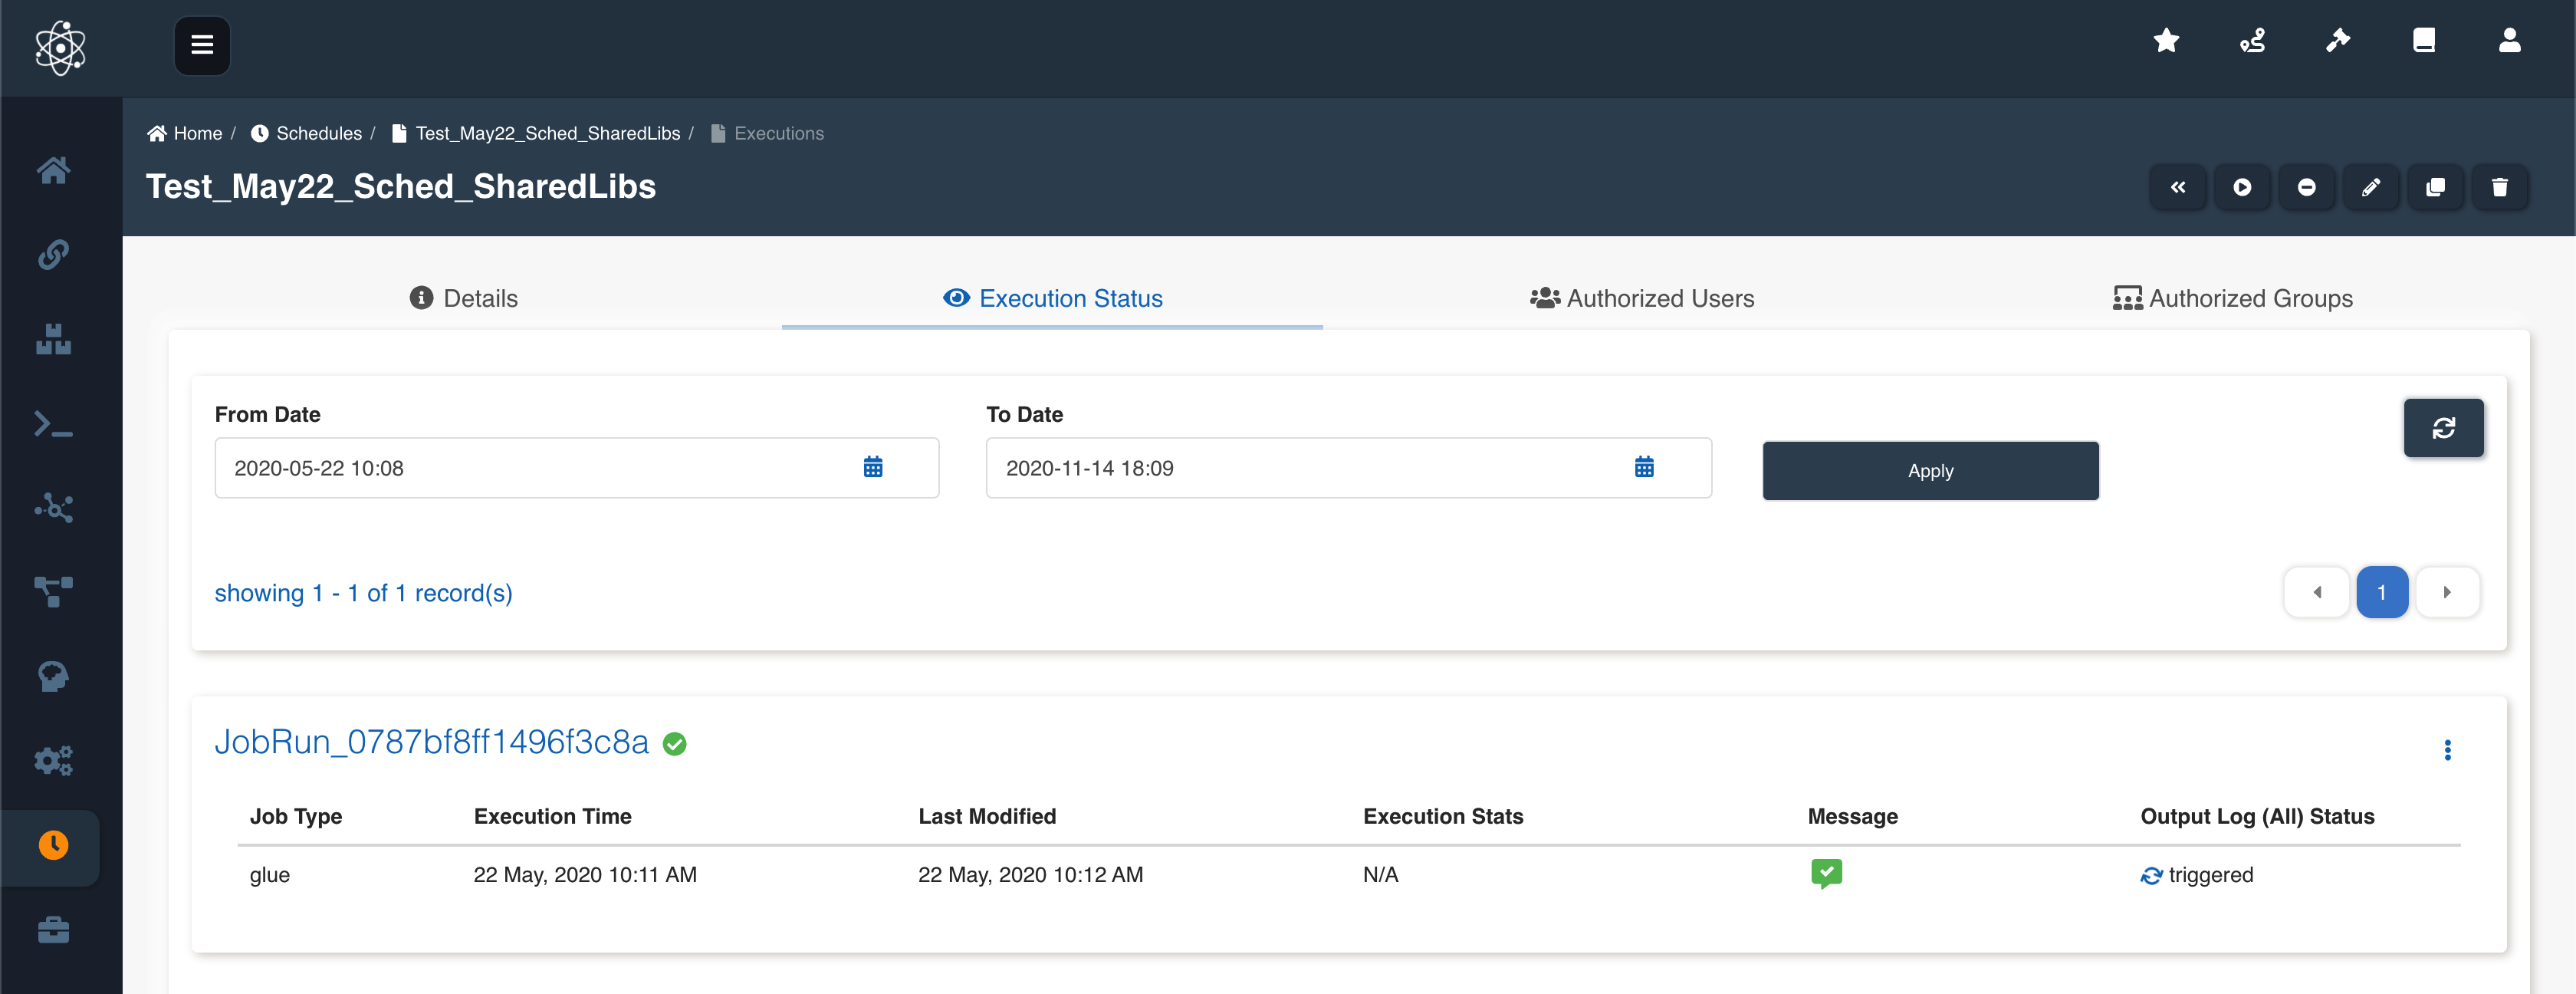
Once a schedule is executed, the executions will be displayed in the 'Executions' tab. All executions of the schedule will be displayed by default.
If user wants to filter the executions based on the time of execution then executions can be filtered by using the 'From Date', 'To Date' calendar fields in the 'Executions' tab.
Select the range of time of executions and click the 'Apply' button to retrieve the executions based on the specified time frame. User can view all the schedule executions anytime using either the 'Refresh' button or the time frame specifying 'To Date' as current time.
The following picture depicts how to filter the schedule executions and also reset to view all executions:
If the schedule is of type ETL Job and if Job has Max Retries value then the schedule will display all the executions including the retry attempts. Attempt number will be displayed beside the run id.
The following picture depicts the retry attempts of the schedule execution:
Download logs
Once a schedule status is updated, user can download the output (if any) and error logs (if any) through more (3 dots) option. The logs option is of 3 types:
- Output Logs (latest 1 MB): The latest 1 MB of the output logs for the schedule execution. This option will download the latest 1 MB of output logs immediately. If logs are not available, It'll display that 'No output logs available for the execution' message.
- Output Logs (All): All of the output logs for the schedule execution. This option will initiate log file creation. User will be notified through email once the log file is created. If there are no output logs then the log file will be empty. This option is applicable only for schedules with 'ETL job' type.
- Error Logs: Error logs for the schedule execution. If logs are not available, It'll display that 'No error logs available for the execution' message.

If the user opts to download the full logs then it initiates the log file creation and the status will be 'triggered'. Status will be changed to 'available' and user will receive the email once log file is created. User can download the full logs using the same 'Output Logs (All)' option.
Disable Schedule
To disable the schedule, click the Disable Schedule (- minus) button on the right side options of the details page.

If the schedule is disabled successfully, then it will not run until it is enabled again.
Enable Schedule
To enable the schedule, click the Enable Schedule (tick) button on the right side options of the details page.
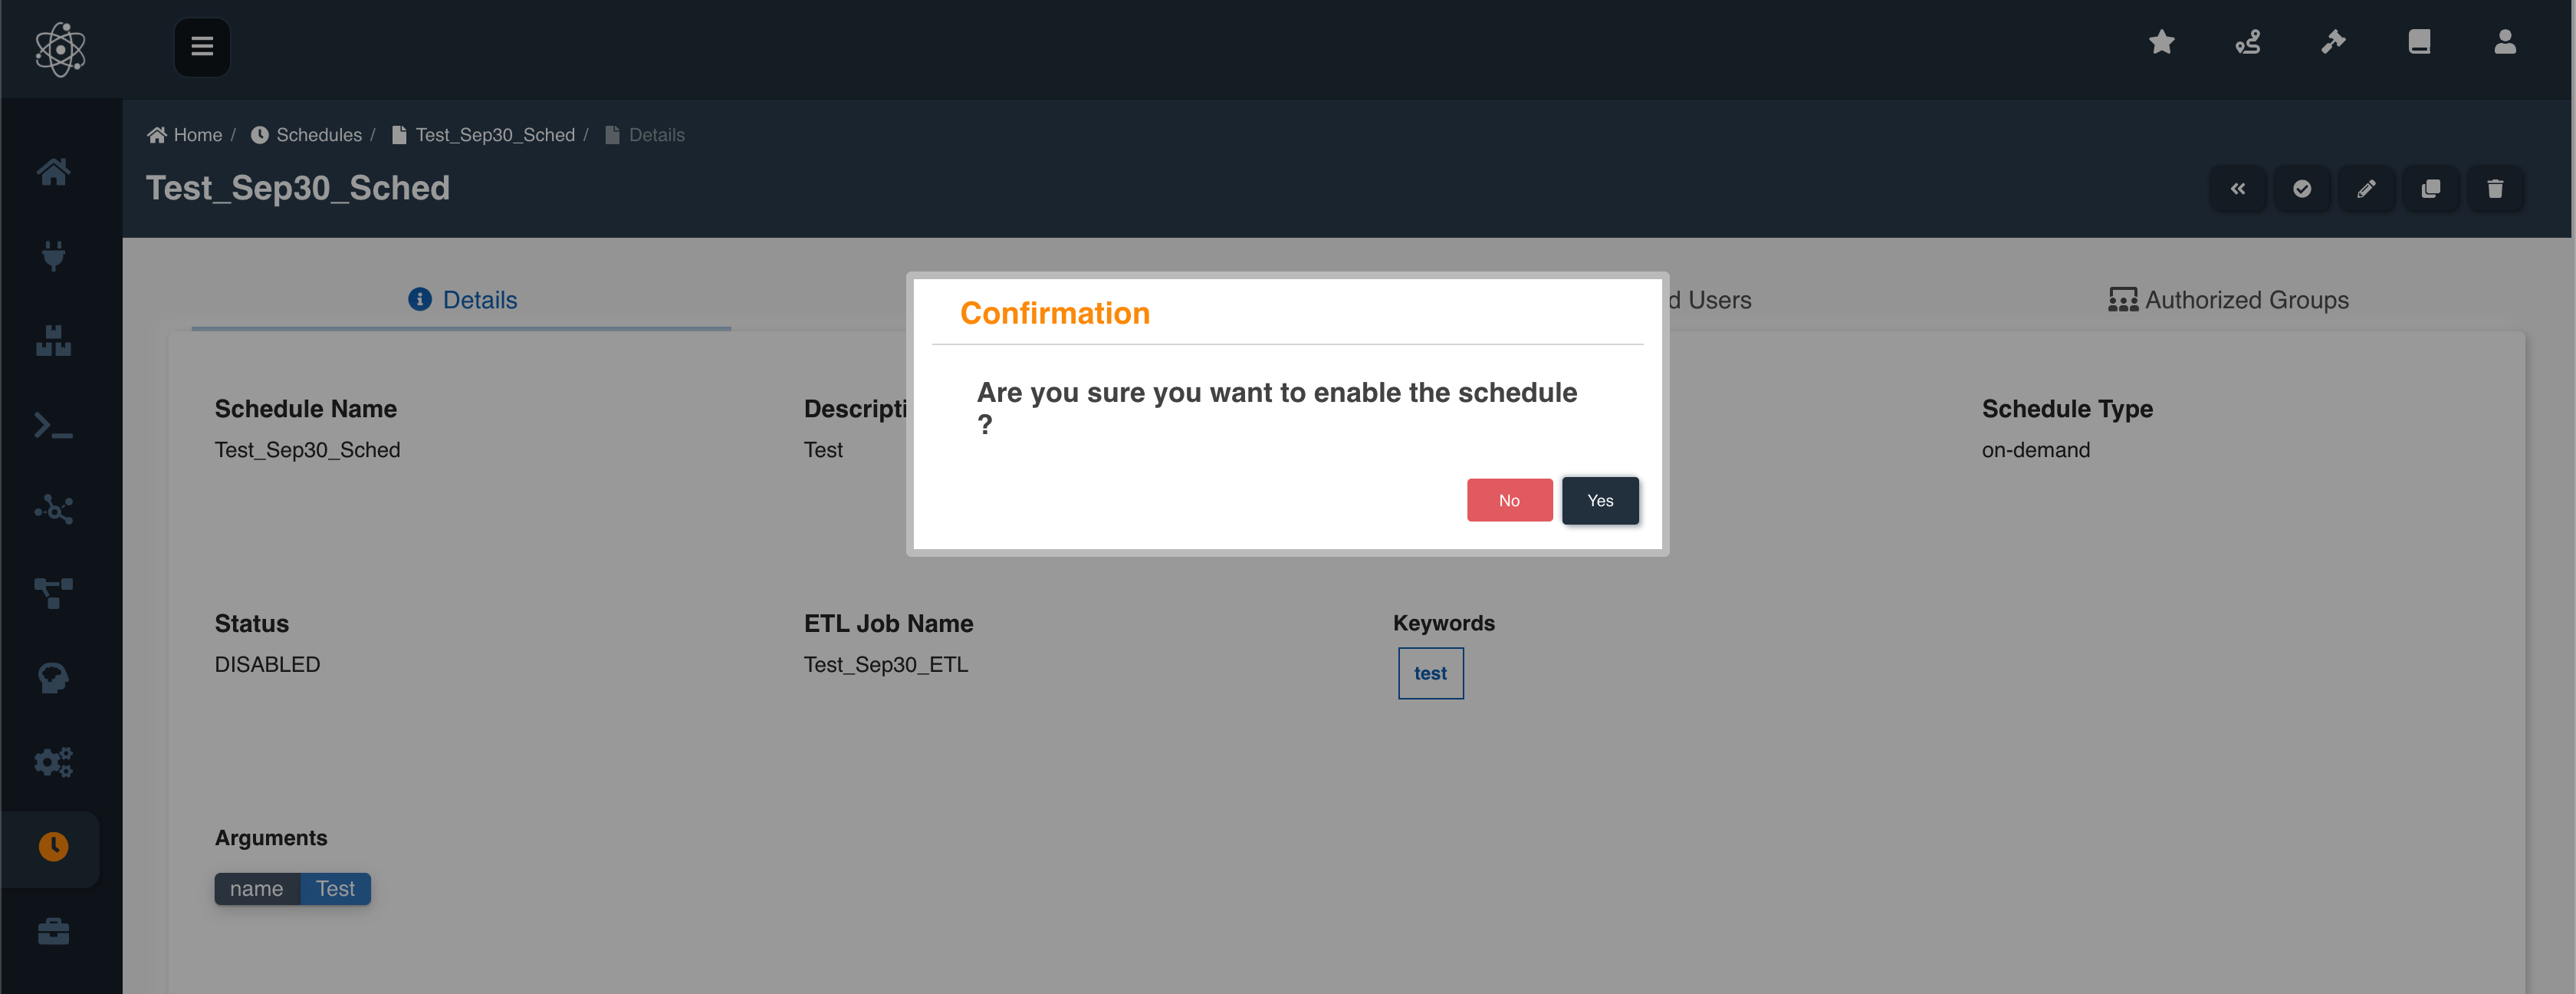
Once the schedule is enabled successfully, then it will resume the executions based on the time specified if it is of type 'time-based' or user can trigger it manually anytime if it is of type 'on-demand'.
Edit Schedule
To edit the schedule, click the Edit Schedule (pencil) button on the right side options of the details page.
Only Description, Keywords and Schedule Expression of the schedule metadata can be edited.

Once the schedule is updated successfully, then the updated details will be displayed in the schedule details page.
Clone Schedule
User can clone a schedule in Amorphic by clicking on clone button on the top right corner of the Schedule details page.
Clone Schedule page auto-populates almost all the metadata of schedule from which it is being cloned, reducing the effort to fill every field required for creating the schedule.
Once all the fields are filled, user can create a schedule by clicking the "Create" button at the bottom right corner of the form.
Following picture depicts the populated fields in clone schedule form for schedule of type ETL Job:

Delete Schedule
If the user has sufficient permissions to delete the schedule and if the schedule is not in 'running' state then the schedule can be deleted using the 'Delete' (trash) button on the right side.
Following image depicts how to delete the schedule:
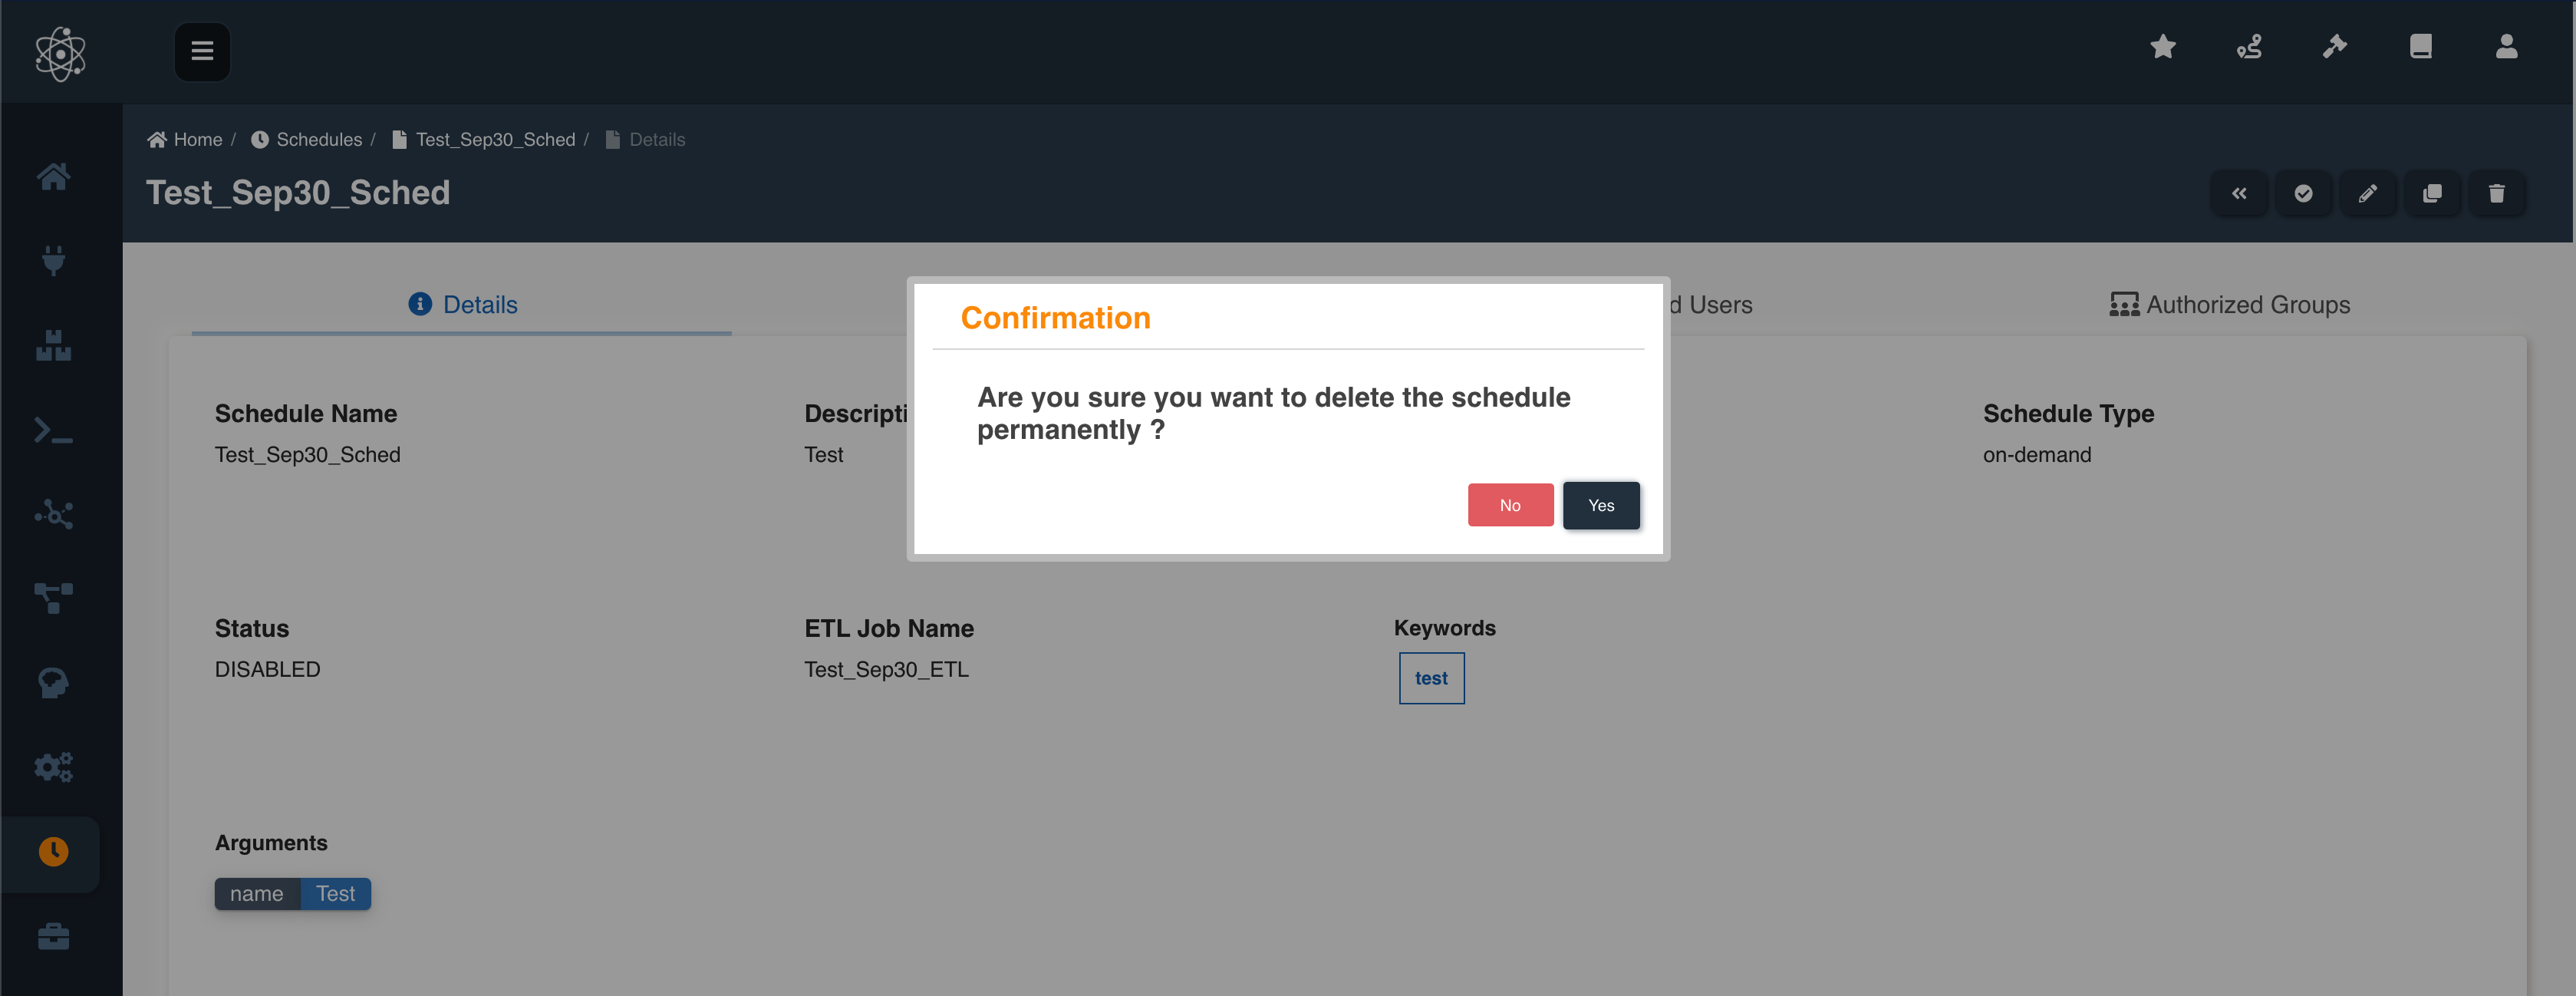
Once the schedule is deleted successfully, then the schedule will not be displayed in the schedules listing page.