
Azure AD SSO
Amazon Cognito integrates with Azure AD to enable existing AD users to sign-on to Amorphic Data Cloud. This section explains how to register and set up your application with Azure AD as an identity provider.
What is Single Sign-On?
Single sign-on (SSO) is an authentication method that enables users to securely authenticate with multiple applications and websites by using just one set of credentials. SSO works based upon a trust relationship set up between an application, known as the service provider, like Amorphic Data Cloud and an identity provider, like Azure AD. This trust relationship is often based upon a certificate that is exchanged between the identity provider and the service provider. This certificate can be used to sign identity information that is being sent from the identity provider to the service provider so that the service provider knows it is coming from a trusted source.
Pre-requisites for Azure AD Identity Provider
Before we proceed with the Azure AD IDP setup, we need the following pre-requisites:
- Azure account - https://portal.azure.com/
- Amazon AWS account
- A Cognito user pool with an application client and a user pool domain
Steps to register Amorphic app with Azure AD
- Create a Non-Gallery Enterprise Application under Azure Active Directory Service
- Get App Federation Metadata Url & Login URL
Create a Non-Gallery Enterprise Application under Azure Active Directory Service
Login to Azure portal using this link.
Search for Azure
Active Directory Serviceas shown in below image and open it.

- Select
Enterprise applicationson the left menu panel of portal & SelectNew Applicationas shown in below image:

- Click on
Create your own applicationas shown in below image:

- Enter a custom name for your application & finally click on
Create. Make sure to selectIntegrate any other application you don't find in the gallery (Non-gallery)option as shown below:

Get App Federation Metadata Url & Login URL
- On the newly created Enterprise application page, select
Single sign-onoption on the left menu panel as shown below:

- Now, choose
Set up Single Sign-On with SAML& follow the steps shown in the below screenshots:

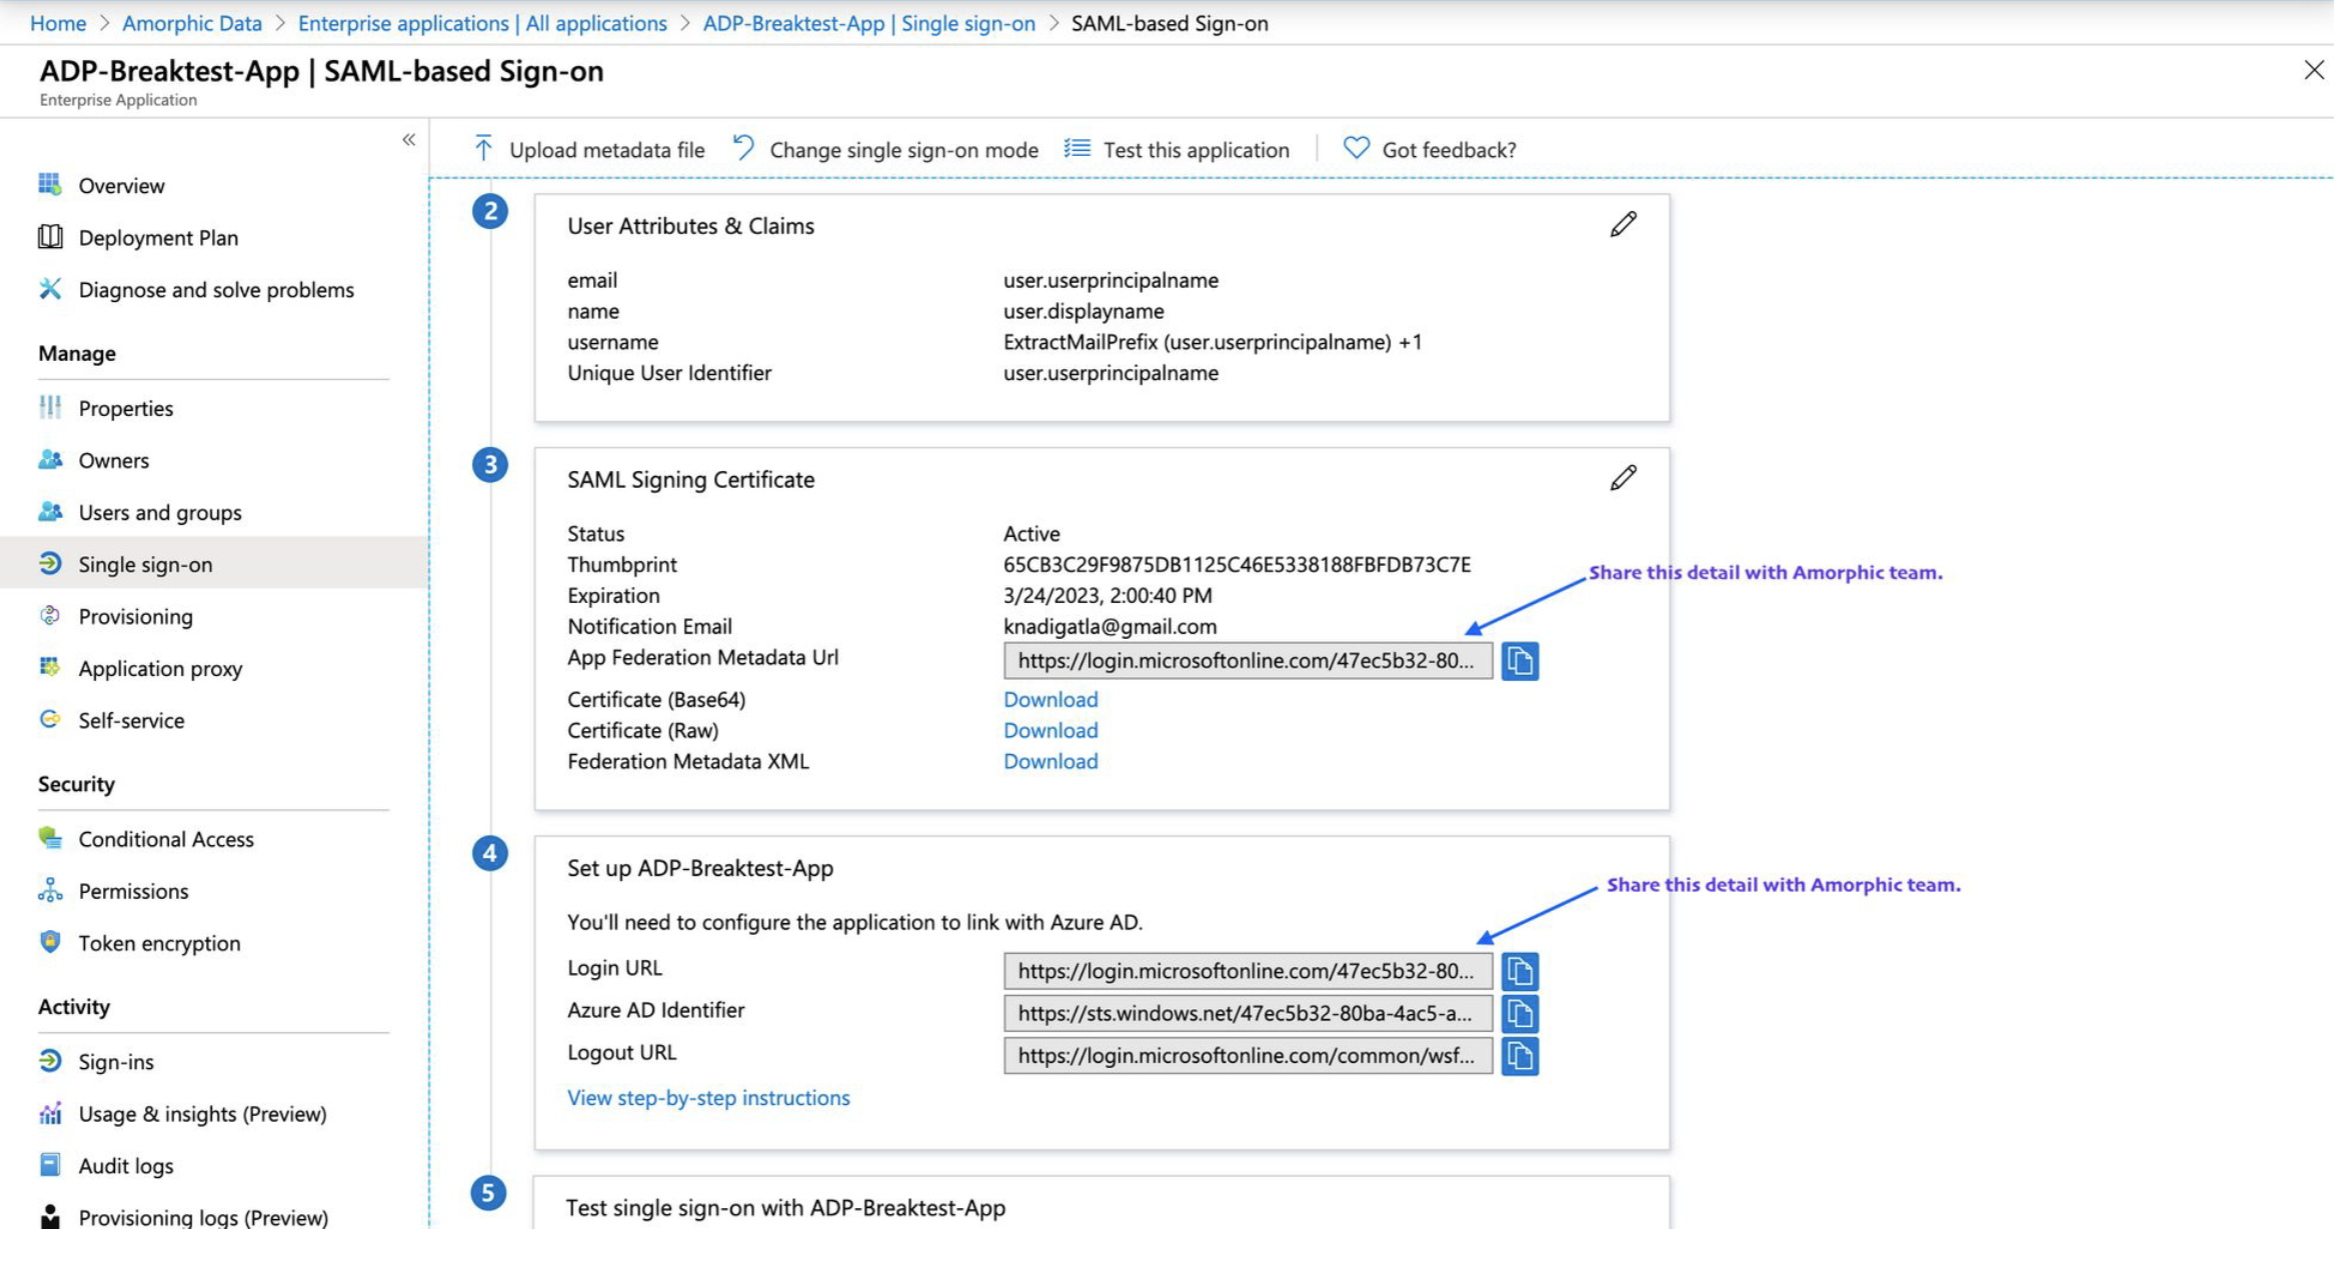
- Finally share
App Federation Metadata UrlandLogin URL(as shown in the above screenshot) with Amorphic team.