
HealthImaging
Amazon HealthImaging is a new HIPAA-eligible capability that makes it easy to store, access, and analyze medical images at petabyte scale. In Amorphic, this functionality allows medical images within the Amorphic dataset to be processed through AWS HealthImaging service.
To use HealthImaging, HCLS should be enabled in the environment.
How to create a HealthImaging store?
- Click on
+ New Imaging Datastore. - Fill in the required fields (Details listed below).
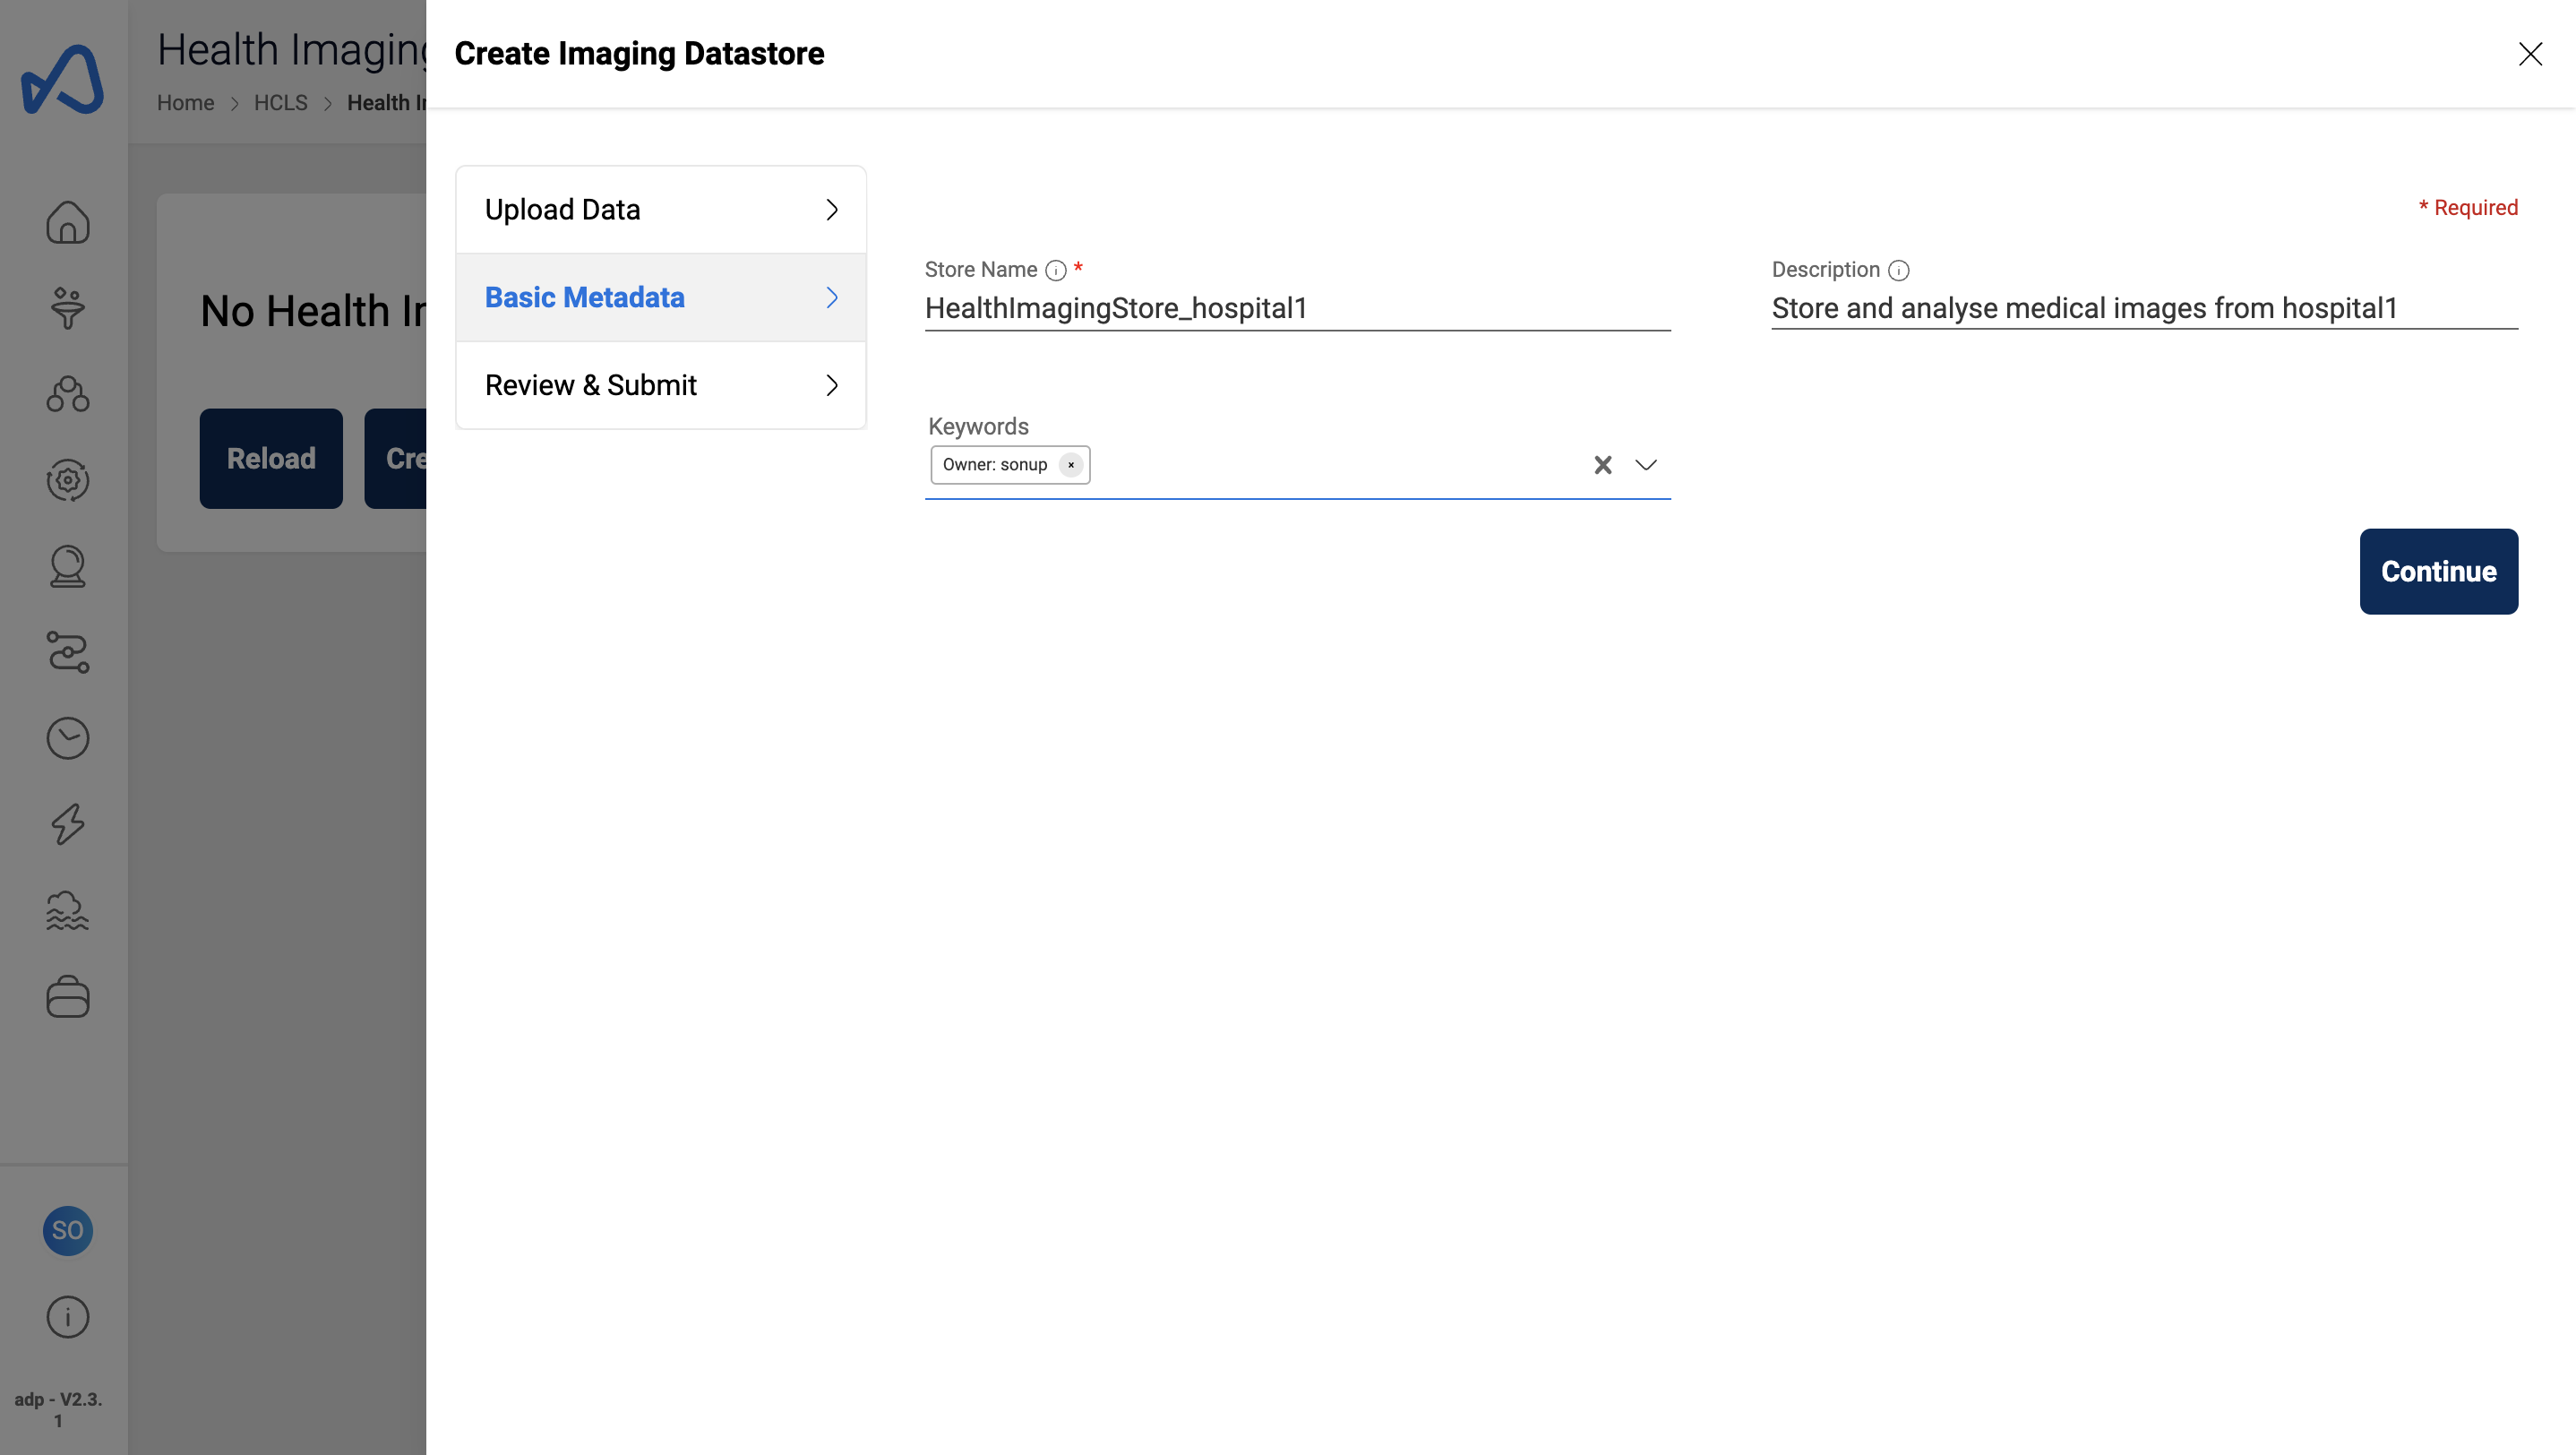
Following fields are needed to create a new Imaging Datastore:
- StoreName: The name for the HealthImaging data store.
- Description: A brief description about the HealthImaging data store.
- Keywords: Optional keywords for the HealthImaging data store. This can be used to flag related stores.
- IsAutoTerminateEnabled: This enables Imaging Store termination based on the time value provided by the user.
- AutoTerminationTime: Time at which the system auto terminates the Imaging store.
After entering the details, click the Create button to initiate the HealthImaging data store creation.
HealthImaging Store details
Once the store creation is triggered, the store details will appear in the page in this format.

How to import data into HealthImaging Datastore?
- Under the Import Jobs tab, click on the
+ New Jobbutton. - In the following form, specify a dataset which contains the DICOM data.
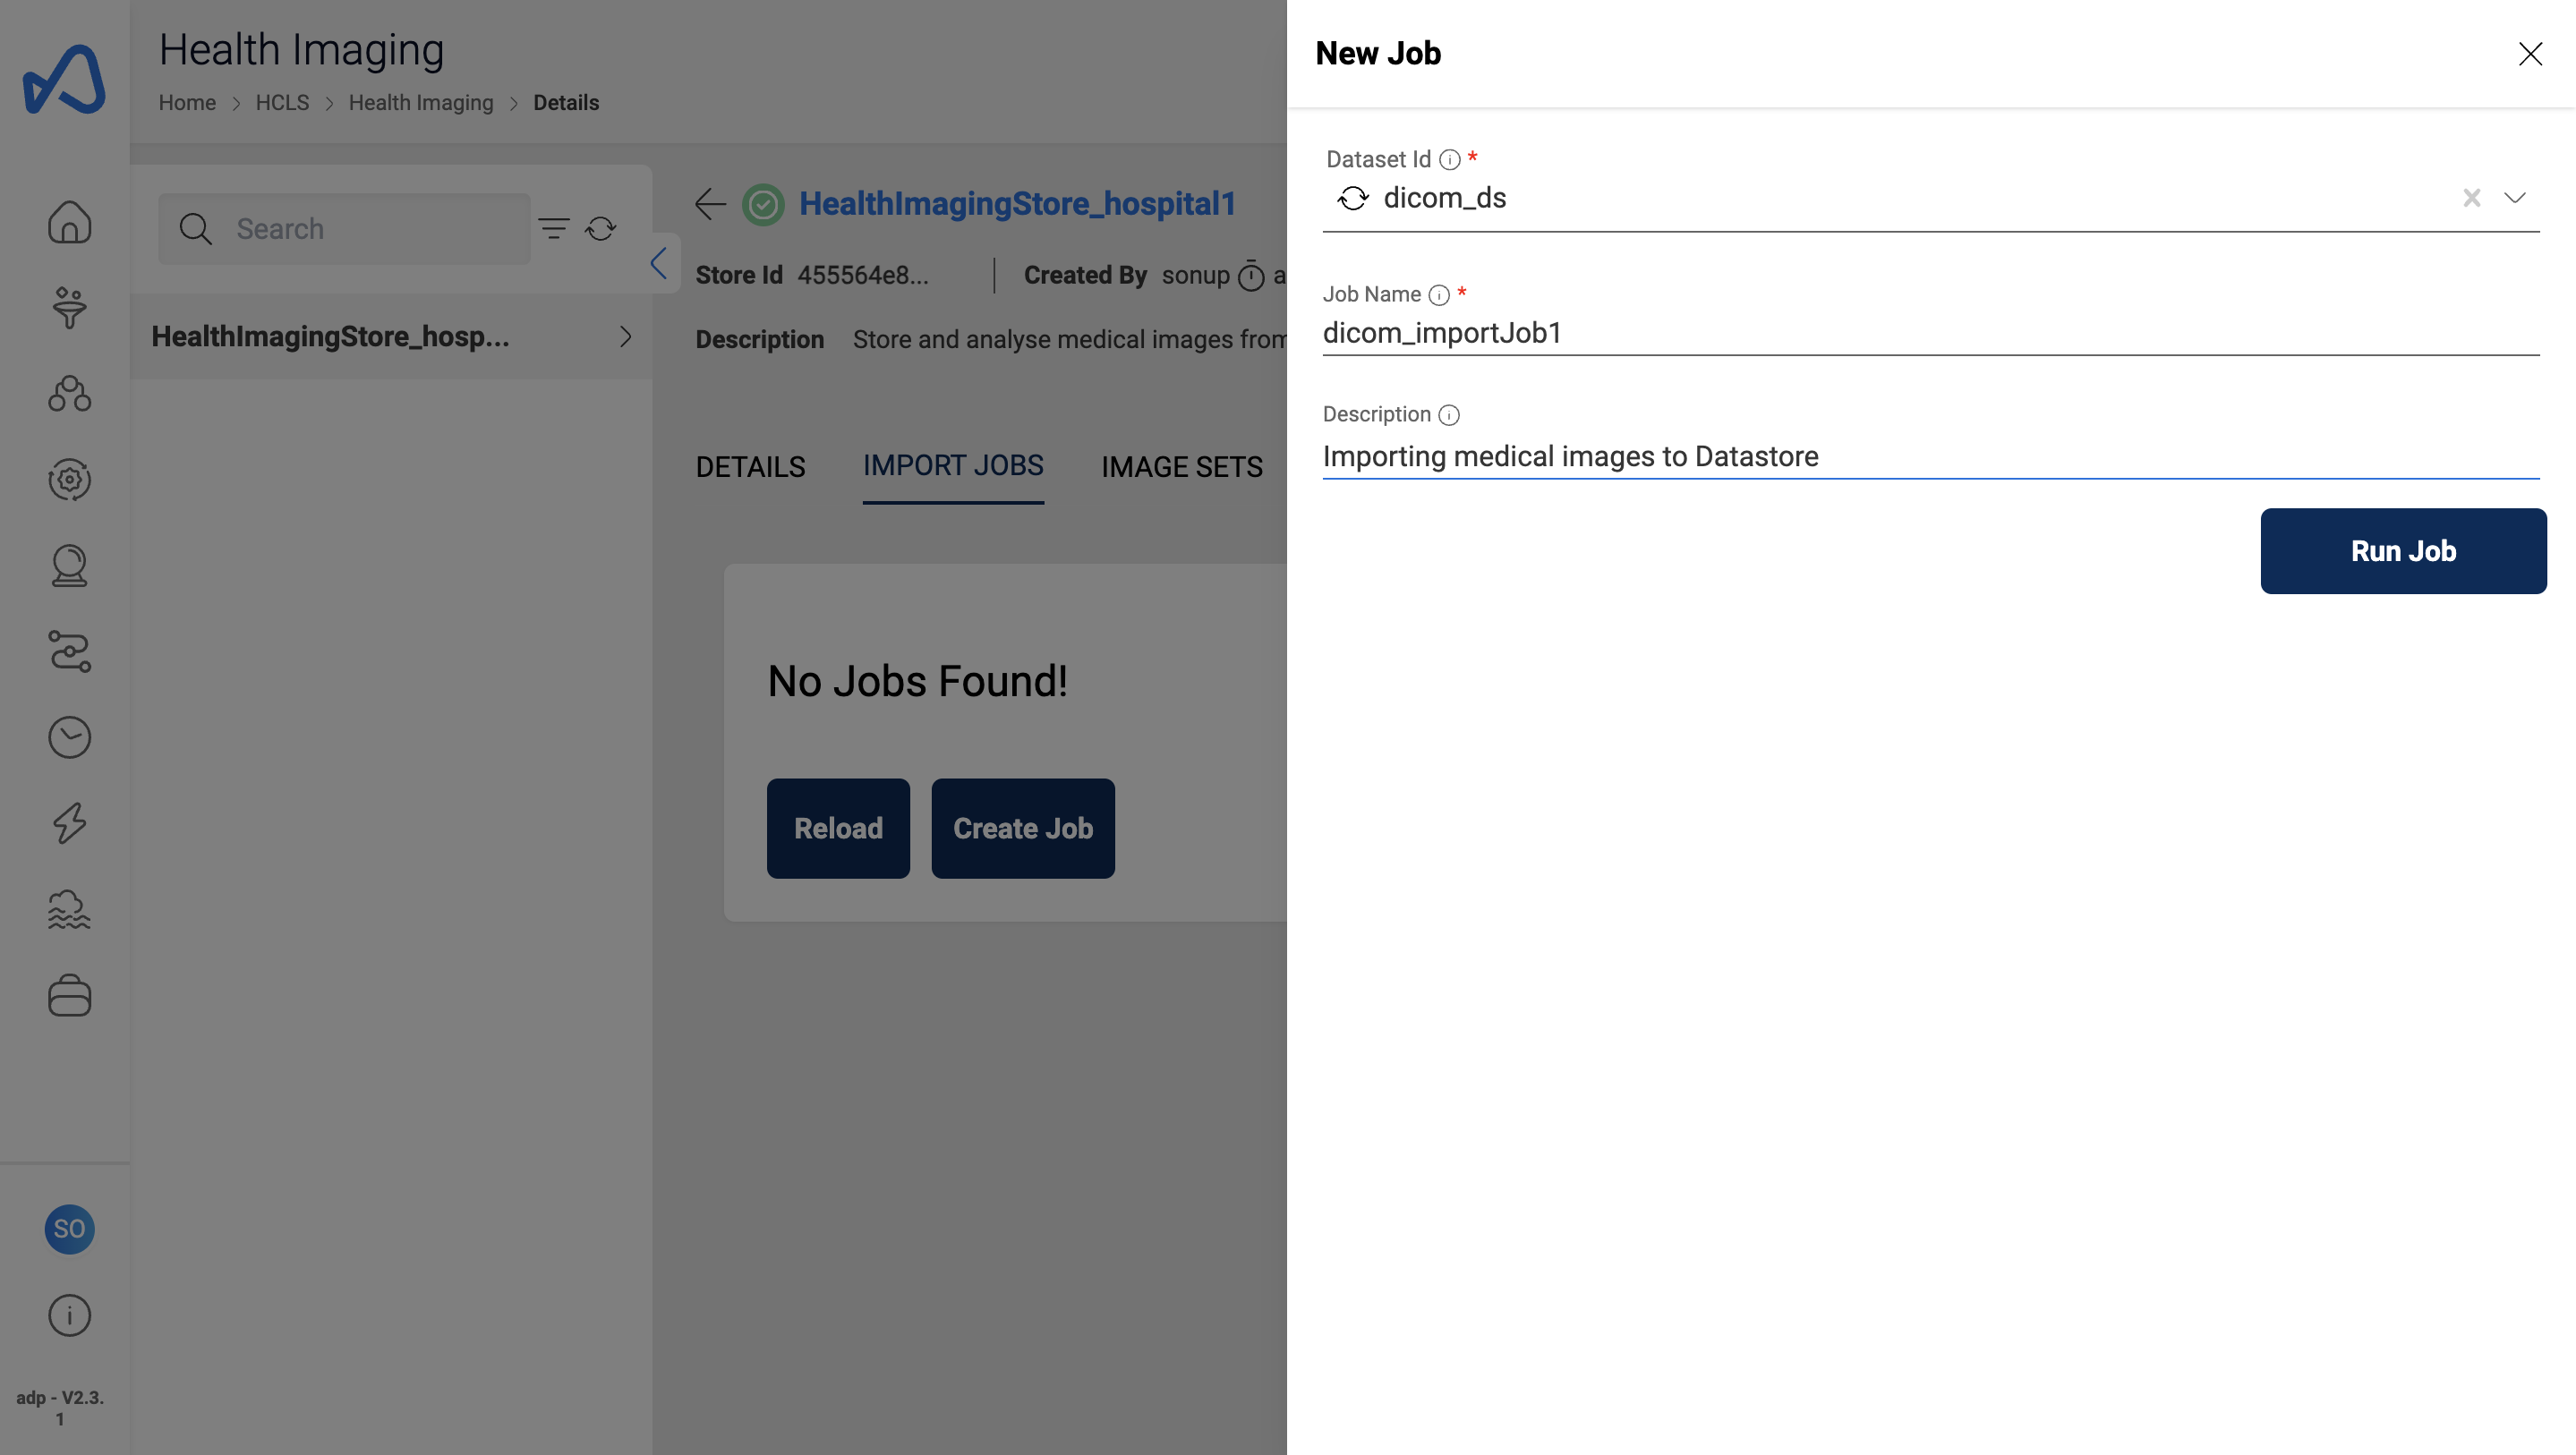
Only files of .dcm format will be imported into HealthImaging Datastore.
Steps for creating an import job:
- User must first create a dataset in Amorphic with S3 target type and set the file type as 'others'.
- Upload the required DICOM file (.dcm format) into that dataset.
- Create a job by selecting this dataset name from the drop-down list and initiate the job.
- Scheduling functionality also available, allowing execution of import jobs at desired intervals.
Upon successful completion, the user can view the imageset created from those files in the imageset tab. This is an asynchronous process and will take a while to complete.
If an import job has either succeeded or failed, user can download the respective success and failure files, along with the manifest file, directly from the Job details tab, as shown below.
What is Imagesets?
An imageset is automatically generated upon successful completion of an import job. Users can view the metadata and preview of the imageset, and they also have the ability to edit the imageset metadata. For each imageset updation, a new version of the imageset will be created.
However, when a user updates any imageset metadata, that imageset will go into a LOCKED state, preventing the user from viewing it. After the updation, the user can see the imageset in the list.
When utilizing the AWS HealthImaging service, there are specific constraints for updating the imageset. Users must refer to the documentation to identify and update the correct fields. If a user attempts to update any non-editable attributes, the imageset update status will be marked as failed.
An example of imageset updating is shown below:
Imagesets are dependent on datastores. To delete datastore, all associated imagesets must be deleted.
How to Search Imagesets
Users can search through imageset metadata with different DICOM attributes. It is possible to filter the imagesets with combinations of multiple DICOM attributes. This helps the user to list and view only the imagesets they are interested in with.
An example of how to search imagesets is shown below::
The currently supported DICOM attributes for filtering in each level of imageset are:
PatientName, PatientID,
IssuerOfPatientID, TypeOfPatientID, PatientBirthDate, PatientSex, EthnicGroup,
ResponsiblePerson, ResponsiblePersonRole, ResponsibleOrganization, PatientIdentityRemoved,
ClinicalTrialSponsorName, ClinicalTrialProtocolID, ClinicalTrialProtocolName, ClinicalTrialSiteID, ClinicalTrialSiteName, ClinicalTrialSubjectID, ClinicalTrialSubjectReadingID
StudyInstanceUID, StudyDate, StudyTime, StudyID,
ReferringPhysicianName, AccessionNumber,
PatientAge, SmokingStatus, PatientState, Occupation, AdmissionID
Modality, BodyPartExamined, PatientPosition,
SeriesInstanceUID, SeriesNumber, Laterality, ProtocolName,
Manufacturer, InstitutionName, InstitutionalDepartmentName
How to view the medical images in HealthImaging store using image viewer?
Users can view the medical images that are upload to HealthImaging using image preview option.
All imagesets in a HealthImaging store will have a key called StudyInstanceUID. Imagessets that are having the same StudyInstanceUID will be grouped together to view the images in the image viewer.
Following are the step to view HealthImaging images in the image viewer:
- Select the HealthImaging store from which you want to view the images.
- Go to image preview tab and click on the
Connect to Imageviewerbutton. - You can optionally click on
Recheck statusbutton to check the connection status of HealthImaging store with Image viewer.
Below image shows how view medical images in HealthImaging store with image viewer.
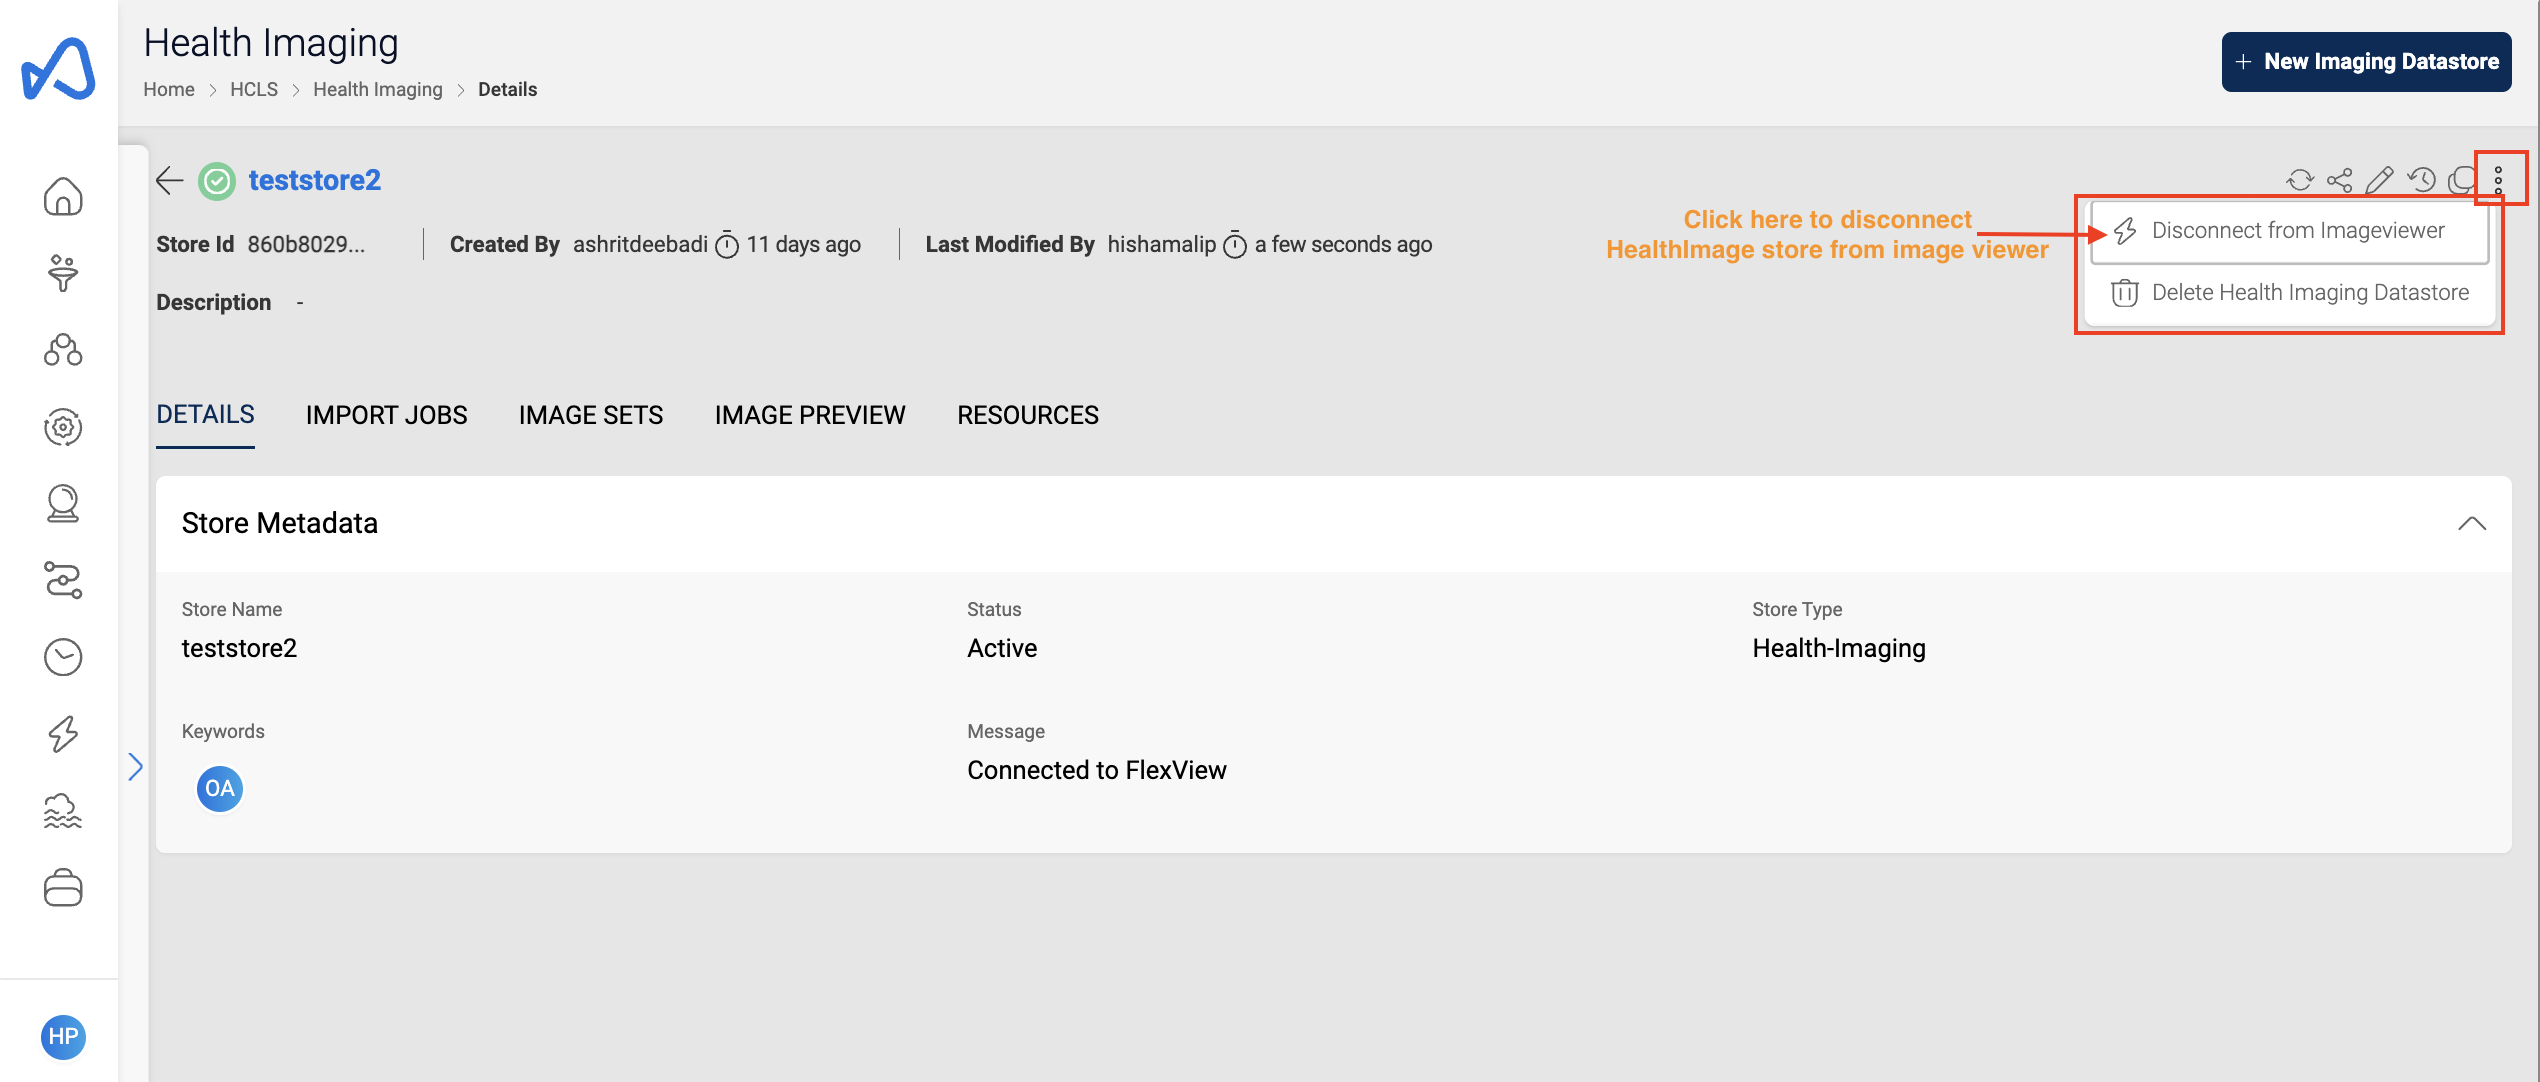
Users have the option to disconnect HealthImaging store from image viewer if image viewing is no longer required.
To do that, click on Disconnect from Imageviewer from the three dot button on the top right corner of HealthImaging store.
Customer first need to set up image viewer inorder to use this feature. Contact Amorphic support setting up image viewer in Amorphic.