
Windows AD FS SSO
Amazon Cognito integrates with Windows Active Directory Federation Service to enable existing AD users to sign-on to Amorphic Data Cloud. This section explains how to register and set up your application with Windows AD FS as an identity provider.
What is Single Sign-On?
Single sign-on (SSO) is an authentication method that enables users to securely authenticate with multiple applications and websites by using just one set of credentials. SSO works based upon a trust relationship set up between an application, known as the service provider, like Amorphic Data Cloud and an identity provider, like Windows ADFS. This trust relationship is often based upon a certificate that is exchanged between the identity provider and the service provider. This certificate can be used to sign identity information that is being sent from the identity provider to the service provider so that the service provider knows it is coming from a trusted source.
Amorphic username convention
Due to the variety of systems Amorphic integrates with, Amorphic requires strict rules to be enforced for its usernames. Failure to follow the required rules may lead to Amorphic users not being able to login as intended. These rules required for Amorphic are conventional rules required for AD integration from other systems, and follow best practices.
The requirement for the usernames are as follows:
- The usernames must be unique for different users
- Usernames are integrated with access to datasets and resources, and as such cannot change
- Should not start with a number
- Should be only alphanumeric, no special characters are permitted
- Username can contain both lowercase and uppercase alphabets
- Should have a minimum of 3 characters and should not exceed 20 characters
It should be noted that any and all transformations used to convert the username in the SSO provider to the Amorphic username should produce a username compliant with the Amorphic username convention specified above. For example, if you have a username like John_Doe@email.com and the transformation results in JohnDoe or JohnDoe123, this is compliant with the rules. However, if the transformation results in John_Doe or 123John, it would violate the rules (since special characters or starting with a number are not allowed). If you have such IDs, it is recommended to create a new field with an Amorphic compliant username format and use that as the Amorphic username.
Pre-requisites for Windows ADFS Identity Provider
Before we proceed with the Windows AD FS IDP setup, we need the following pre-requisites:
- Active Directory Federation Service configured, available under a given domain to public and a valid SSL certificate.
- Amorphic application deployed with Identity Provider option enabled
Steps to register Amorphic app with AD FS
Connect to the Windows instance using a Windows RDP client.
Add a claims-aware relying party trust in AD FS
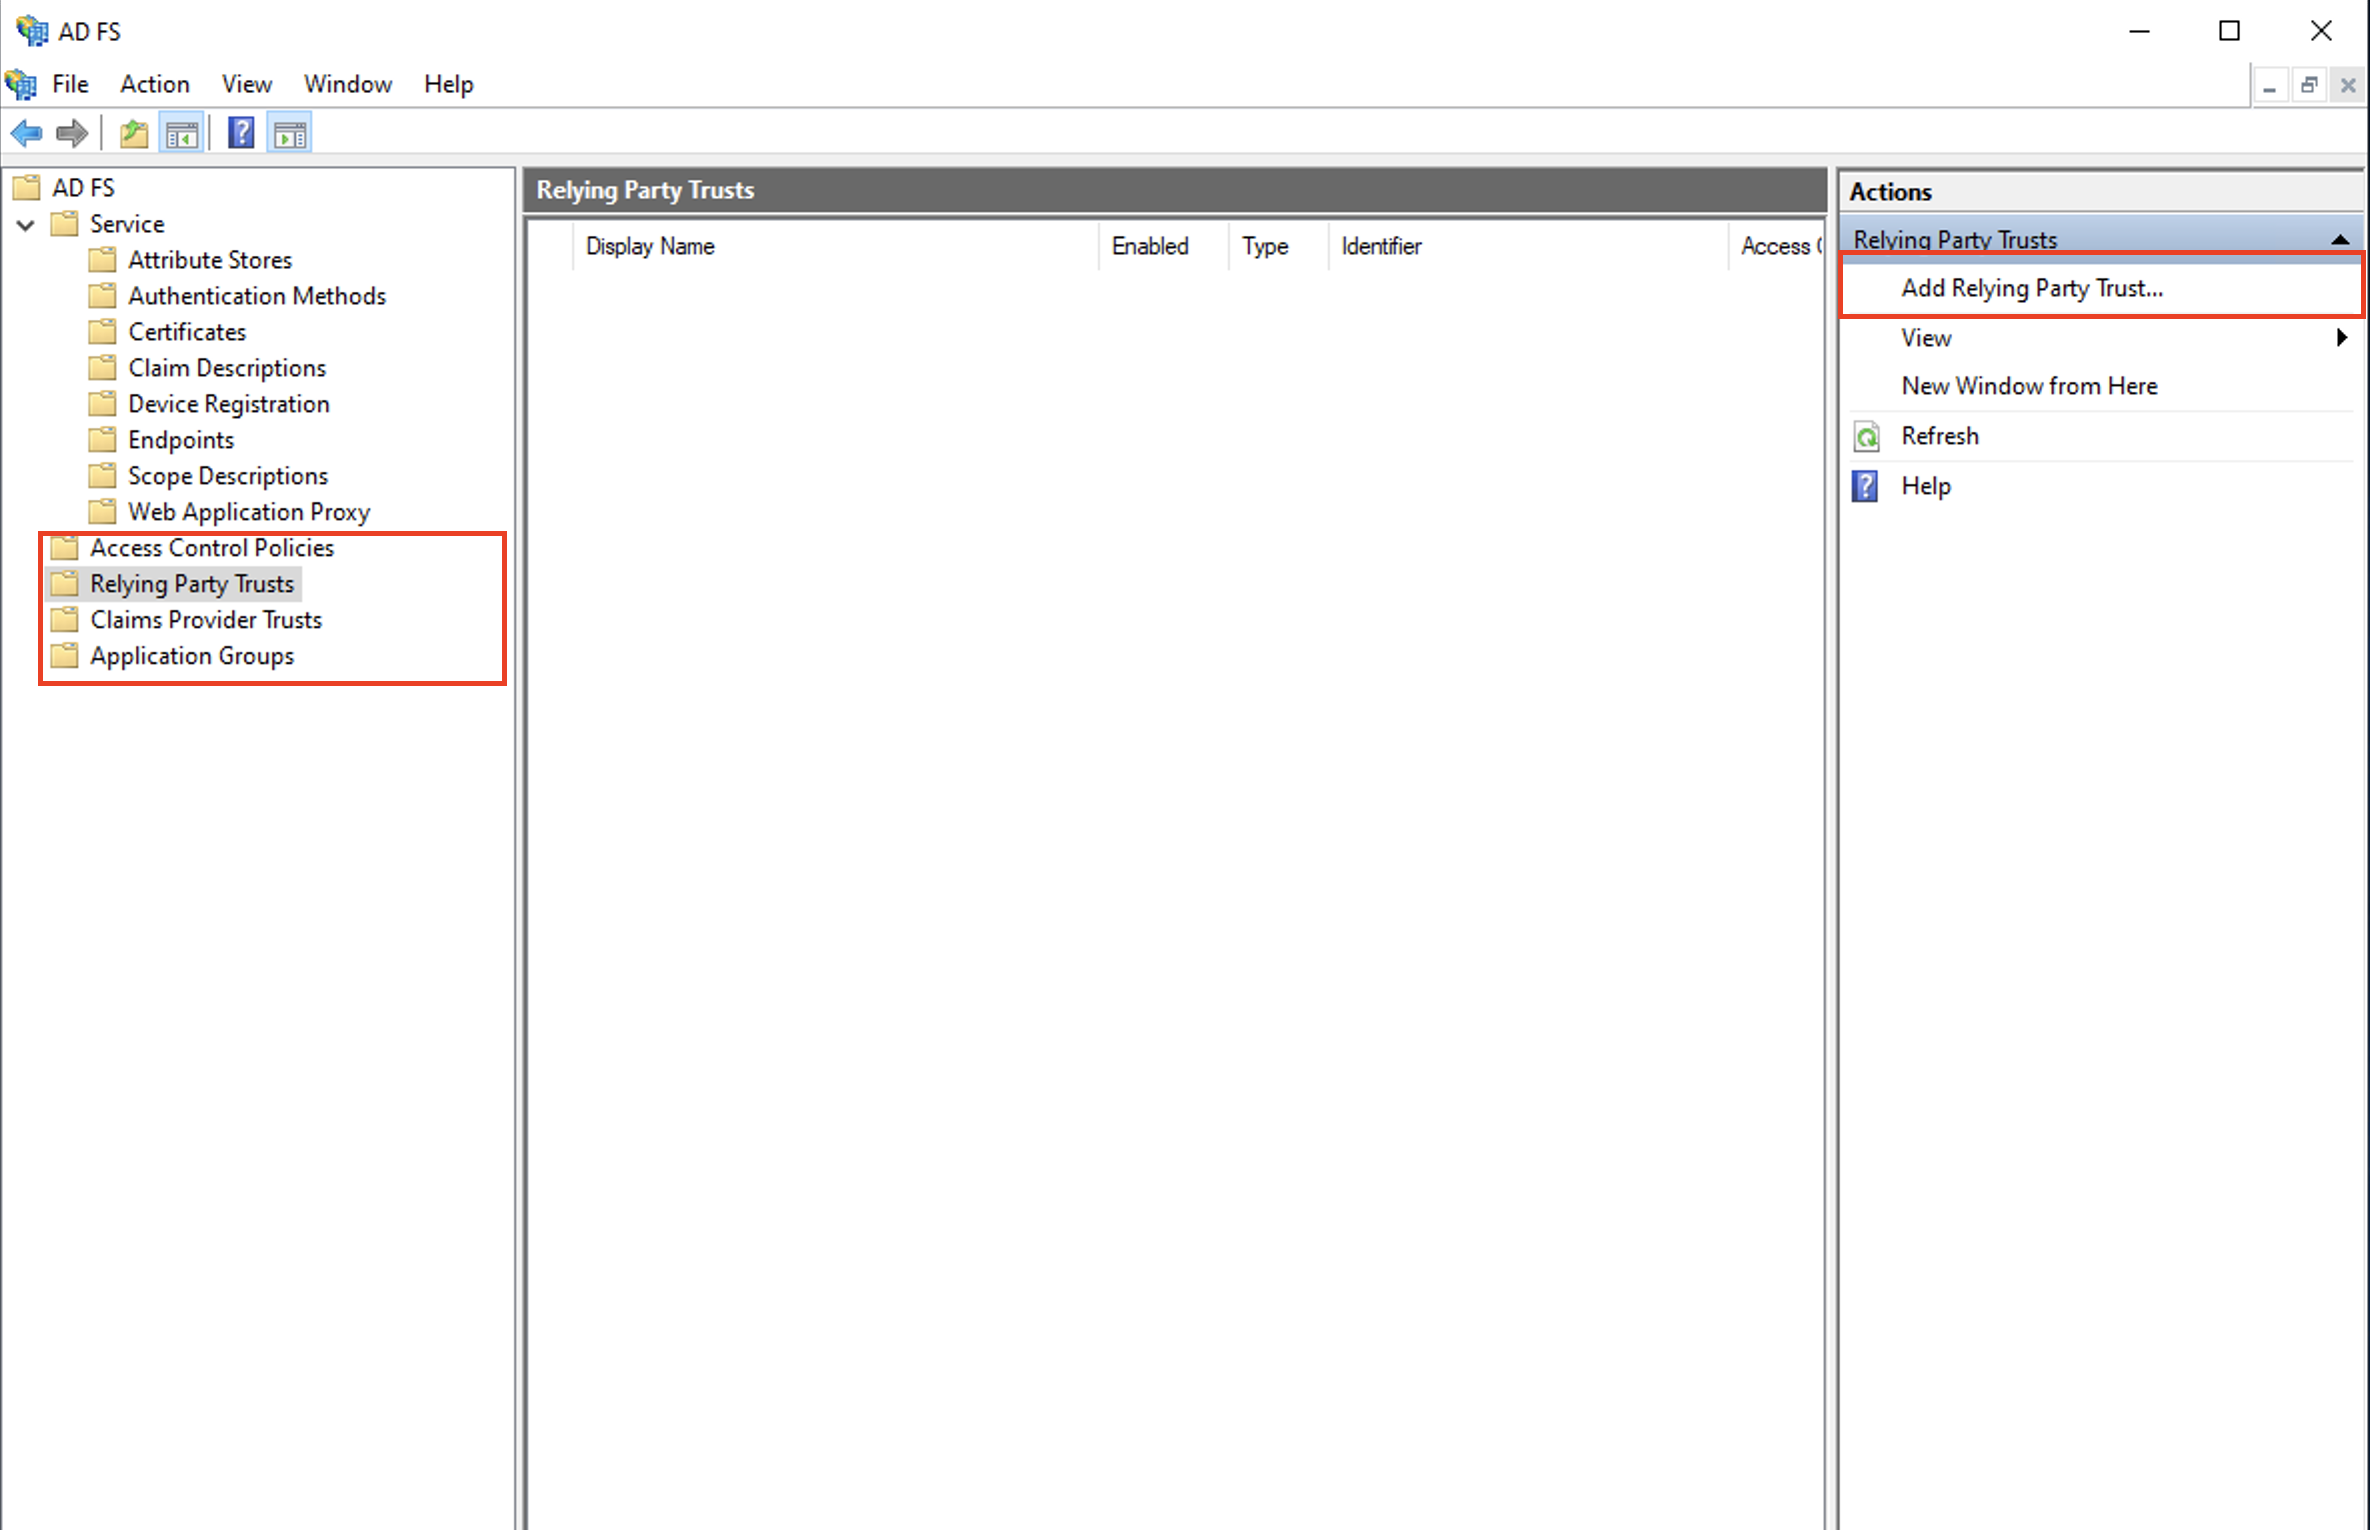
Open ADFS Management Application and click on Relying Party Trust and click on Add Relying Party Trust option in the Actions pane
Select Claims Aware and click start
On the next page, select Enter data about the relying party manually option and click Next and specify a Display name on the next page.
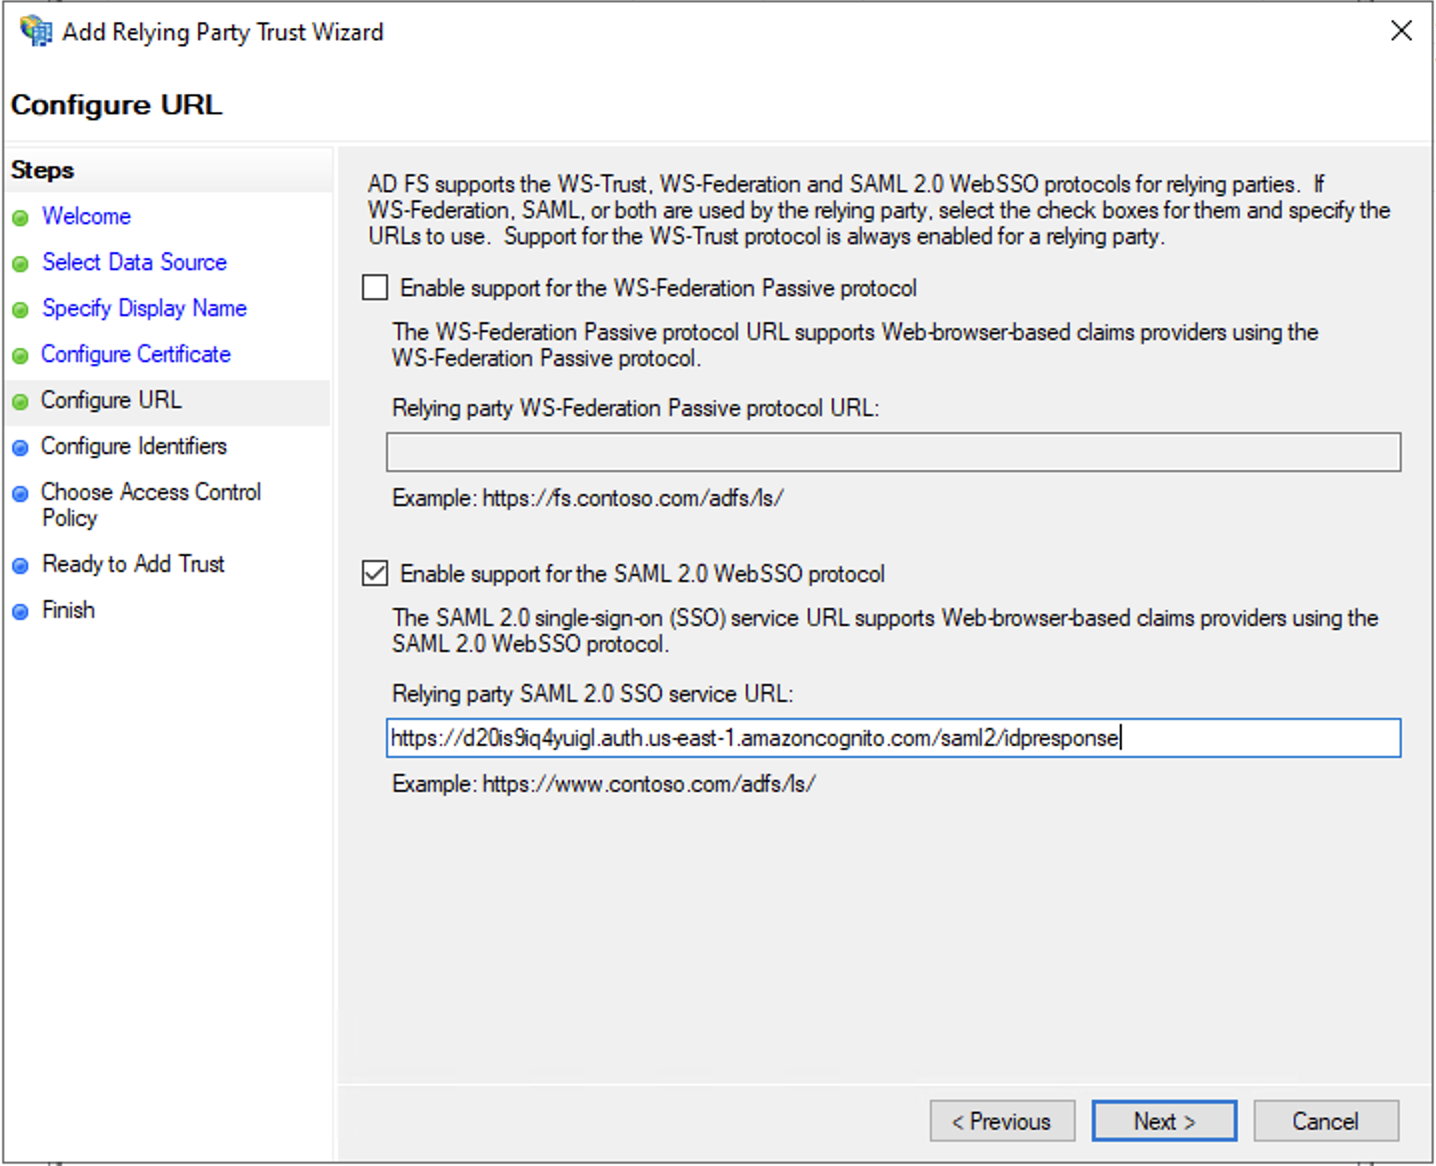
On Configure URL page, select Enable support for the
SAML 2.0 WebSSO protocoloption and forRelying party SAML 2.0 SO service URLenter, formatted as follows:https://congnitodomain.auth.region.amazoncognito.com/saml2/idpresponse. Replace congnitodomain with your Amazon Cognito user pool's domain prefix and replace region with the user pool's AWS region
For
Relying party trust identifier, enter this URN:urn:amazon:cognito:sp:your_user_pool_id. Cloudwick support team can provide the cognito domain and userpoolid. Click on Add button and then Next button.Choose
Permit everyonepolicy and click Next and keep the rest default.Now you can see that a Relying Party trust has been created.
Edit application's claims issuance policy in AD FS
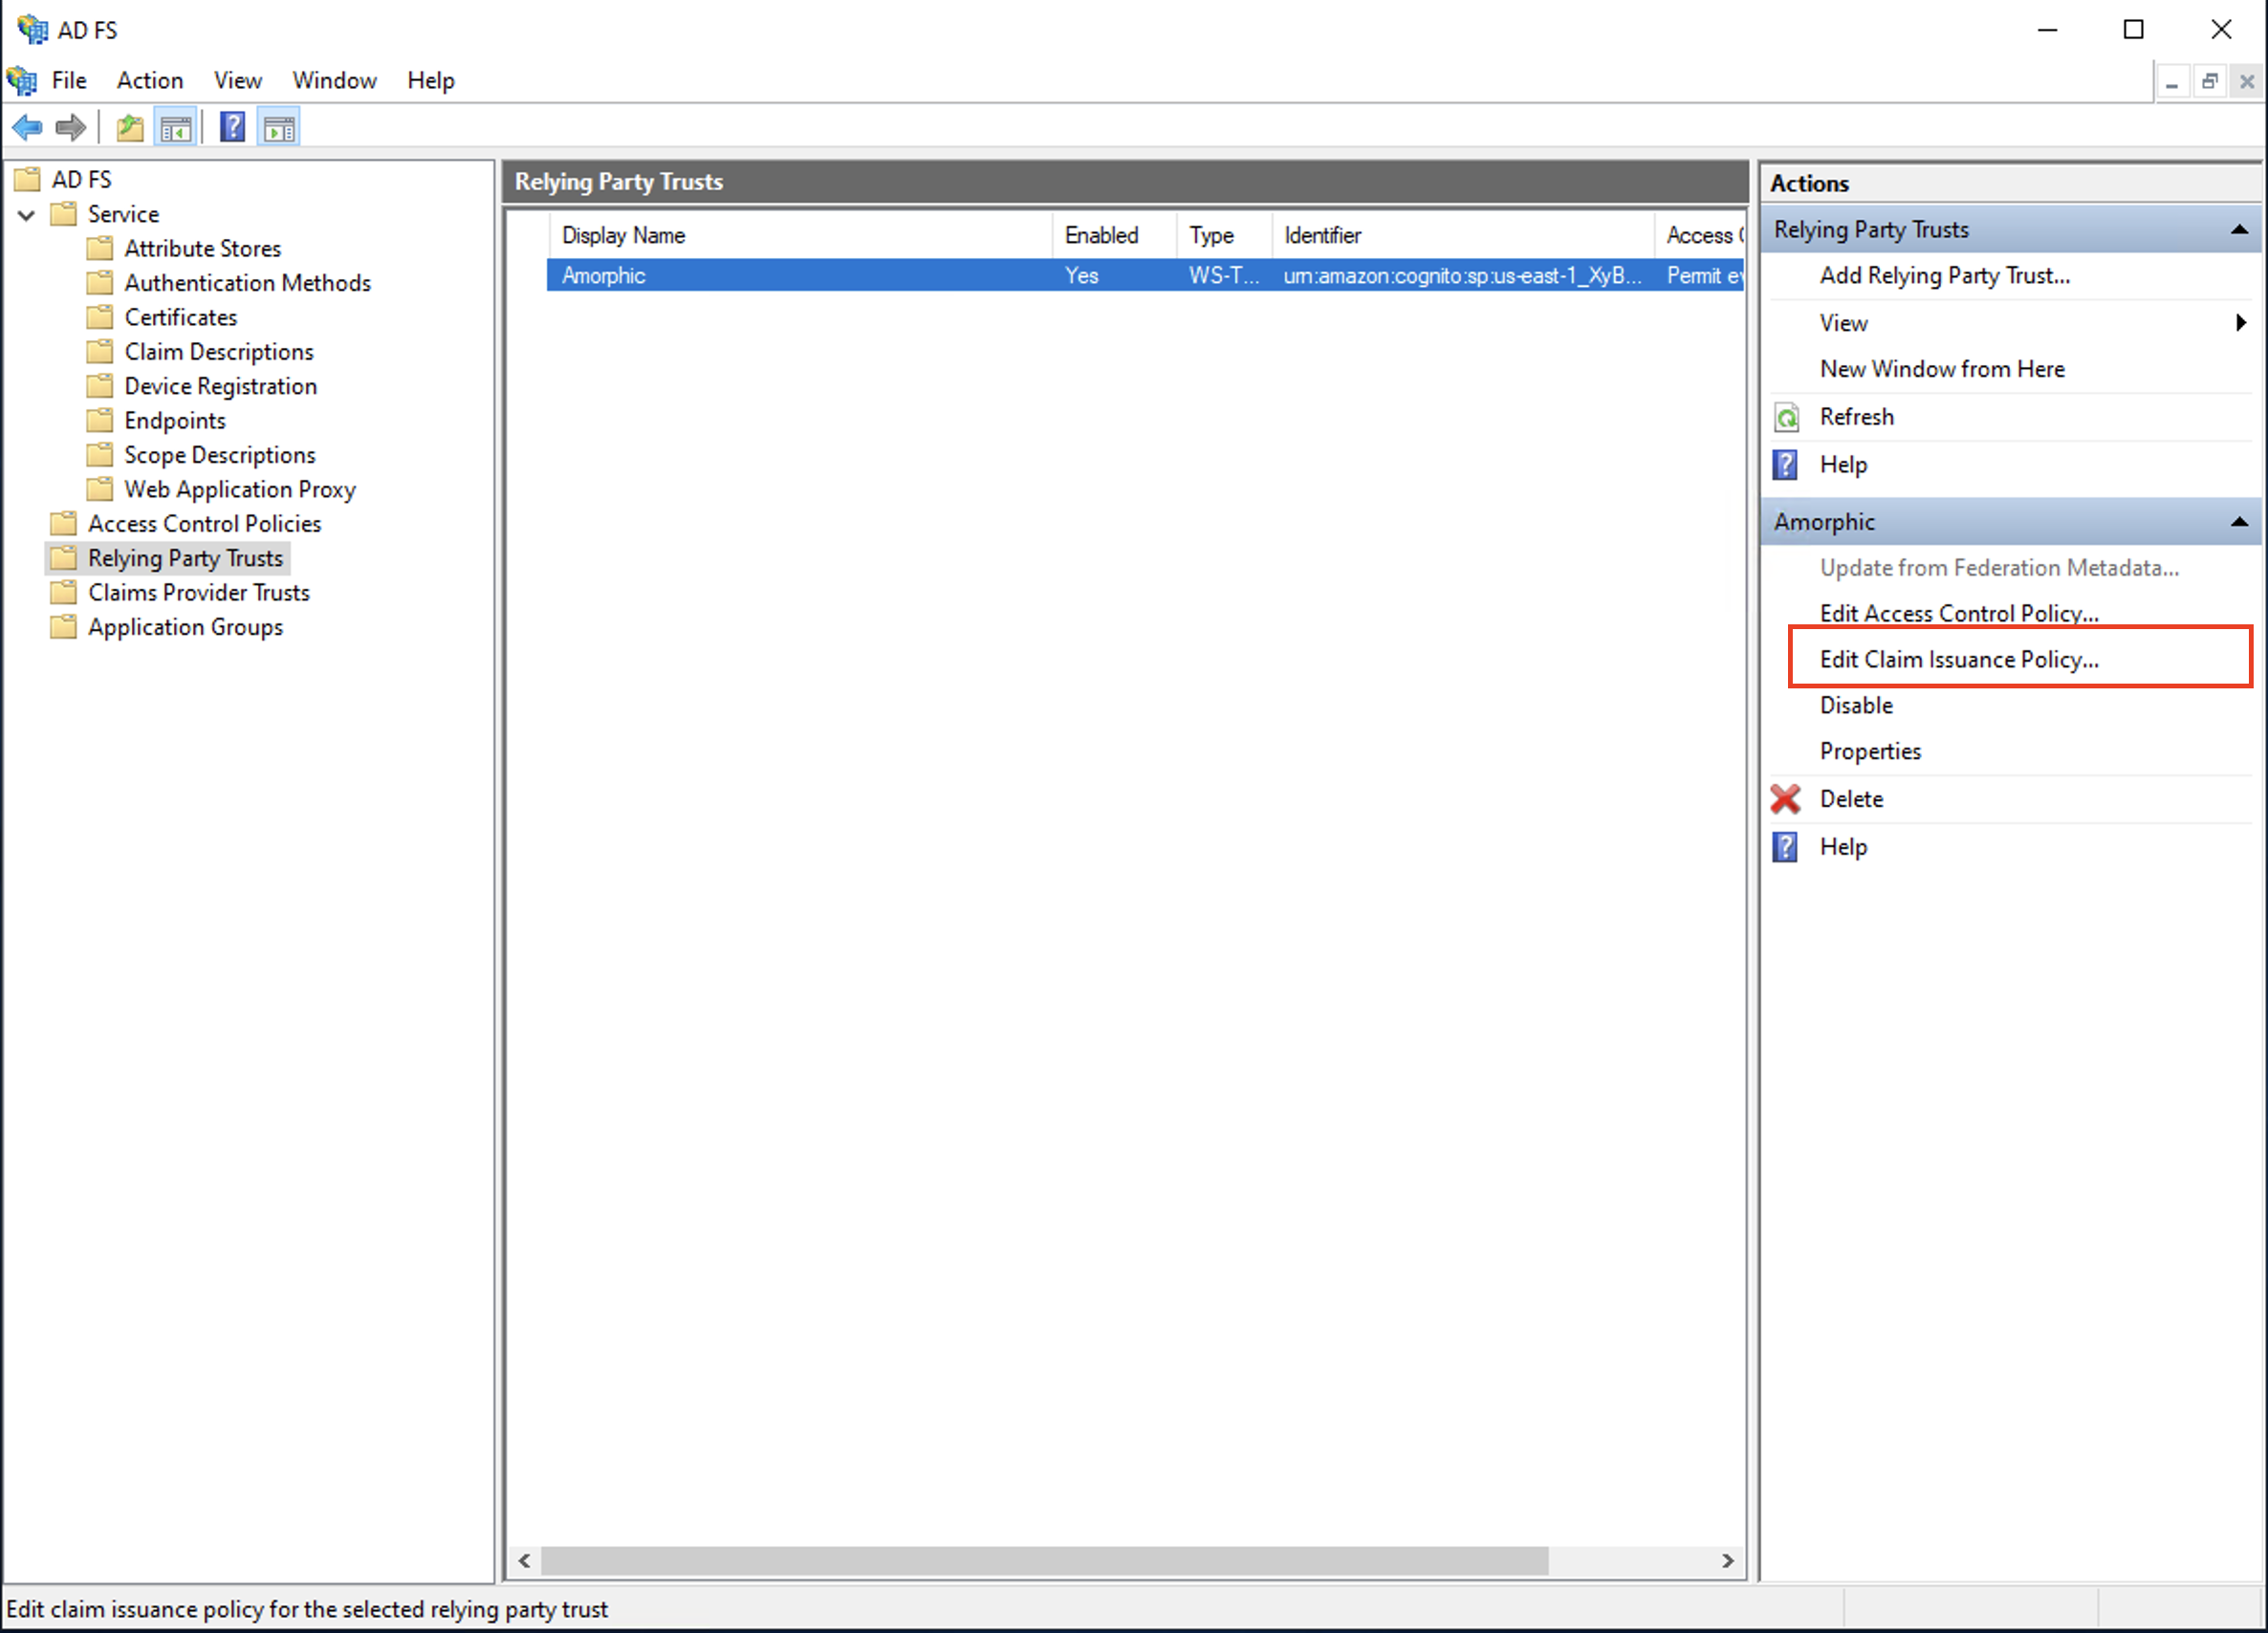
- Add a rule to the trust created above, to send LDAP attributes as claims. Amorphic requires 3 claims in the SAML response - name, username and email. Select the newly created trust and click on
Edit Claim Issuance Policy�option.
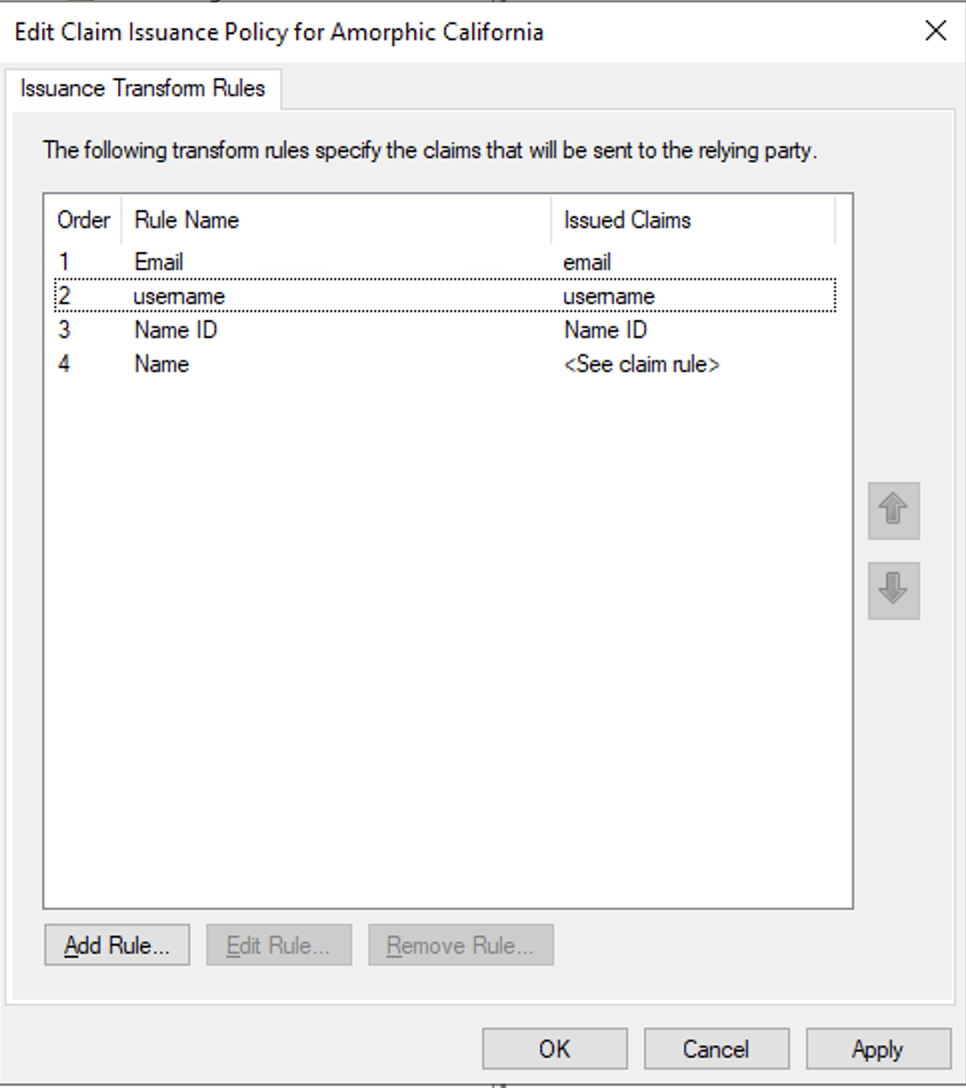
Click on Add New Rule, then for Claim rule template select
Send LDAP Attributes as Claimsand click Next ForClaim rule name, enterName ID. ForAttribute store, chooseActive Directory. ForLDAP Attribute, chooseSAM-Account-NameFor OutgoingClaim Type, chooseName IDRepeat the same for Email. For
Claim rule name, enterEmail. ForAttribute store, chooseActive Directory. ForLDAP Attribute, chooseE-Mail-Address. For Outgoing Claim Type, typeemailin small cases. Do not select Email from the list instead.Repeat the same for Username. For
Claim rule name, enterUsername. ForAttribute store, chooseActive Directory. ForLDAP Attribute, chooseSAM-Account-Name. ForOutgoing Claim Type, typeusernamein small cases.To add Name in SAML claims, click on Add, then select
Send Claims Using a Custom Rulefor Claim rule template. ForClaim rule name, entername. Forrule, enter the following.
c:[Type == "http://schemas.microsoft.com/ws/2008/06/identity/claims/windowsaccountname", Issuer == "AD AUTHORITY"]
 => issue(store = "Active Directory", types = ("name"), query = ";displayName;{0}", param = c.Value);
Configuring SAML Groups for Role-Based Access in Amorphic (OPTIONAL):
Amorphic allows you to manage user access using SAML Groups, which can be linked to roles within the platform. This means your access will be determined by your group membership in WindowsADFS.To use this feature, WindowsADFS administrator needs to:
- Create a group in WindowsADFS. (Eg.
BusinessAnalysts-AD) - Configure the SAML assertion to include a groups claim.
- Assign users to the relevant groups in WindowsADFS.
Amorphic admin needs to:
- Create a SAML Group Mapping using the same group name as defined in the WindowsADFS (
BusinessAnalysts-AD) - A SAML group mapping must be created, ensuring the group name matches exactly as defined in WindowsADFS.
- Attach the group to the desired Amorphic Role (e.g.,
SystemRole-businessanalyst)
How it Works:
When a user logs into Amorphic via SSO, the SAML assertion will include the groups claim. If the user belongs to BusinessAnalysts-AD in WindowsADFS, and the group is mapped to the SystemRole-businessanalyst role in Amorphic, the user will automatically gain the ability to switch to the role upon login.
NoteAmorphic application roles access grant/revoke can be managed from WindowsADFS groups. Groups are case-sensitive. Ensure the group name in WindowsADFS matches exactly with the group name in Amorphic. SAML group mappings could also be configured later. Add a mapping attribute(OPTIONAL) in the WindowsADFS application created as shown below:

- Create a group in WindowsADFS. (Eg.
Click on Apply button and then Ok button
Update Amorphic with credentials
- In Amorphic CMP (customer management portal), select IDP provider as SAML and update the values.
IDP Server URLin cmp corresponds tohttps://<domain_name>/adfs/lsIDP Metadata URLin cmp corresponds tohttps://<domain_name>/federationmetadata/2007-06/federationmetadata.xml
Once the values are added, click on Update IDP Details.
This will take around 45-60 mins to get reflected in the login page.

Frequently asked questions (FAQ)
1. What happens if any configuration changes at Identity Provider end?
a. When Identity Provider configuration like Certificate, etc changes, Cloudwick support team must re-import the saml metadata file in AWS Cognito Console.