
Google SSO
Amazon Cognito integrates with Google to enable existing Gmail and GSuite users to sign-on to Amorphic Data Cloud. This section explains how to register and set up your application with Google as an identity provider.
What is Single Sign-On?
Single sign-on (SSO) is an authentication method that enables users to securely authenticate with multiple applications and websites by using just one set of credentials. SSO works based upon a trust relationship set up between an application, known as the service provider, like Amorphic Data Cloud and an identity provider, like Google. This trust relationship is often based upon a certificate that is exchanged between the identity provider and the service provider. This certificate can be used to sign identity information that is being sent from the identity provider to the service provider so that the service provider knows it is coming from a trusted source.
Amorphic username convention
Due to the variety of systems Amorphic integrates with, Amorphic requires strict rules to be enforced for its usernames. Failure to follow the required rules may lead to Amorphic users not being able to login as intended. These rules required for Amorphic are conventional rules required for AD integration from other systems, and follow best practices.
The requirement for the usernames are as follows:
- The usernames must be unique for different users
- Usernames are integrated with access to datasets and resources, and as such cannot change
- Should not start with a number
- Should be only alphanumeric, no special characters are permitted
- Username can contain both lowercase and uppercase alphabets
- Should have a minimum of 3 characters and should not exceed 20 characters
It should be noted that any and all transformations used to convert the username in the SSO provider to the Amorphic username should produce a username compliant with the Amorphic username convention specified above. For example, if you have a username like John_Doe@email.com and the transformation results in JohnDoe or JohnDoe123, this is compliant with the rules. However, if the transformation results in John_Doe or 123John, it would violate the rules (since special characters or starting with a number are not allowed). If you have such IDs, it is recommended to create a new field with an Amorphic compliant username format and use that as the Amorphic username.
Pre-requisites for Google Identity Provider
Before we proceed with the Google IDP setup, we need the following pre-requisites:
- Google Developers account -https://console.developers.google.com/
- Amazon AWS account
- A Cognito user pool with an application client and a user pool domain
Steps to register Amorphic app with Google
- Create a Google API Console project
- Configure Consent Screen
- Get OAuth 2.0 client credentials
- Update Amorphic with credentials
Create a Google API Console project
- Login to Google Developer console using this link. If there are no projects created within the console then you should see a webpage like below image. Click on the CREATE PROJECT

If there are existing projects within the console then you can click the projects dropdown menu on top-left corner and then click NEW PROJECT

- In the New Project page, enter a Project name. For Location, choose BROWSE, and then select an organization (if applicable). Choose CREATE.

Configure Consent Screen
- Although this procedure is done automatically by Google in the following step, it is recommended to set up the consent screen when doing for the first time.
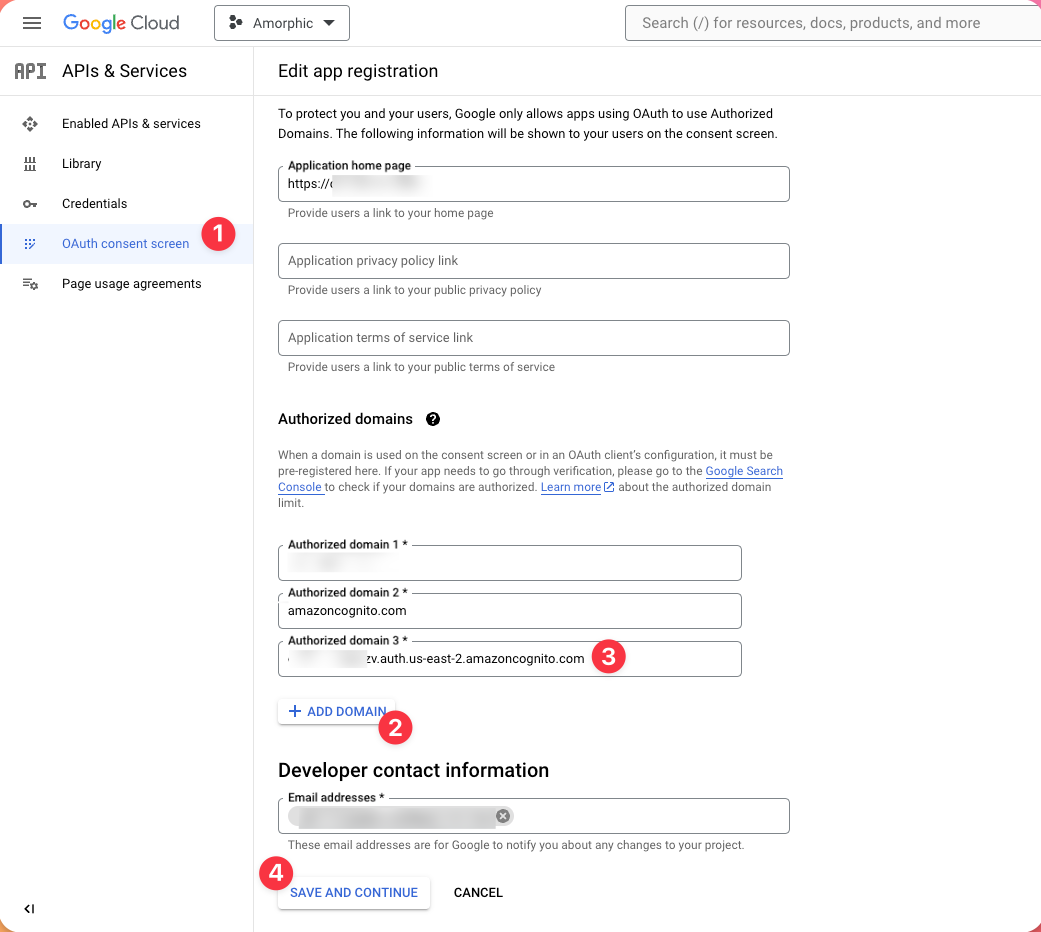
On the left pane, select OAuth consent screen and then select the project created in the previous step and then click edit.
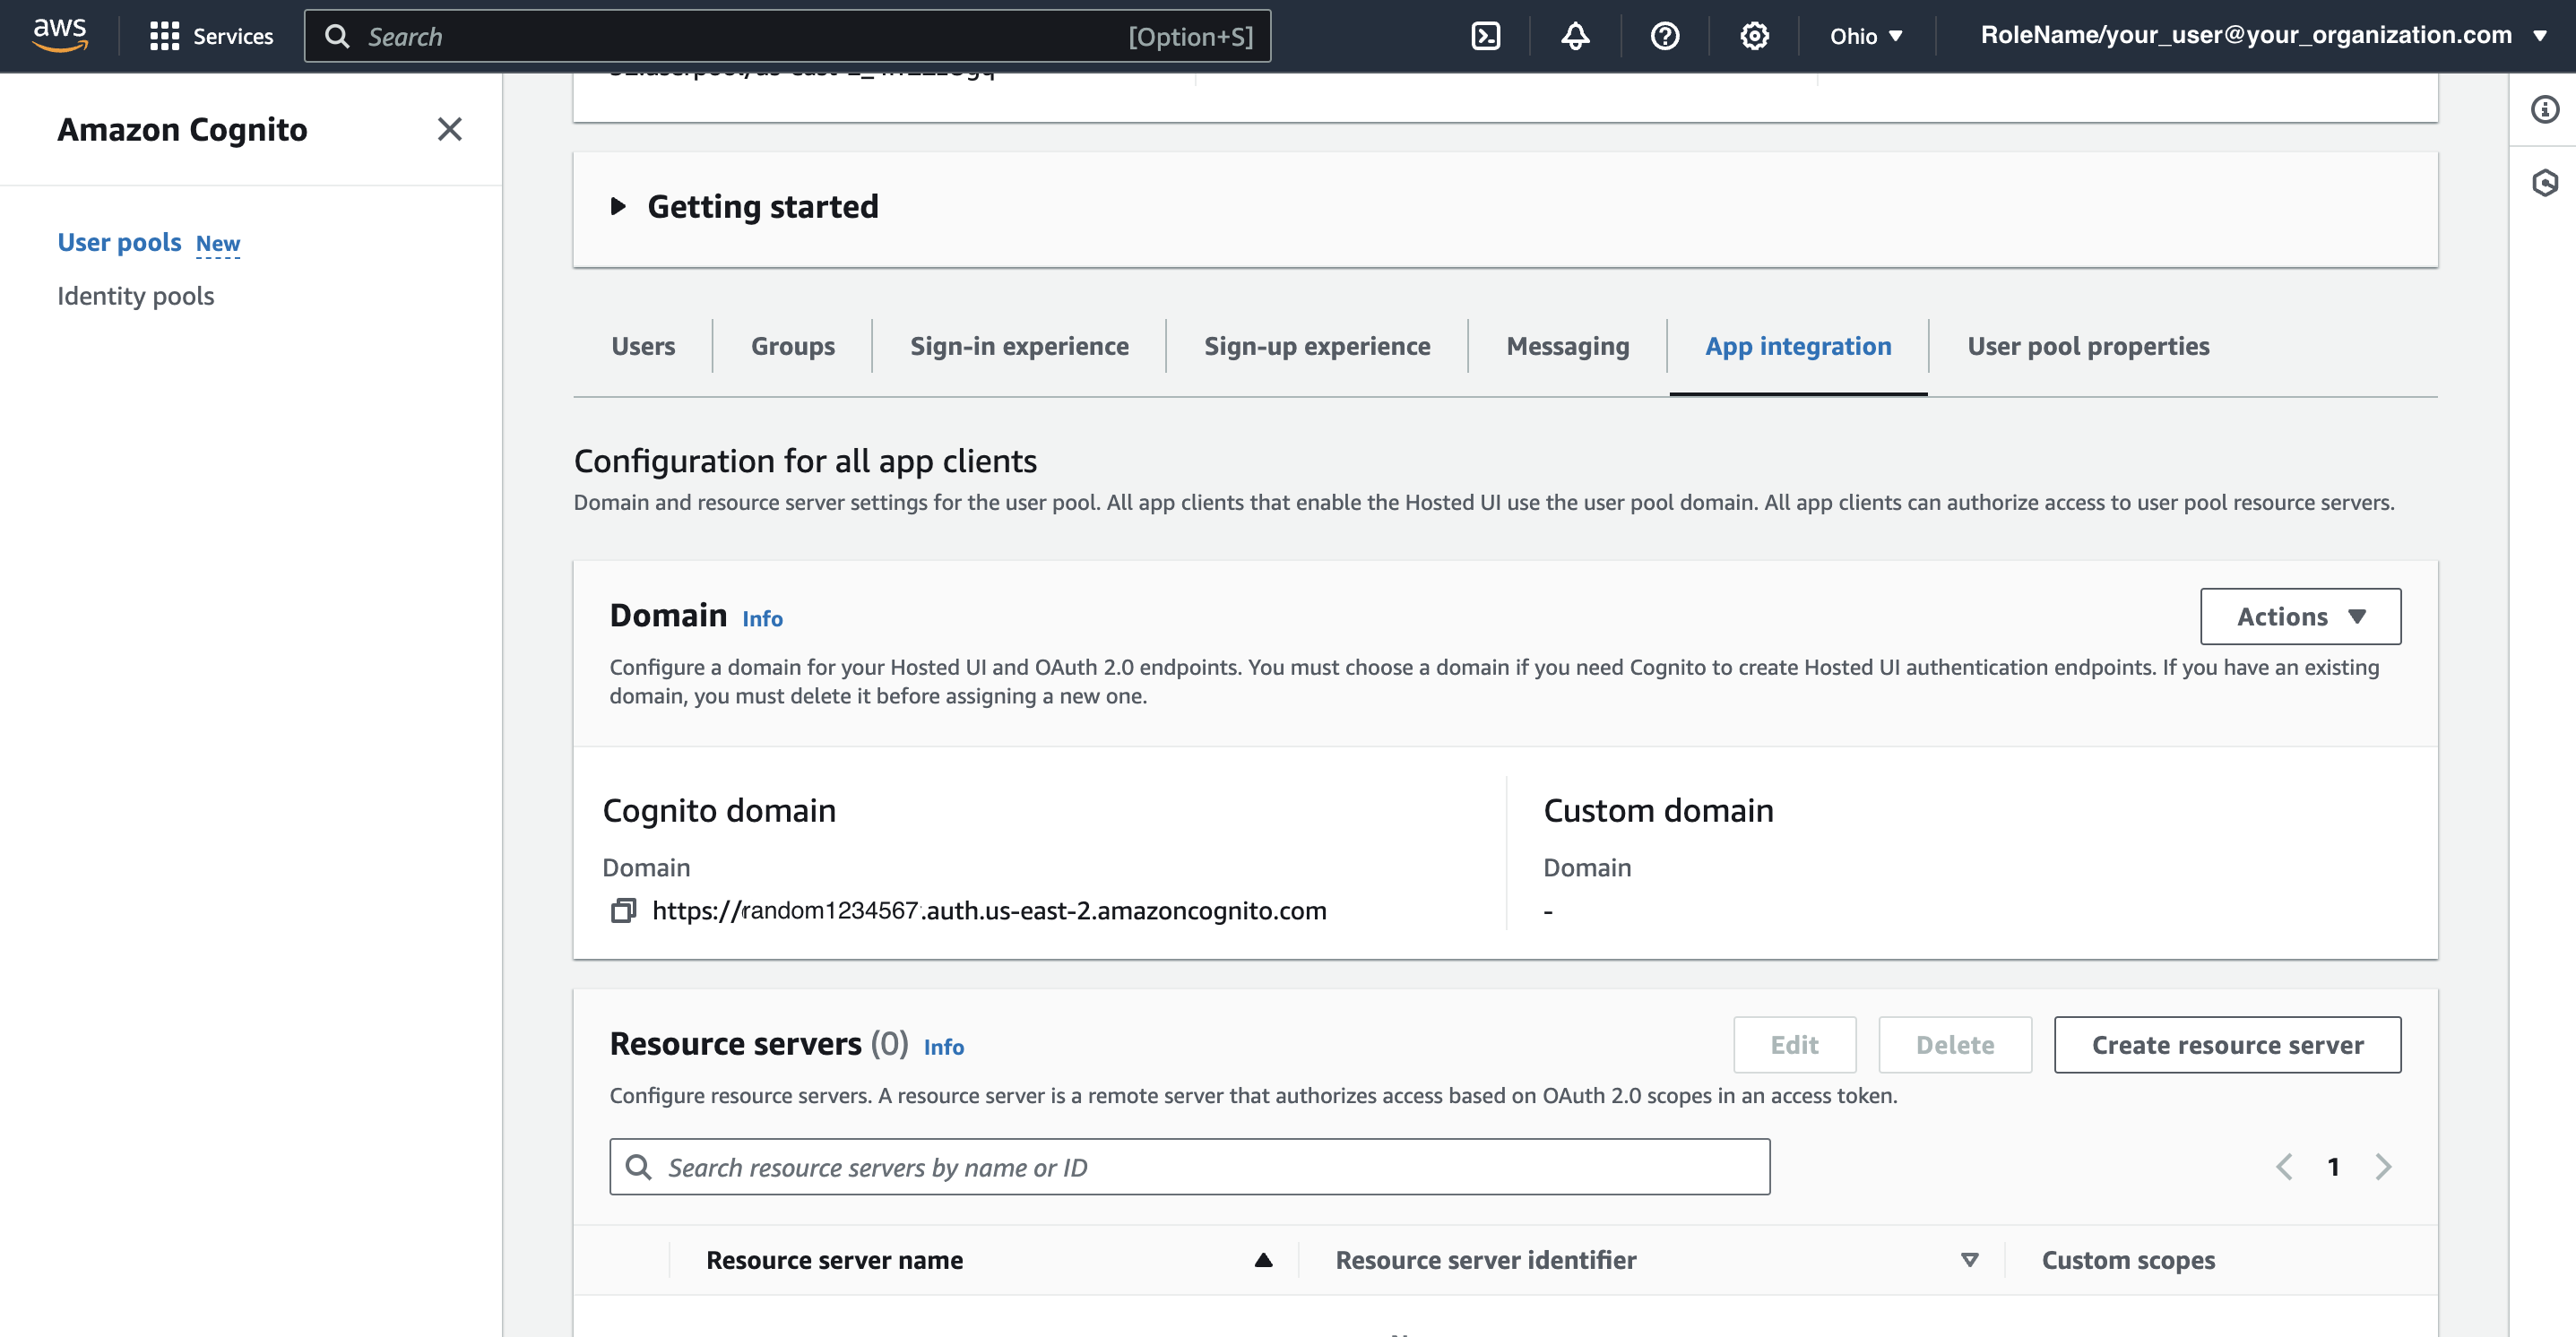
Then click on ADD DOMAIN and enter the Cognito domain. Amazon Cognito domain value can be found in AWS Management Console -> Services -> Cognito -> User Pools -> select user pool -> App integration -> Cognito domain:
- Finally, add your email addresses where you want notifications to be sent for any changes in the project and click SAVE AND CONTINUE.
Get OAuth 2.0 client credentials
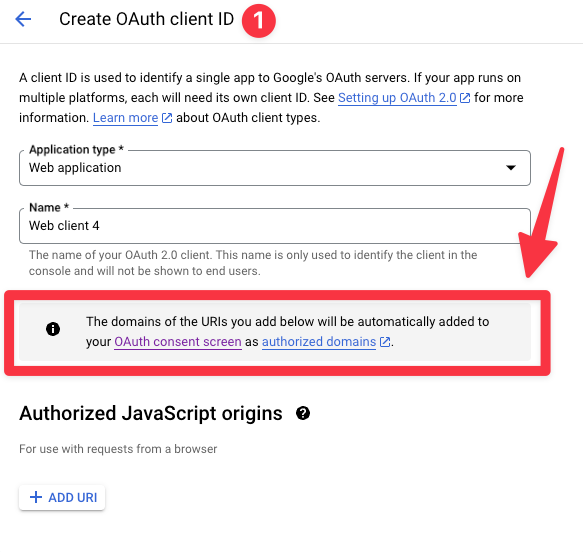
- In the Google API Console, on the Credentials page, choose Create credentials, and then choose OAuth client ID.

On the Create OAuth client ID page, for Application type, choose Web application.
Enter OAuth client Name. This name is only used within the Google console to identify the client.
For Authorized JavaScript origins, enter your Amazon Cognito domain. Amazon Cognito domain value can be found in AWS Management Console -> Services -> Cognito -> User Pools -> select user pool -> App integration -> Cognito domain:
https://<yourDomainPrefix>.auth.<region>.amazoncognito.com
Replace yourDomainPrefix and region with the values from your user pool.
For Authorized redirect URIs, enter below URI:
https://yourDomainPrefix.auth.region.amazoncognito.com/oauth2/idpresponse
Replace yourDomainPrefix and region with the values from your user pool.
- Click CREATE and it will generate Client ID and Client Secret.

- Note that Google automatically adds the domain of the URI added in the previous step to the OAuth consent screen. To do it manually, follow this step
- In the OAuth client dialog, find the Client ID and Client Secret, and then note them for later. You'll need these when configuring Google in Amorphic application.

Update Amorphic with credentials
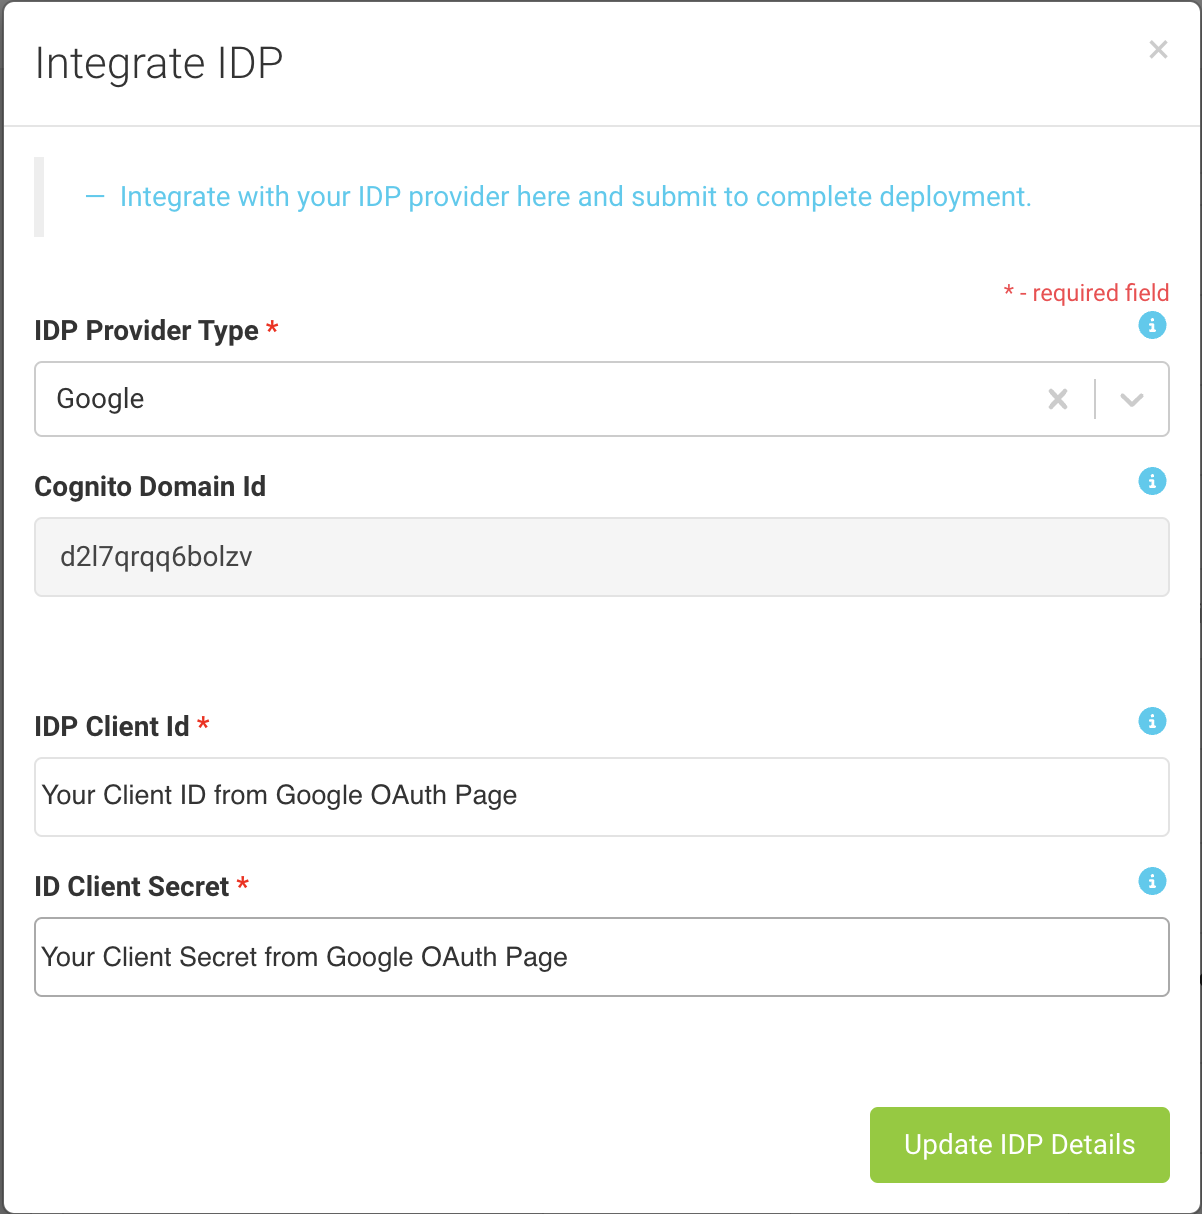
- In Amorphic CMP (customer management portal), select IDP provider as Google and update the values.
IDP Client Idin cmp corresponds toClient IDretrieved from GoogleIDP Client Secretcorresponds toClient Secretfrom Google
Once the values are added, click on Update IDP Details.
This will take around 45-60 mins to get reflected in the login page.
Frequently asked questions (FAQ)
1. What happens if any configuration changes at Identity Provider end?
a. When Identity Provider configuration like Certificate, etc changes, Cloudwick support team must re-import the saml metadata file in AWS Cognito Console.