
Enable DKIM for Amorphic email address
DKIM (DomainKeys Identified Mail) is a standard that verifies the authenticity of emails, helping to prevent them from being flagged as spam. Since Cloudwick is the default domain owner for transactional emails sent from cloudwick.com (like system alerts), we need to set up DKIM for each new Amorphic installation. If customers are using DKIM to validate emails, transactional emails from Amorphic may be flagged as spam or deleted without proper setup. Moreover as DMARC (Domain-based Message Authentication, Reporting, and Conformance) adoption increases, enabling DKIM will become crucial to ensure smooth email delivery. The process takes a few minutes, and is a one-time action per deployment.
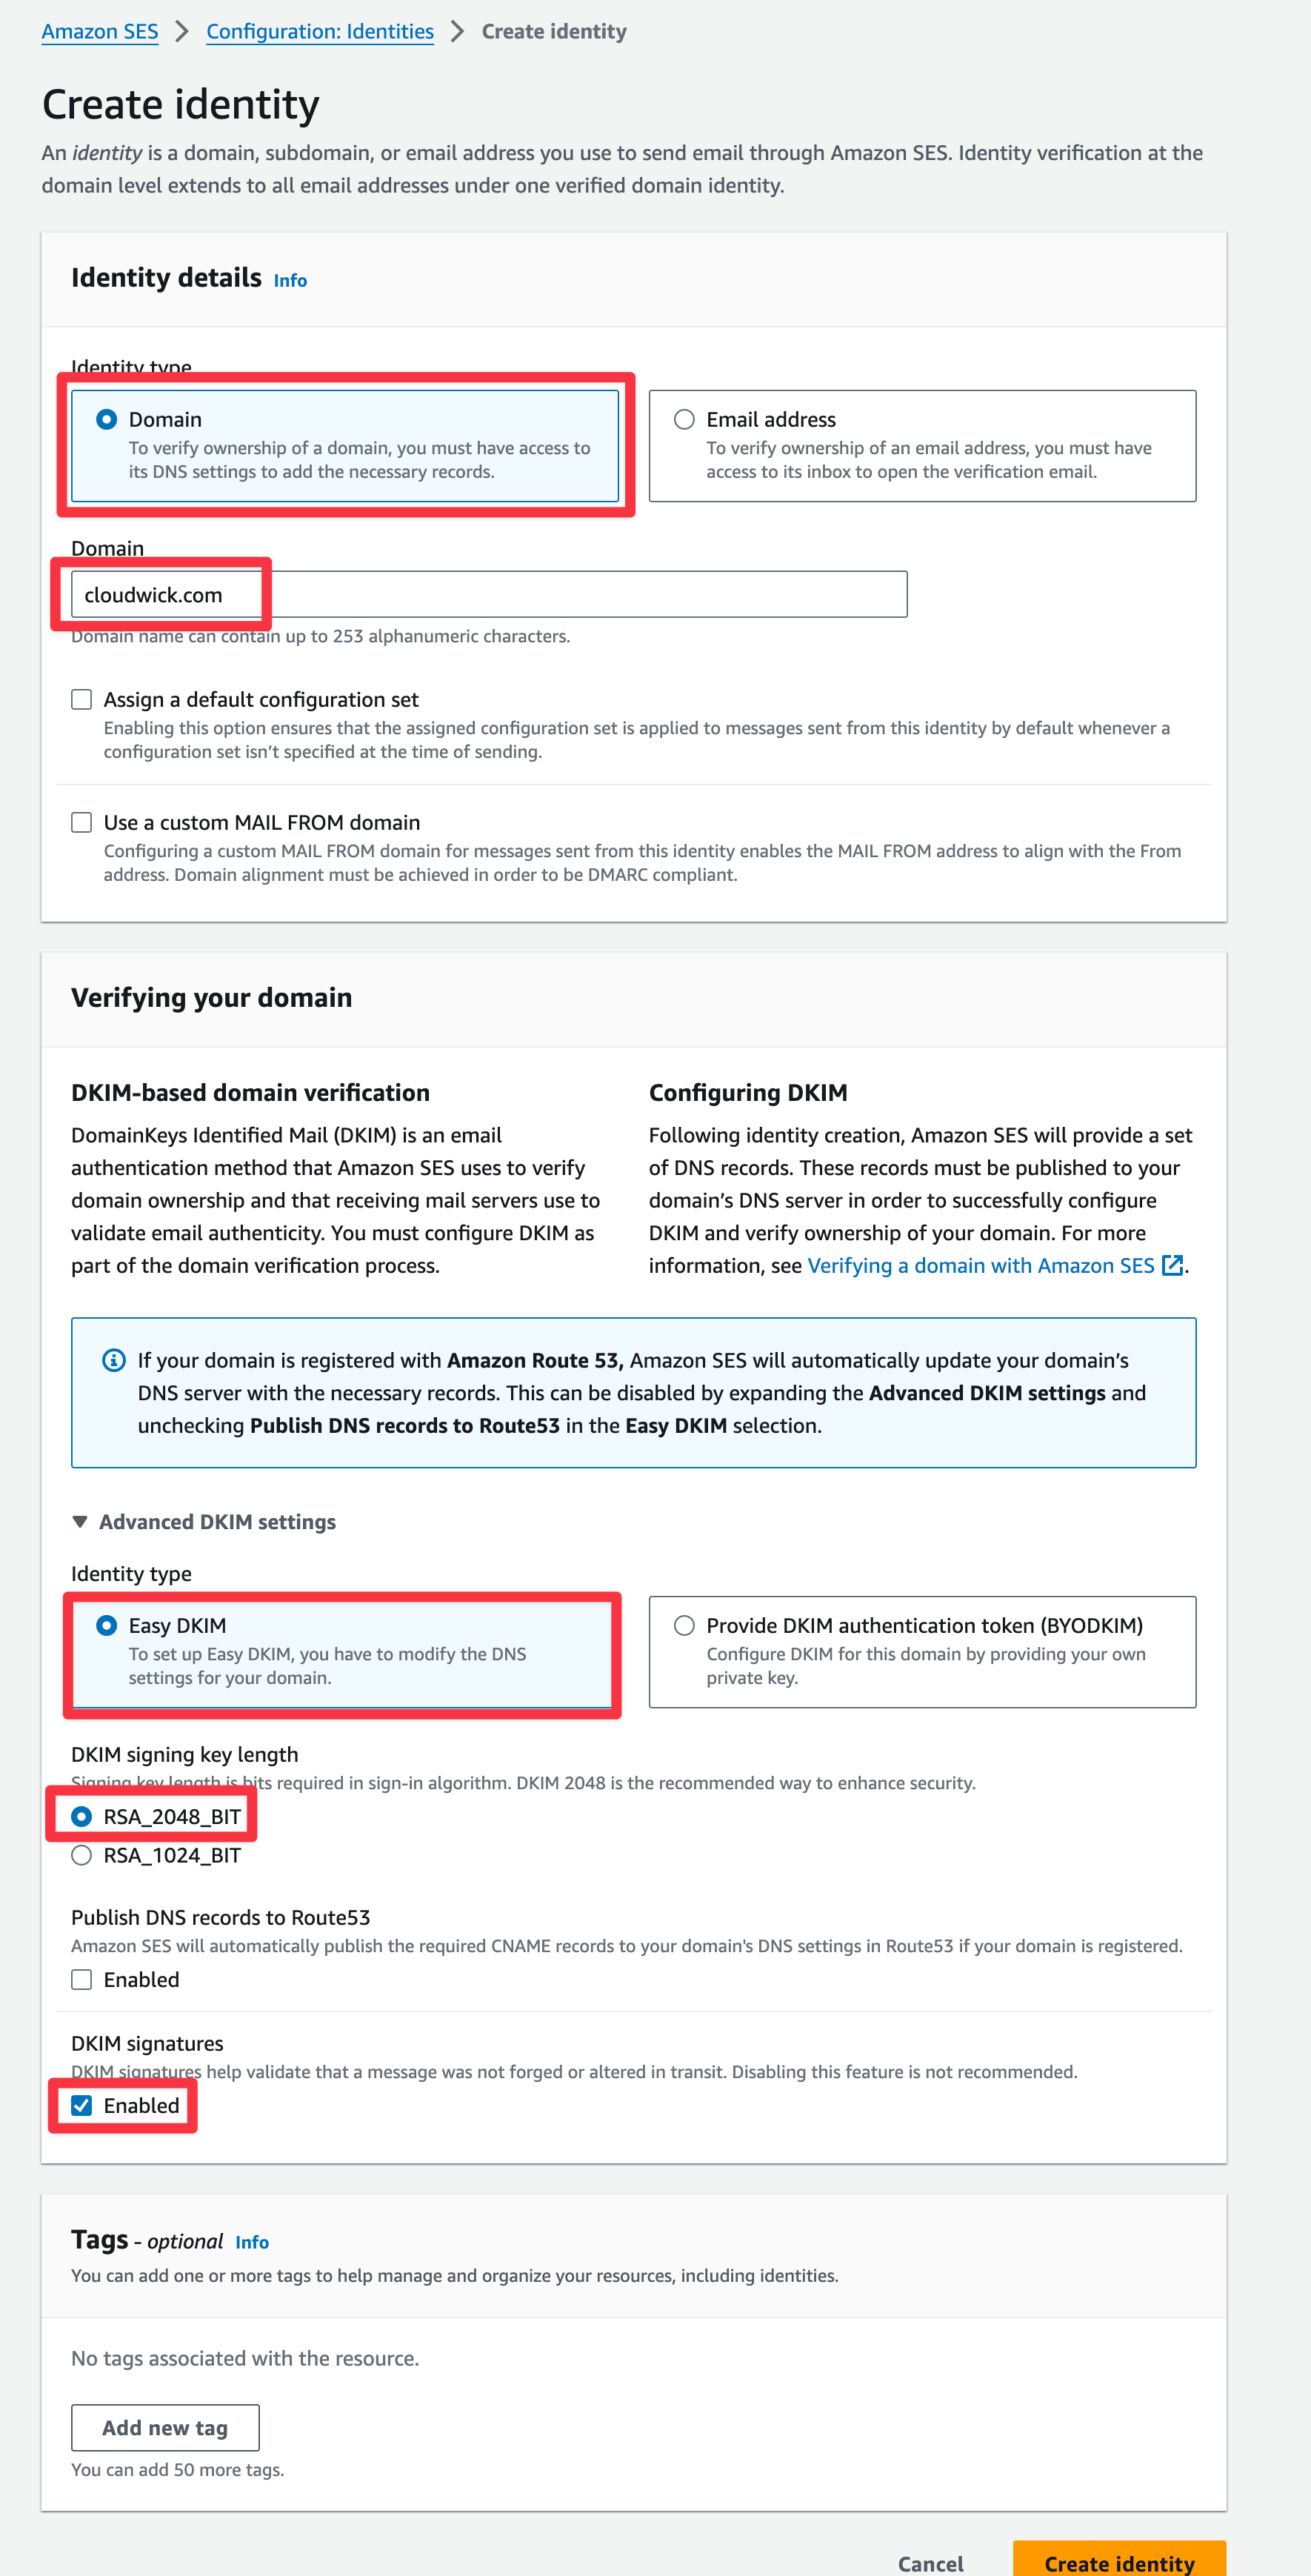
Steps for enabling DKIM
In SES, click on "Identities"
Click on "Create Identity"
Choose "Domain" and enter
cloudwick.comDo not assign a default configuration set or MAIL FROM domain unless there is a site-specific configuration
In "Advanced DKIM" dropdown, choose "Easy DKIM", disable "Publish DNS records to Route53" and leave "DKIM signatures" enabled
Click on "Create Identity"
- Once this is done, you must download and forward the DNS records created (in a CSV file) to amorphic-cmp-support@cloudwick.com and copy in it-support@cloudwick.com
When the DNS is updated on Cloudwick's side, DKIM will be available in the account.